Why should you clean the Fan and replace Thermal Paste in your DCU Screen?
Symptoms of Fan Wear or Thermal Degradation
- Loud fan (Including rythmic fan noise)
- Fan staying on for a long time after the car has shut off
- Slugish performance, random or frequent reboots, or unresponsive to touch
- Important note: This is also a symptom of the general DCU SD Card failure, as described here. Make sure you don’t have this issue before proceeding, as you may benefit from both procedures.
What are the benefits of doing this?
- Quieter Operation
- If your cooling fan is clogged with dust, pet hair, or tar from smoking residue; it can be audible outside the display & even become out of balance, which can cause the fan to fail completely.
- Better Cooling for the processor & Screen
- The main contributing cause of failure for most electronic devices (aside from direct impacts, like dropping your phone for example; or liquid damage, like spilling a drink on a laptop), is heat. Reducing this heat can extend the usable lifespan of your DCU, and the screen.
- Longer Lifespan
- Anecdotally, I have seen more failures of the MicroSD Card in the DCU Screen in hotter & coastal climates, suggesting heat may be a factor in the failure of these units. Keeping things cool can help to extend the lifespan of your unit, even after you repair it.
How often should this be done?
- This should not need to be done very often, unless you have pets or smoke in your vehicle. Then it may be worth performing this cleaning procedure every 2-3 years. This can also apply to the blower motor in your climate control.
Tools & Materials Required
Basic Hand Tools
- Plastic trim removal tool
- Philips Screw driver, preferably magnetic tipped
- Precision Screwdriver Set (Optional)
Cleaning Supplies (isopropyl alcohol, compressed air, soft brush)
- A bottle of 99% Isoprpyl Alcohol
- At minimum, 75% or higher, but 99% is ideal.
- Q-Tips/Cotton Swabs
- A Can of Compressed Air
- Alternatively, an Electric Blower
Bearing Oil and Thermal Paste
Time Needed
- Estimated 20 minutes for cleaning & reassembly
Preparations
Remove the DCU Screen from the Vehicle
- Detailed removal instructions for R52 Nissan Pathfinder
- Detailed removal instructions for Y62 Nissan Armada
Disassemble the DCU Screen
- The instructions for this can be found here, follow along until step 2C and then return to this article.
Refurbishing the Stock Fan
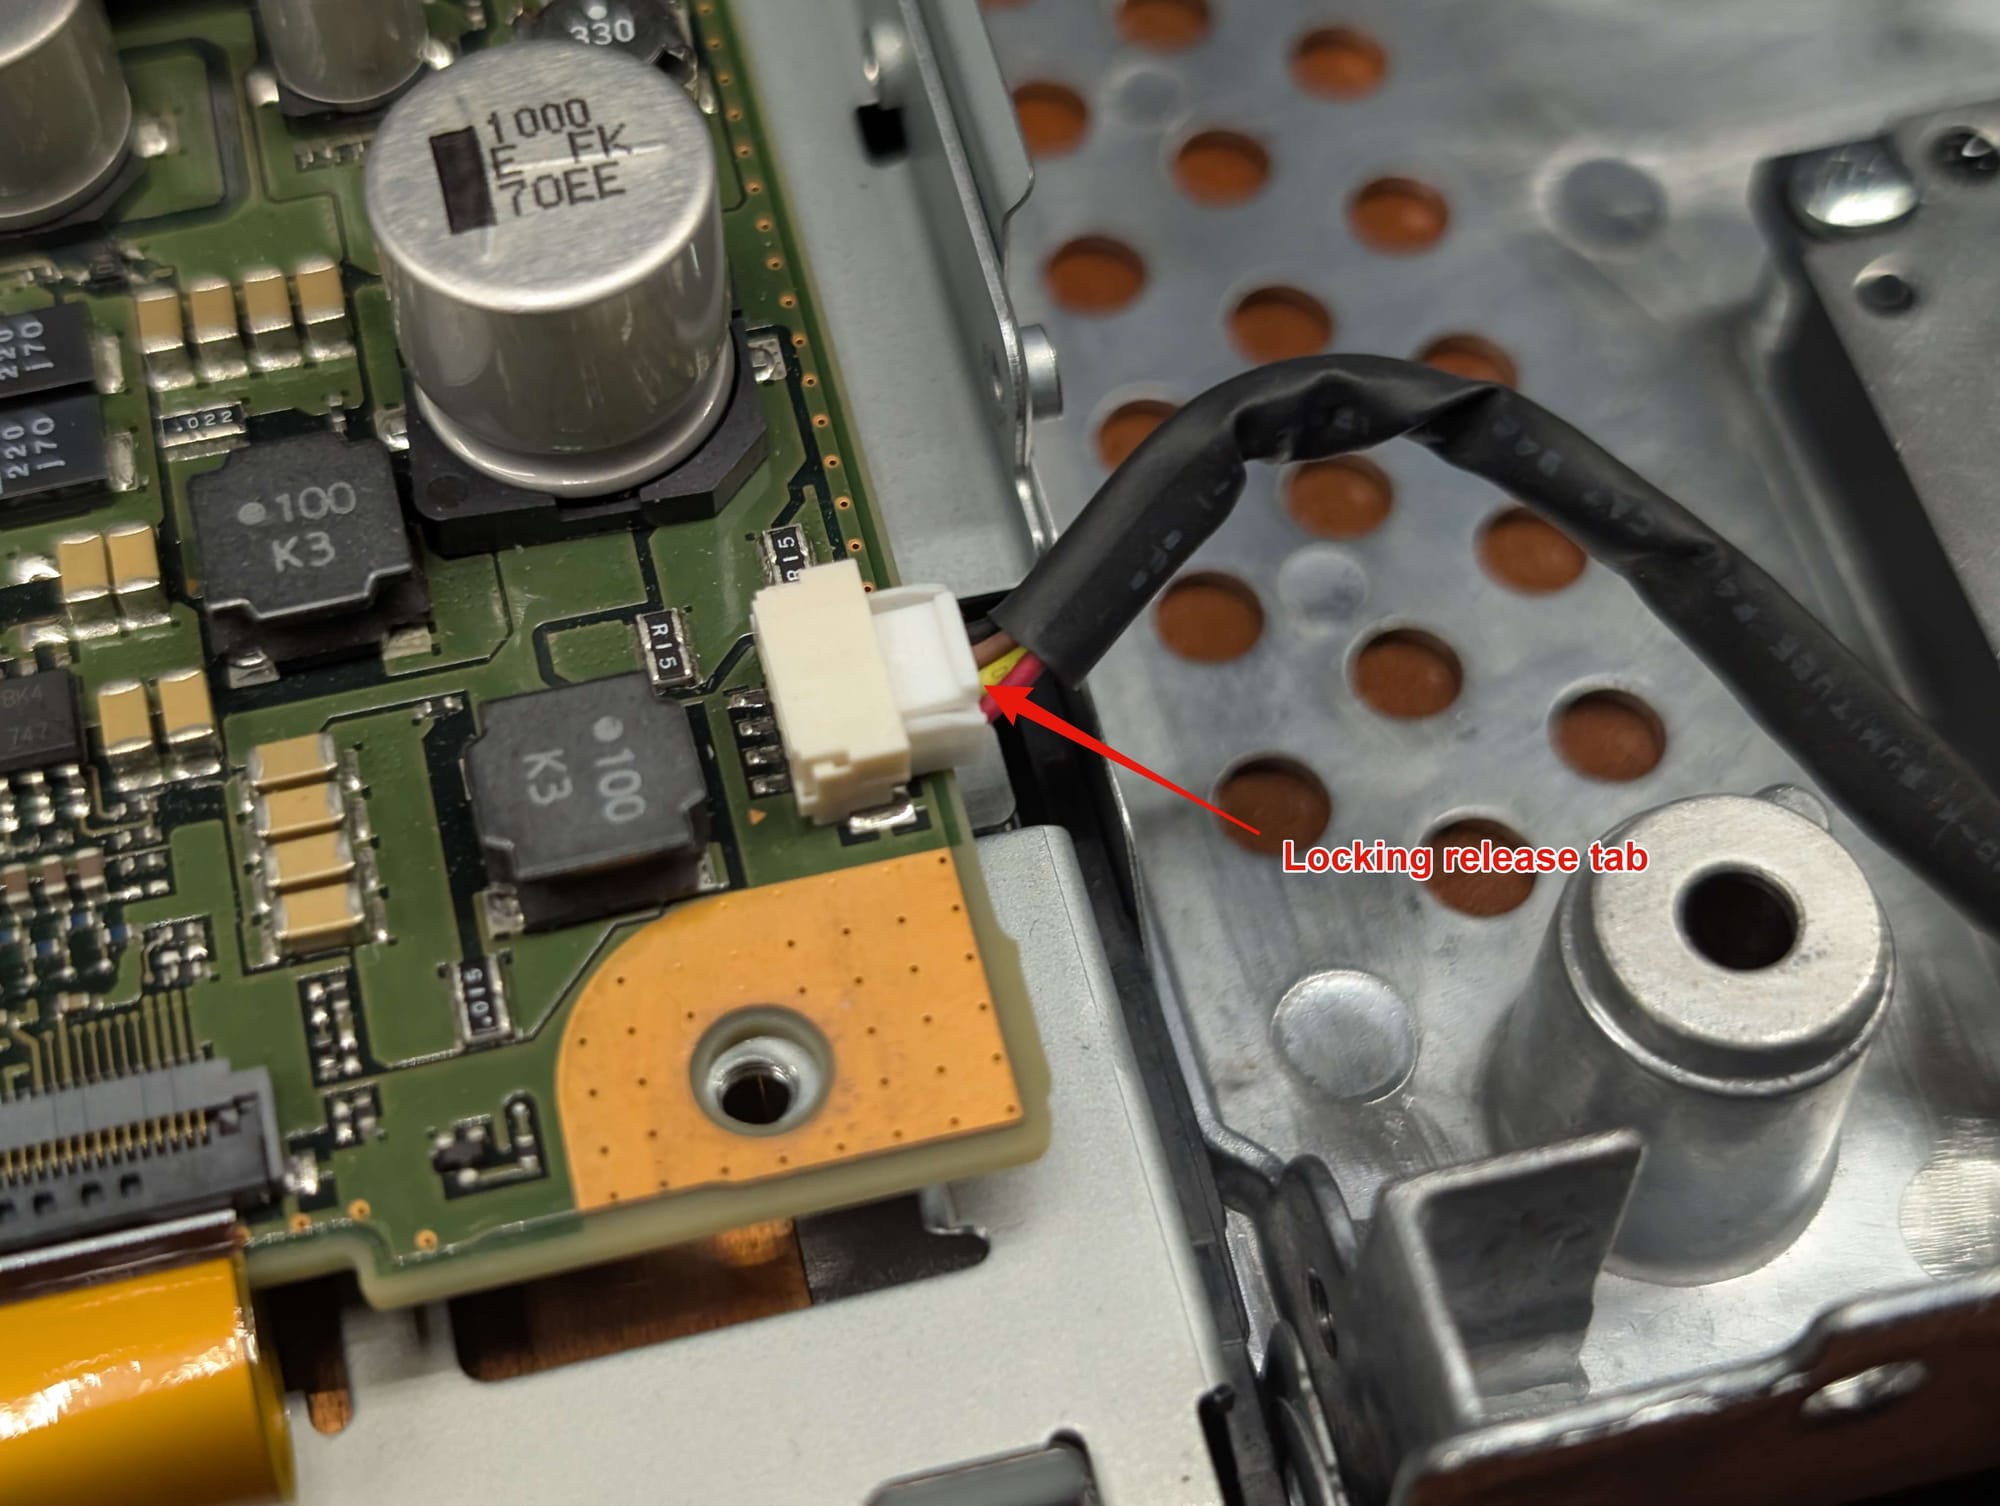
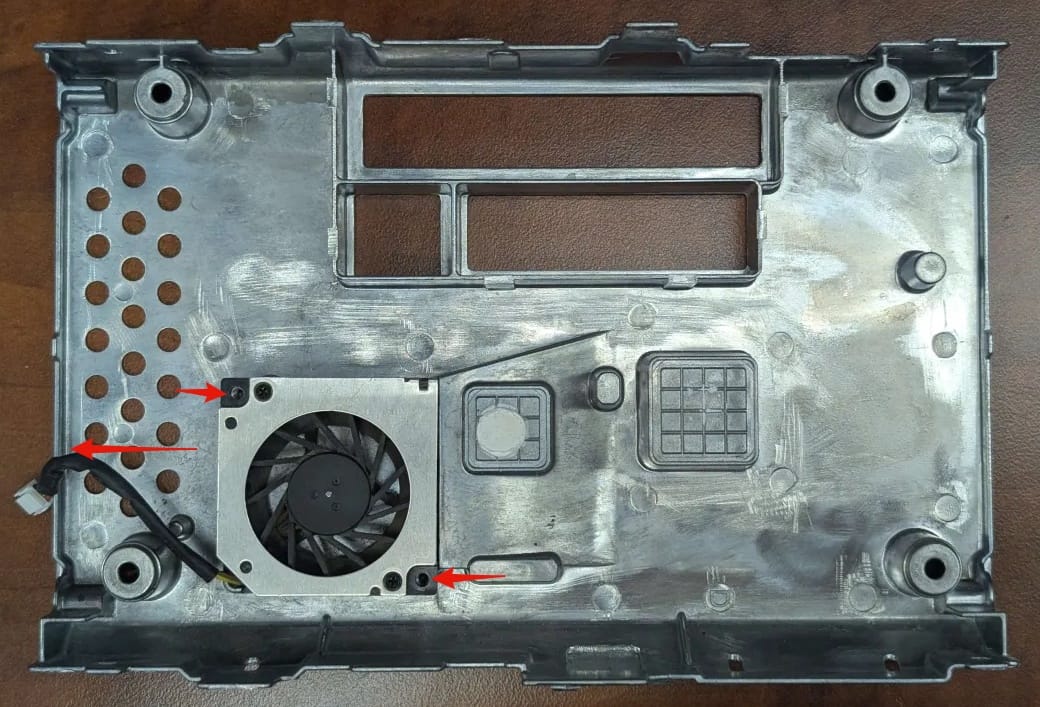
Removing the Fan Without damaging the connector
- Push down on the release tab for the connector and pull out gently
- Do not apply any force at an angle, pull straight out to avoid damaging the connector on the mainboard. It’s quite hard to damage this connector, but it is possible.

- Set aside the main DCU Screen & Board
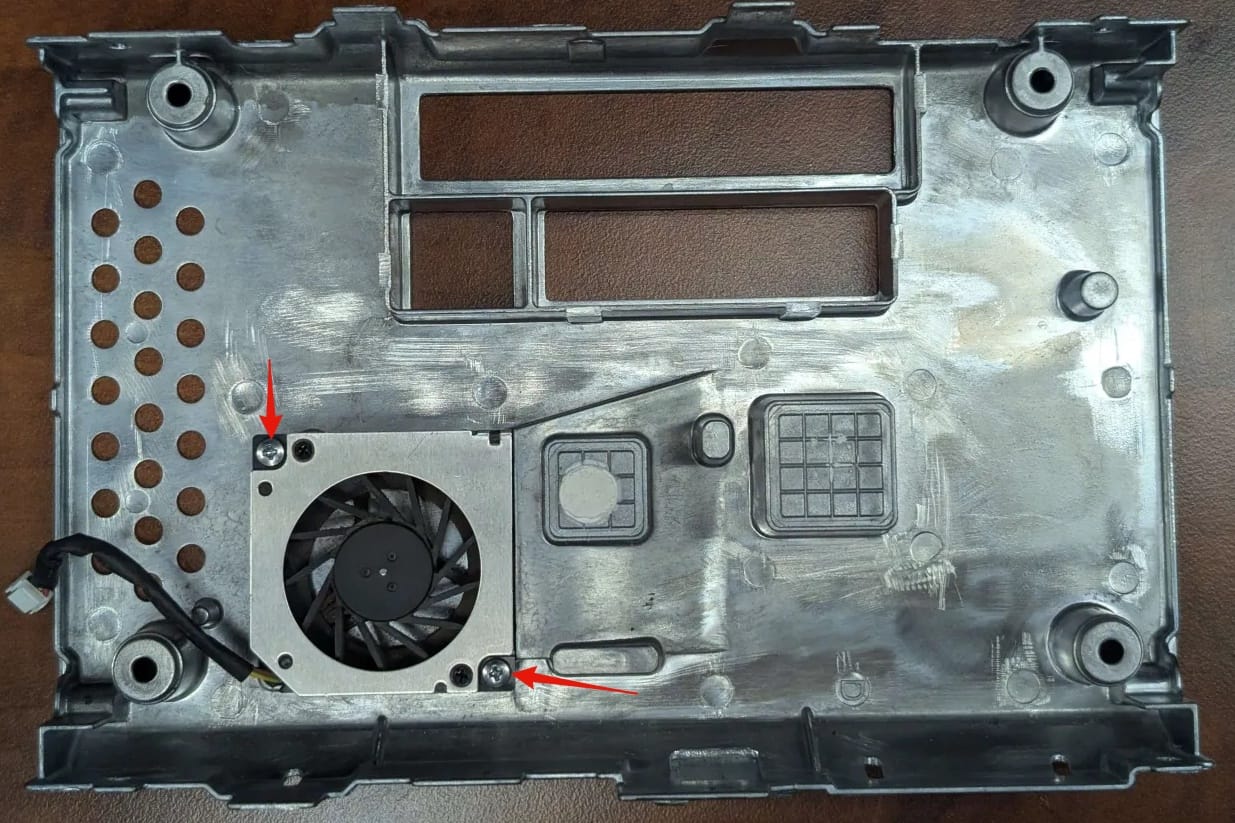
- Remove the two screws holding in the fan so you can access the backside
Cleaning fan blades and housing
- Using compressed air, while holding the fan in place so it does not spin, blow the fins and housing clear of any dust/debris. If there is tar from smoking or sticky residue from vaping, you may need to use isopropyl alcohol and a q-tip to clean each blade directly and gently.
🚧It’s important not to let the fan freely spin while blowing on it, as that can cause damage to the bearings– and if you’ve not unplugged it from the mainboard, it can damage that too by sending current back through it.
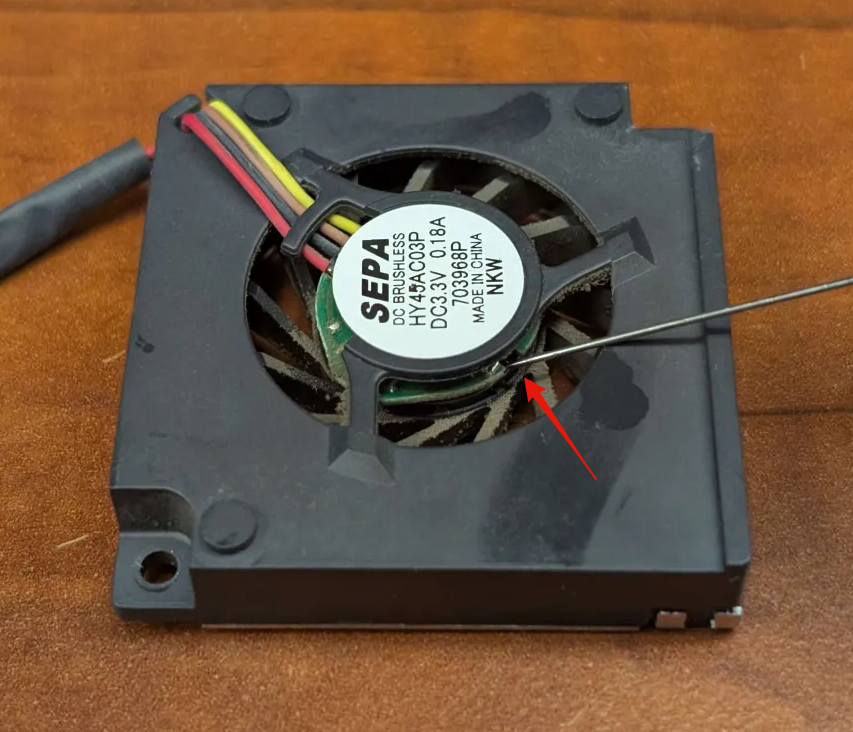
Lubricating Bearings
- This step is optional, but recommended; especially if your fan is giving audible noise as the most likely culprit of that is the bearings.
- Insert the tip of your Needle Oil Applicator filled with 3-in-1 Multi Purpose Oil, and gently squeeze a few drops out into the bearing.
- Remove the Applicator, and spin the fan bearing to evenly distribute and test if it feels smooth. If it feels rough at all, or doesn’t spin for very long; apply a little more.
💡 It’s a good idea to squeeze the applicator a few times before inserting it into the bearing. This primes the needle, and also lets you get a feel for how much oil is coming out when you squeeze it. You don’t want very much oil in this bearing, excess oil will drip out and collect dust in clumps.
- Here is an example of what a good, well lubricated bearing should look like when spun by hand.
Reinstalling and Securing the Fan
- When installing the fan back into the case, be sure to install it with the fan cable facing towards the outer edge of the chassis/case.
- Install the two screws you removed earlier.
Replacing Old Thermal Paste
Properly Cleaning Off Residue
- Using isopropyl alcohol and lint free shop towels or q-tips, gently remove as much of the old thermal paste as possible.
- Remove the bulk of the thermal paste with a dry instrument, and only use the minimal amount of isopropyl alcohol needed to clean the surrounding area
- Ideally, there should be no white residue left when you’re finished with the cleaning steps
Applying Fresh Pads for Optimal Contact
- Thermal paste for a computer may work, but there’s a significant height gap of 1mm from the mainboard of the DCU to the chassis– so ensuring contact between these is crucial. That’s why I’ve recommended you replace the existing thermal goop with a thermal pad.
- Thermal pads work as well or better than thermal paste in these kinds of applications, and the thermal paste from the factory is very basic.
- Using the 1mm Thick Thermal Pad (the middle thickness from the kit I linked above, if you used that), cut out two squares to match the heatsink posts sticking out from the chassis/case of the DCU.
- For reference, they are 13x13mm and 18x18mm in size.
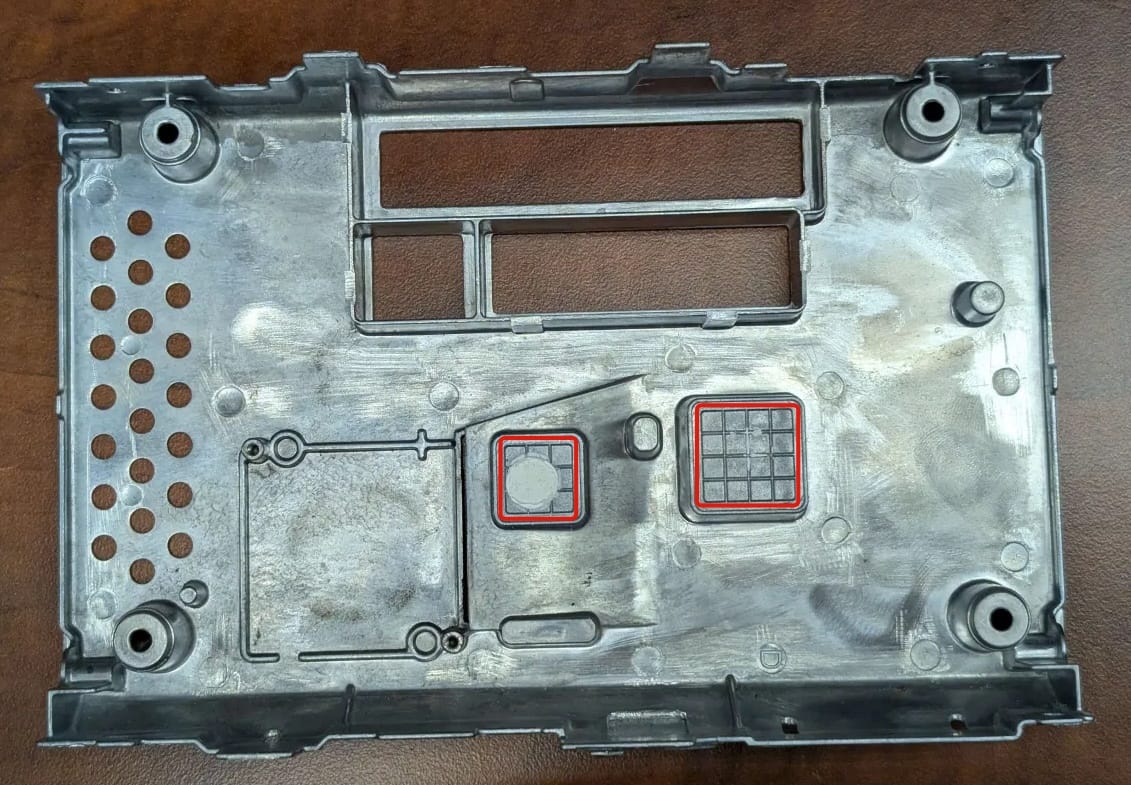
- Place the two pads on the areas shown above. They should be slightly sticky, and at little risk of falling off with a bit of pressure at the edges. If necessary, you can reassemble the DCU with the chassis/case in this position so they don’t fall off. After one installation, the pressure of the screws should firmly keep the pads in place even after removal.
💡 Avoid touching the surface of the pads with your fingers, but you don’t have to start over if you do.
Reassembly & Functional Tests
- Reconnect the fan cable, and if you were also installing an SD Card from your Repair Kit, do that now.
- Follow the assembly guide here, from steps 4 onwards.
- The assembly is the reverse of disassembly.
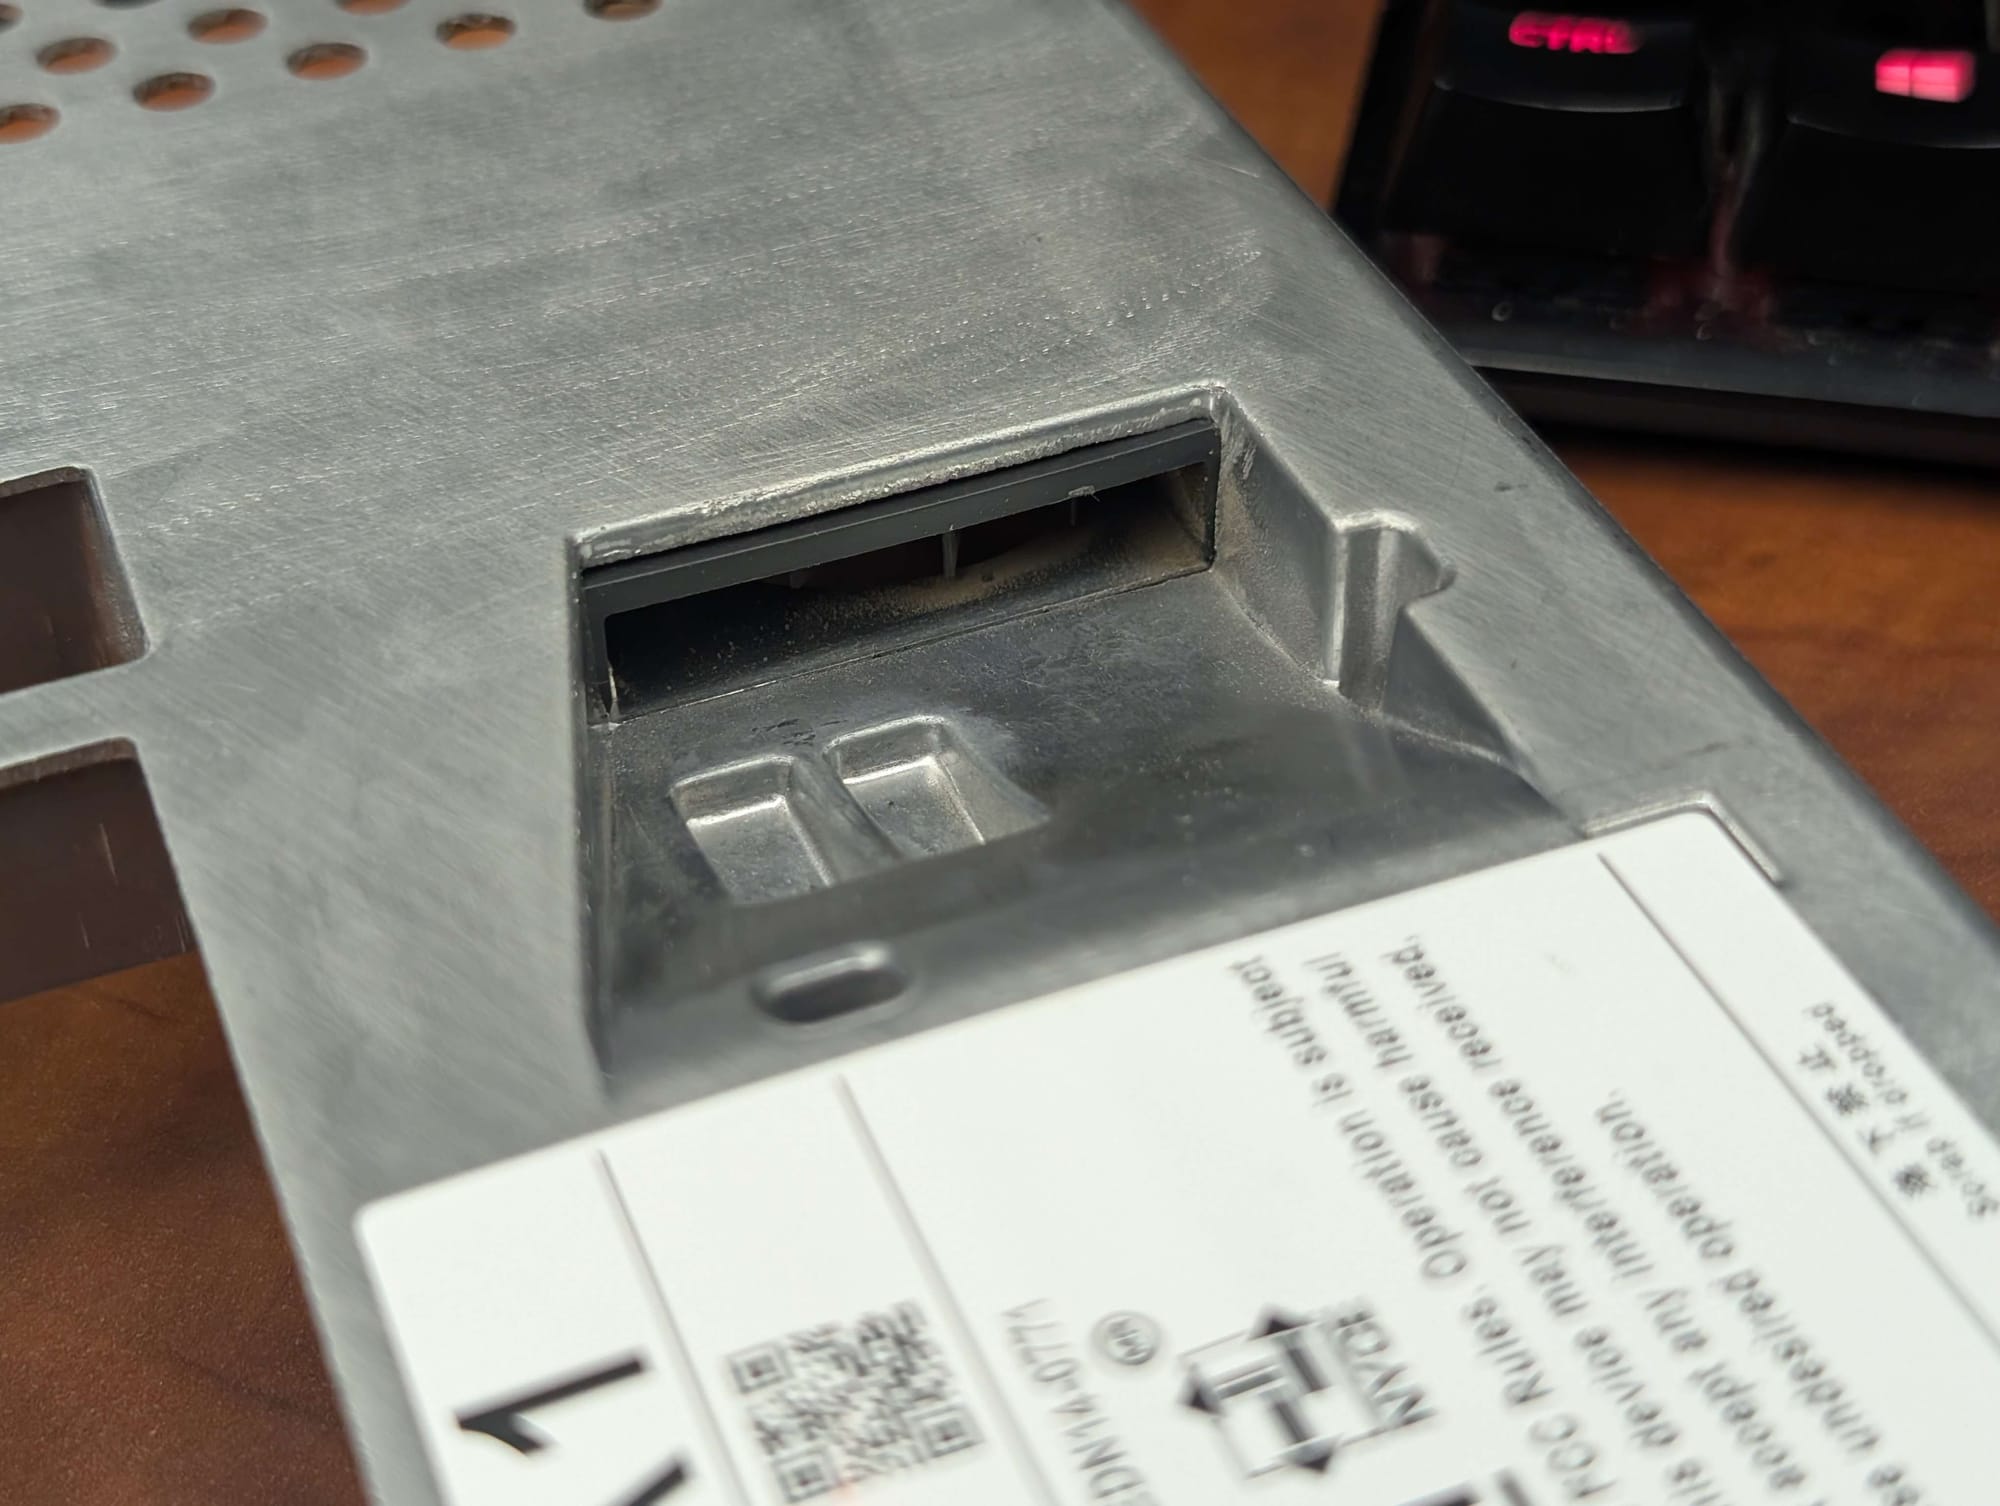
- After assembly and installation in the vehicle, you can confirm the fan is still functional by checking it’s exhaust on the rear of the unit here
Post-Maintenance Tips
- As mentioned above; unless you have pets or smoke in your vehicle, this should not have to be repeated very often if ever. If you do have hairy pets or smoke, then it may be worth performing this cleaning procedure every 2-3 years. This can also apply to the blower motor in your climate control.
- Signs It’s Time for a New Fan (If Ever Available)
- If you perform the fan cleaning process & lubing process, and it doesn’t improve the symptoms (notably, the loud fan symptoms. If you have the other symptoms mentioned, it may be related to the general DCU SD Card failure, which can be fixed by following this process).
- Currently, replacement fans are not available for these units. I am attempting to purchase a bulk of these fans as I can only find them on one market place (taobao). I’ve reached out to the manufacture directly, I will update with a purchase link if available.
- If you have a failed fan, reach out to me directly through my contact form and I’ll see what I can do for you.