How to Remove the DCU Screen in Infiniti QX80 & QX60 (2011-2024)
This month, I added the Infiniti QX80 (and I hope to be adding the QX60 shortly) to the list of vehicles that I have repair kits available for; so to go along with that kit, I’ve also written an article detailing the process to install the SD Card in the kit. Two articles, actually— this article here, which shows you how to access the screen itself; and a companion article linked at the bottom that shows you how to take the screen apart and install the SD Card.
This article is created specifically for owners of Y62 Infiniti QX80s and L50 QX60s; covering the majority of model years from 2011 through 2024. This guide will, include two sections: The first section will be the Y62 Infiniti QX80 section (which is functionally identical to the Y62 Nissan Armada), and the second section will be for the L50 Infiniti QX60 (which is functionally identical to the R52 Nissan Pathfinder).
For a comprehensive list of other supported vehicles, visit the guides section. After successfully removing the DCU (Screen), follow this link (or use the link provided at the end of this page) for detailed instructions on replacing the MicroSD Card within the unit.
This guide further presumes you’ve previously diagnosed your DCU Screen malfunction, confirmed it’s experiencing the common manufacturing defect present in every vehicle using this specific Denso DCU Screen, and secured a suitable MicroSD Boot Card replacement—available either by purchasing a preconfigured repair kit or by following my DIY guide available here.
Required parts & Tools
Before jumping in, I’ll give a list of parts needed and useful tools for getting at the DCU in each of these guides.
Parts needed for repair:
or
Tools needed:
Time Needed:
- Estimated 30-60 Minutes
Enough talk, let’s begin with the guides!
Y62 Infiniti QX80 Screen Removal:
The images for this guide were taken from a Y62 Nissan Armada, however the procedure is the same for the Y62 Infiniti QX80. The DCU Screen itself is the same across all models, with only differences in the connectors and what hardware the system is expecting to be connected to it.
Remove DCU from Vehicle
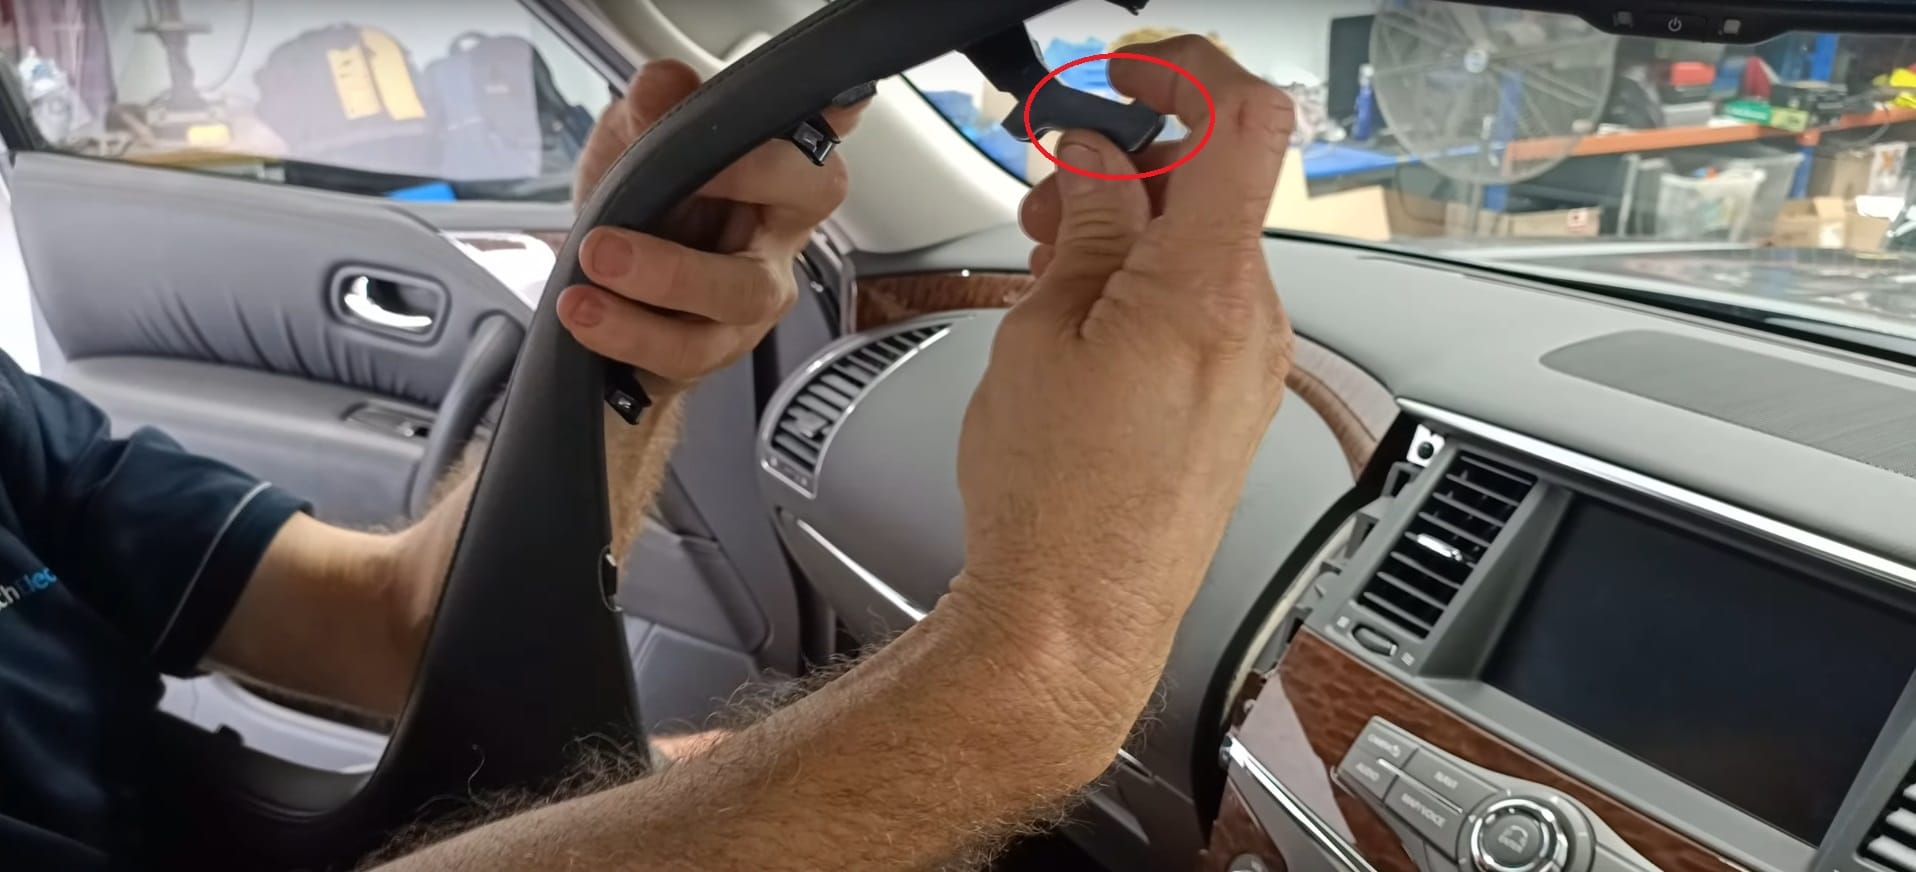
- Step 1: Lower the vanity ring around the shifter boot, remove the snap ring keeping the shift knob in place, and remove the shift knob by pulling straight up
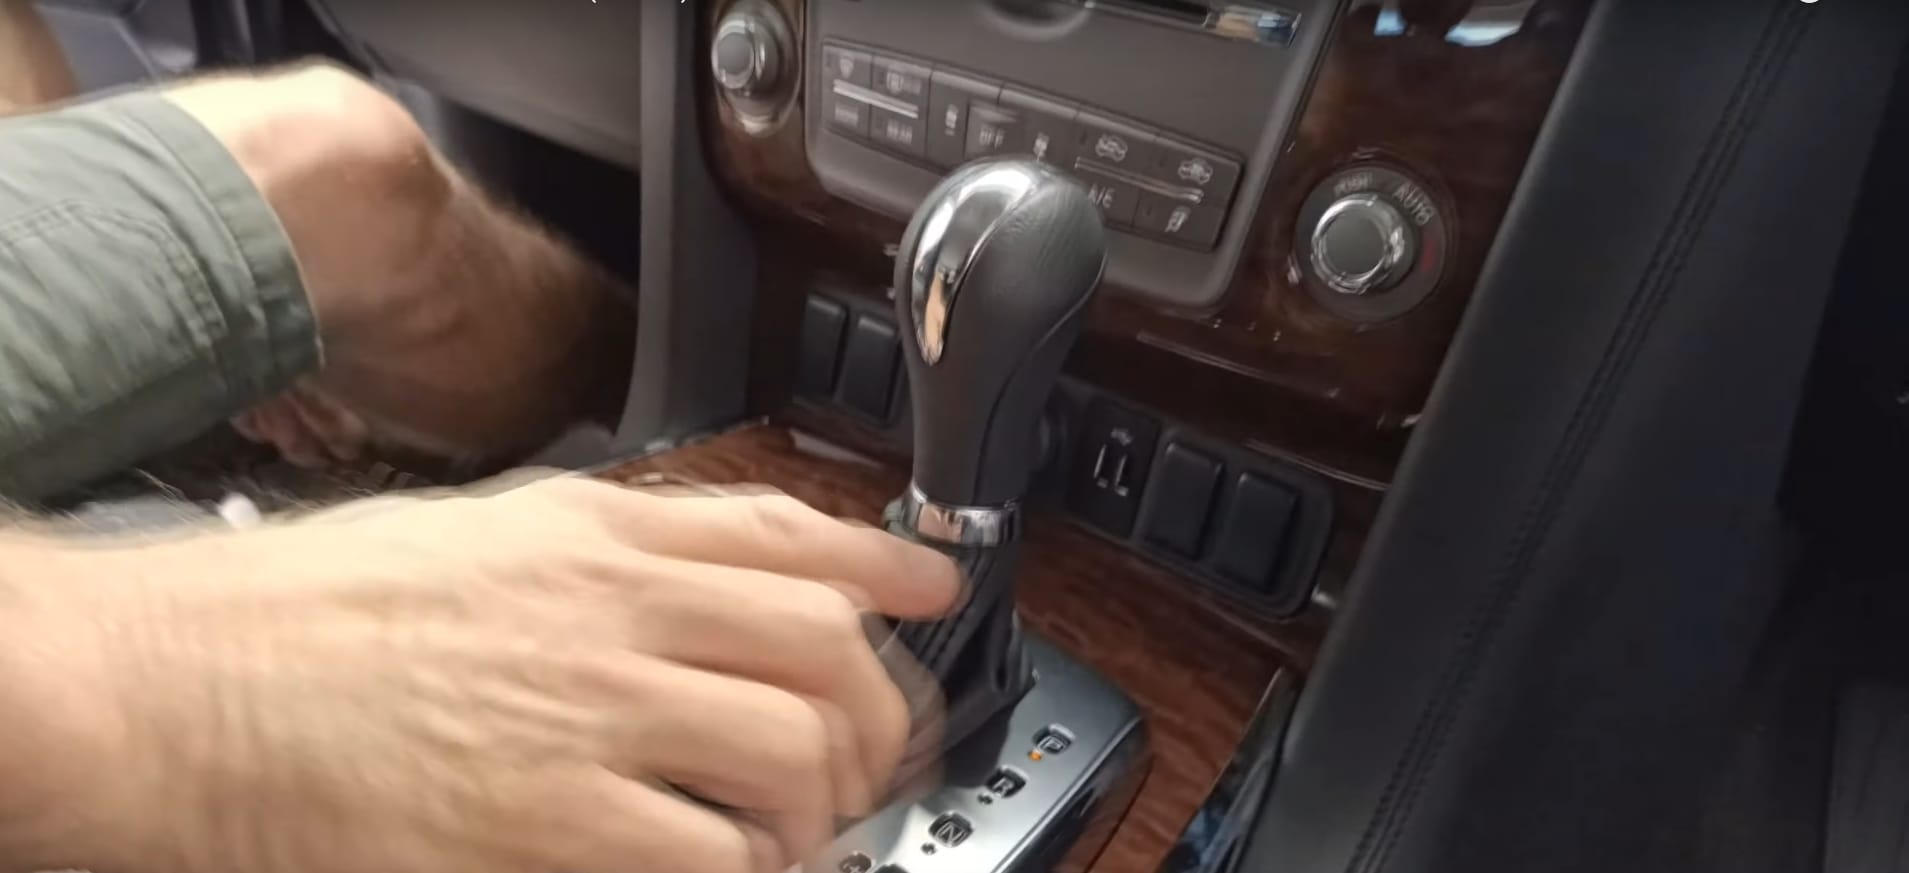
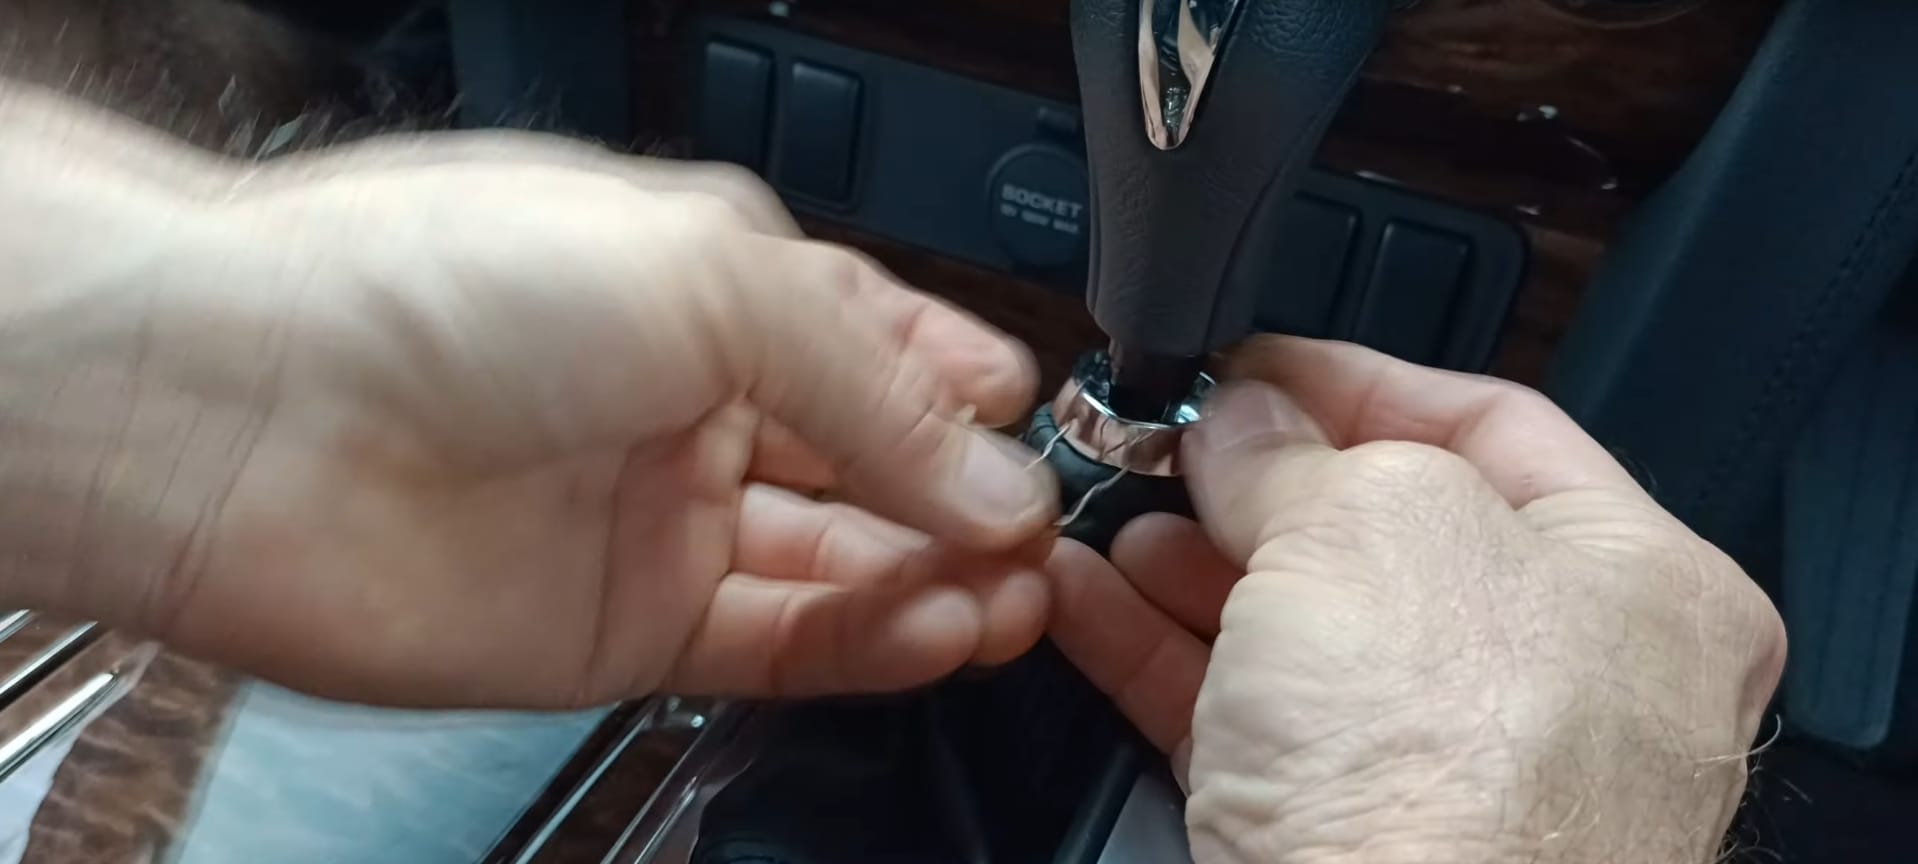
💡 Put the retainer clip back in the shift knob so it doesn’t get lost!
- Step 2: Use a Plastic trim removal tool to unclip the plastic clips in the locations shown. Insert the tool about 1 inch, and gently pull up.
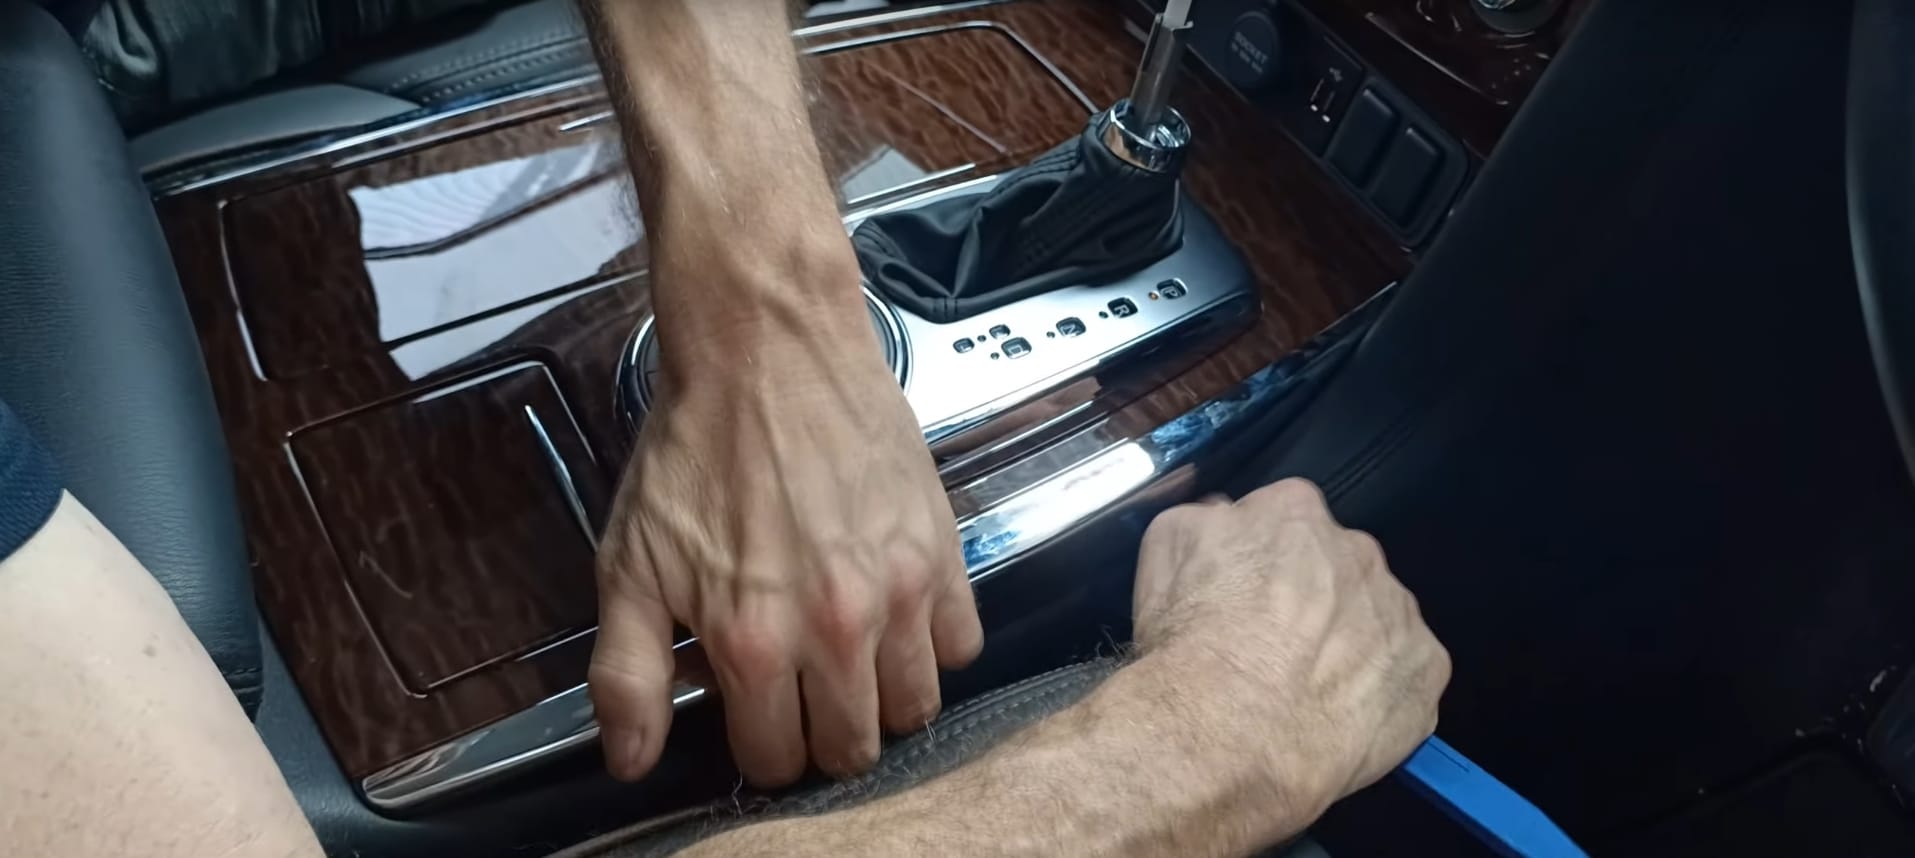
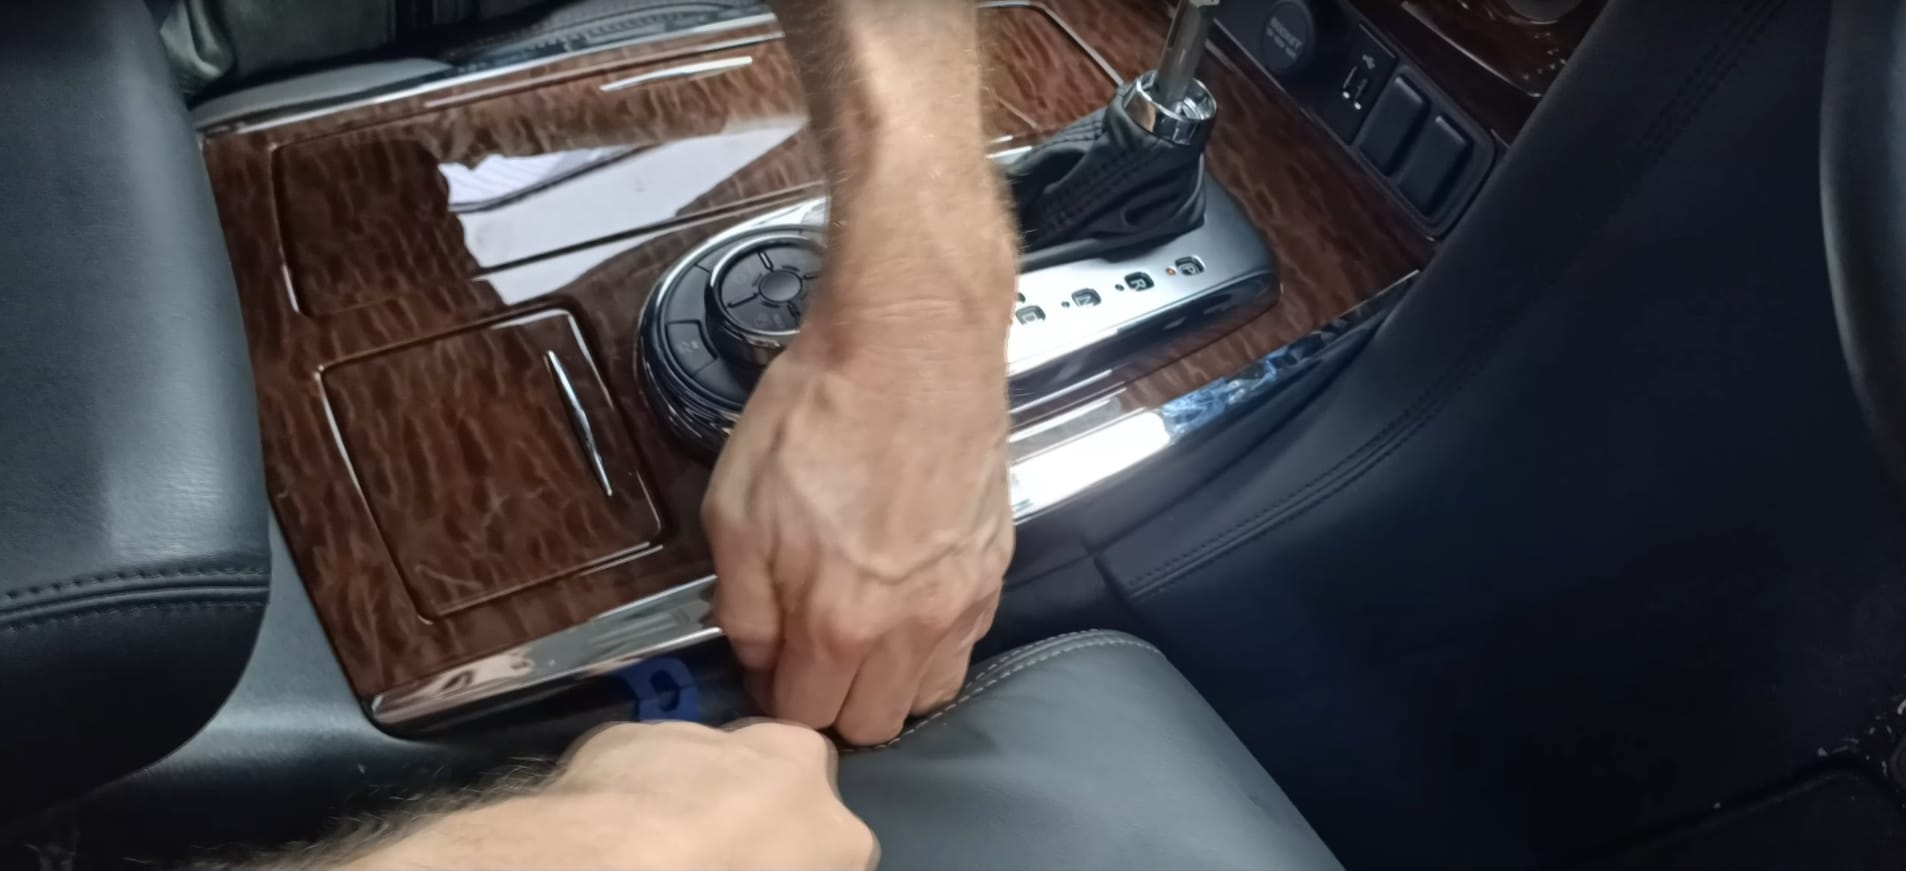
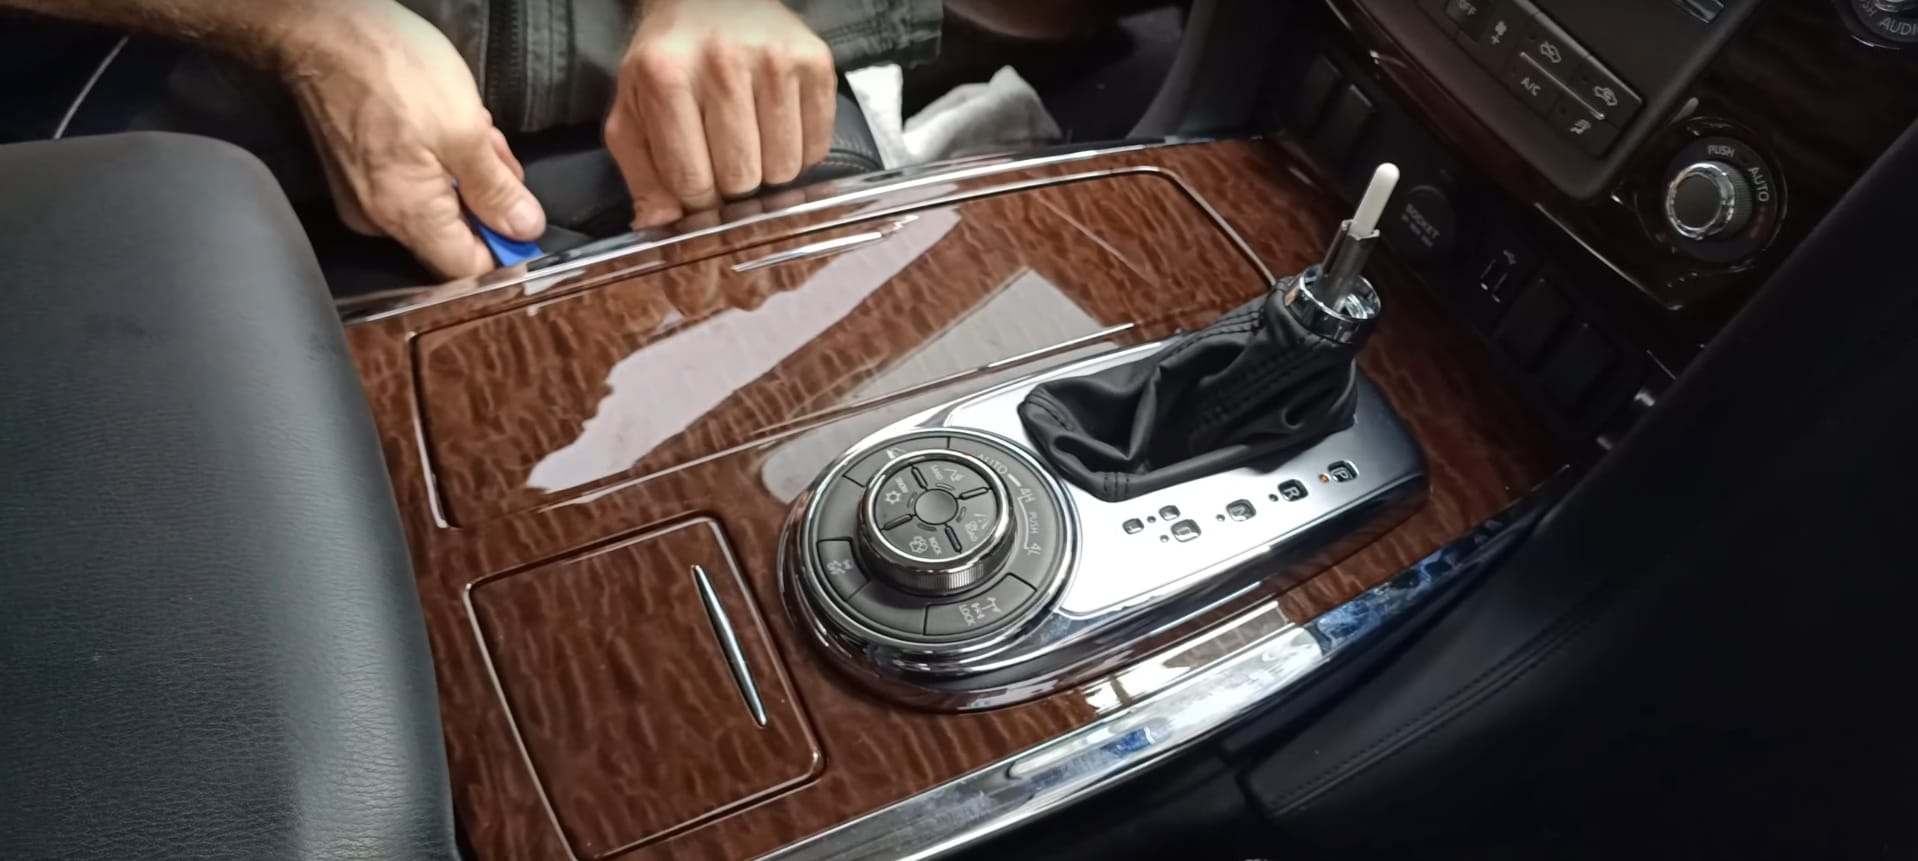
💡 There are four clips, but you’ll likely only need to unclip 3. If one is giving you trouble, move on to another one and come back to that one if necessary.
- Step 3: Once the clips are removed, the center console can be lifted out like this. You can also get a better view of the clip positions in this photo.
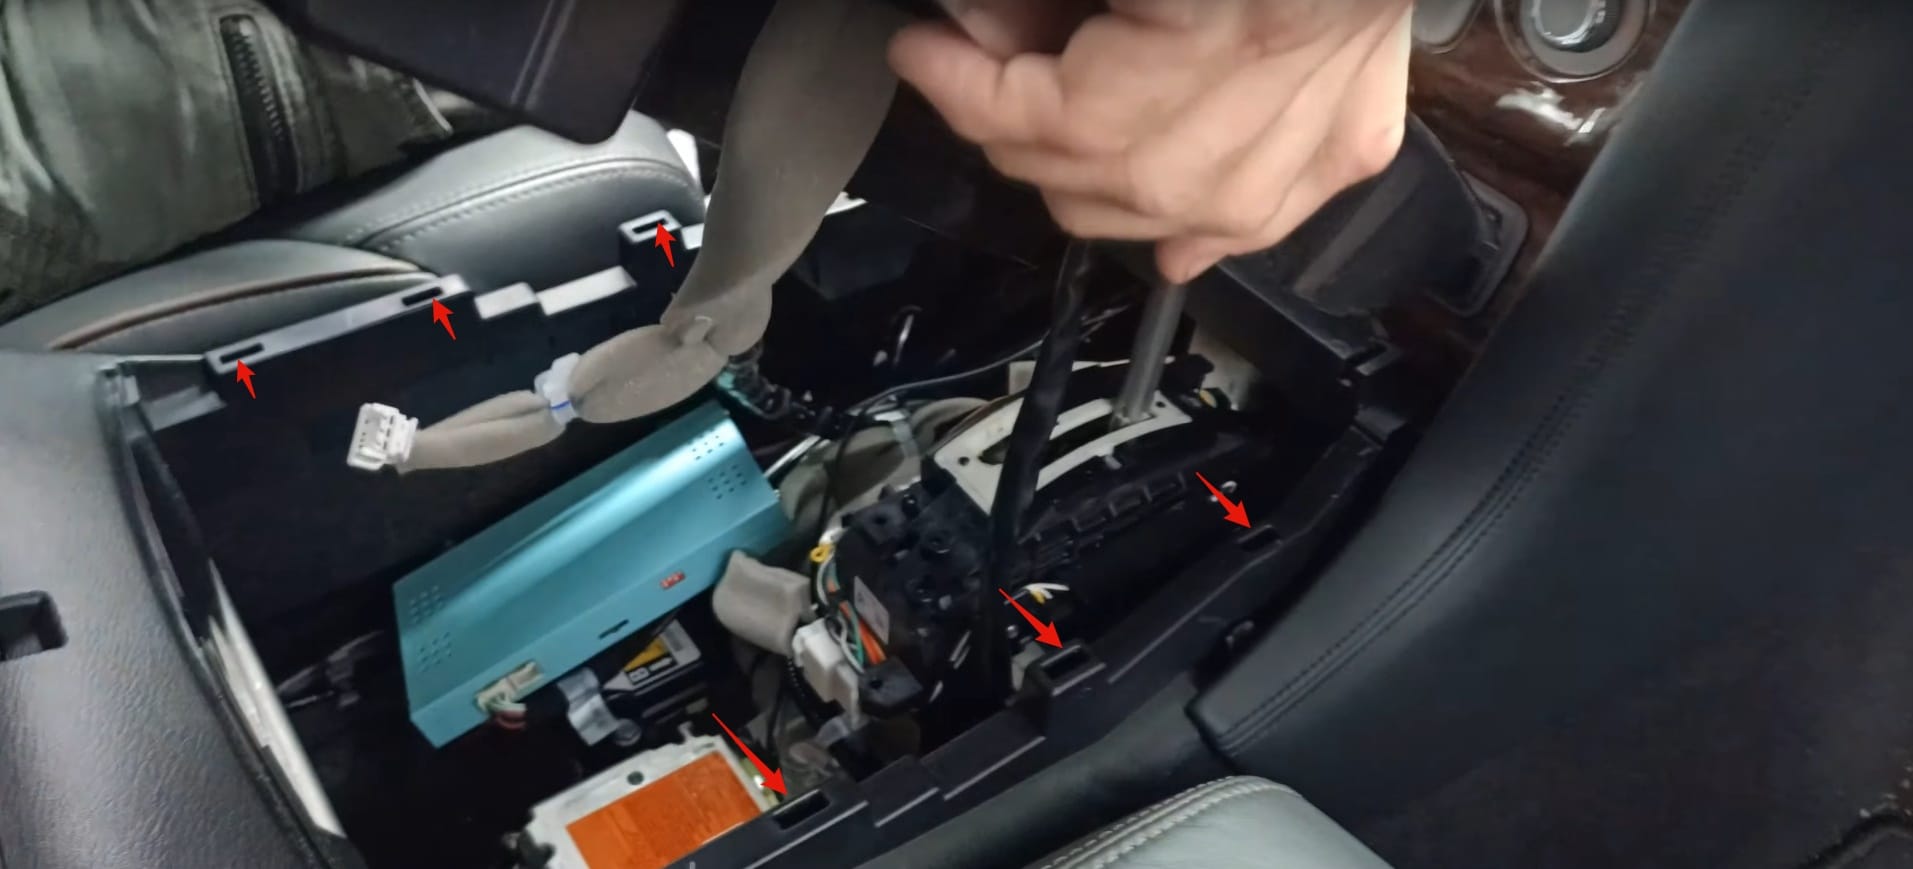
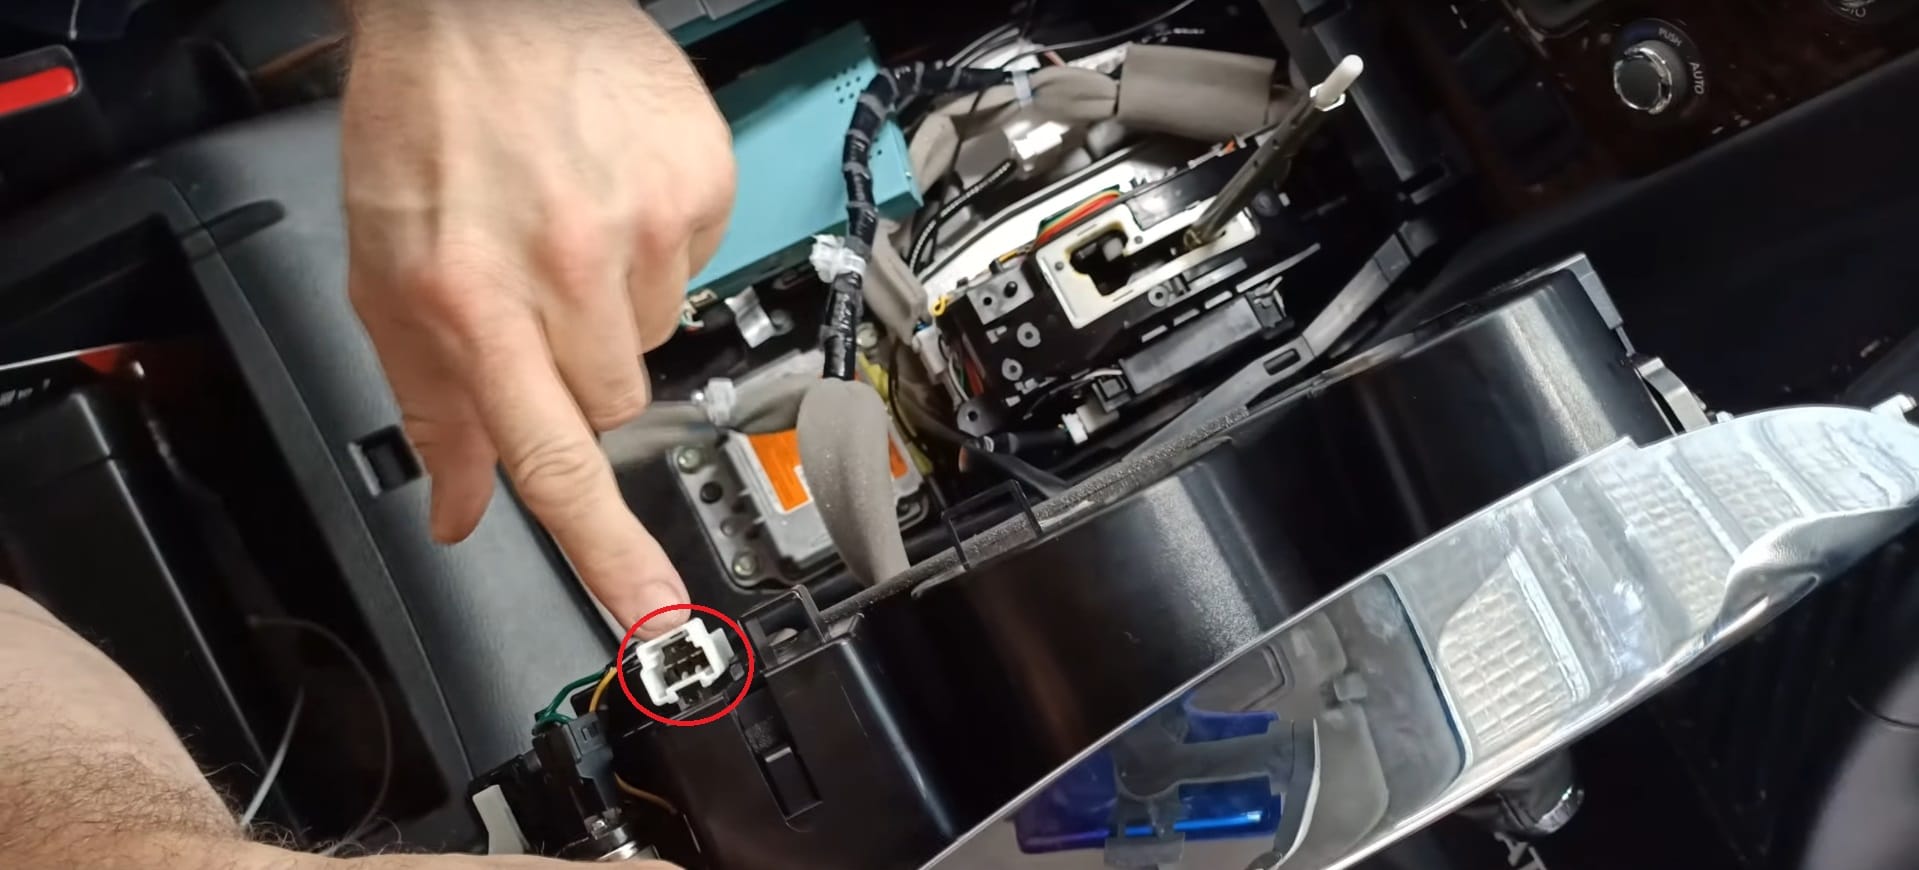
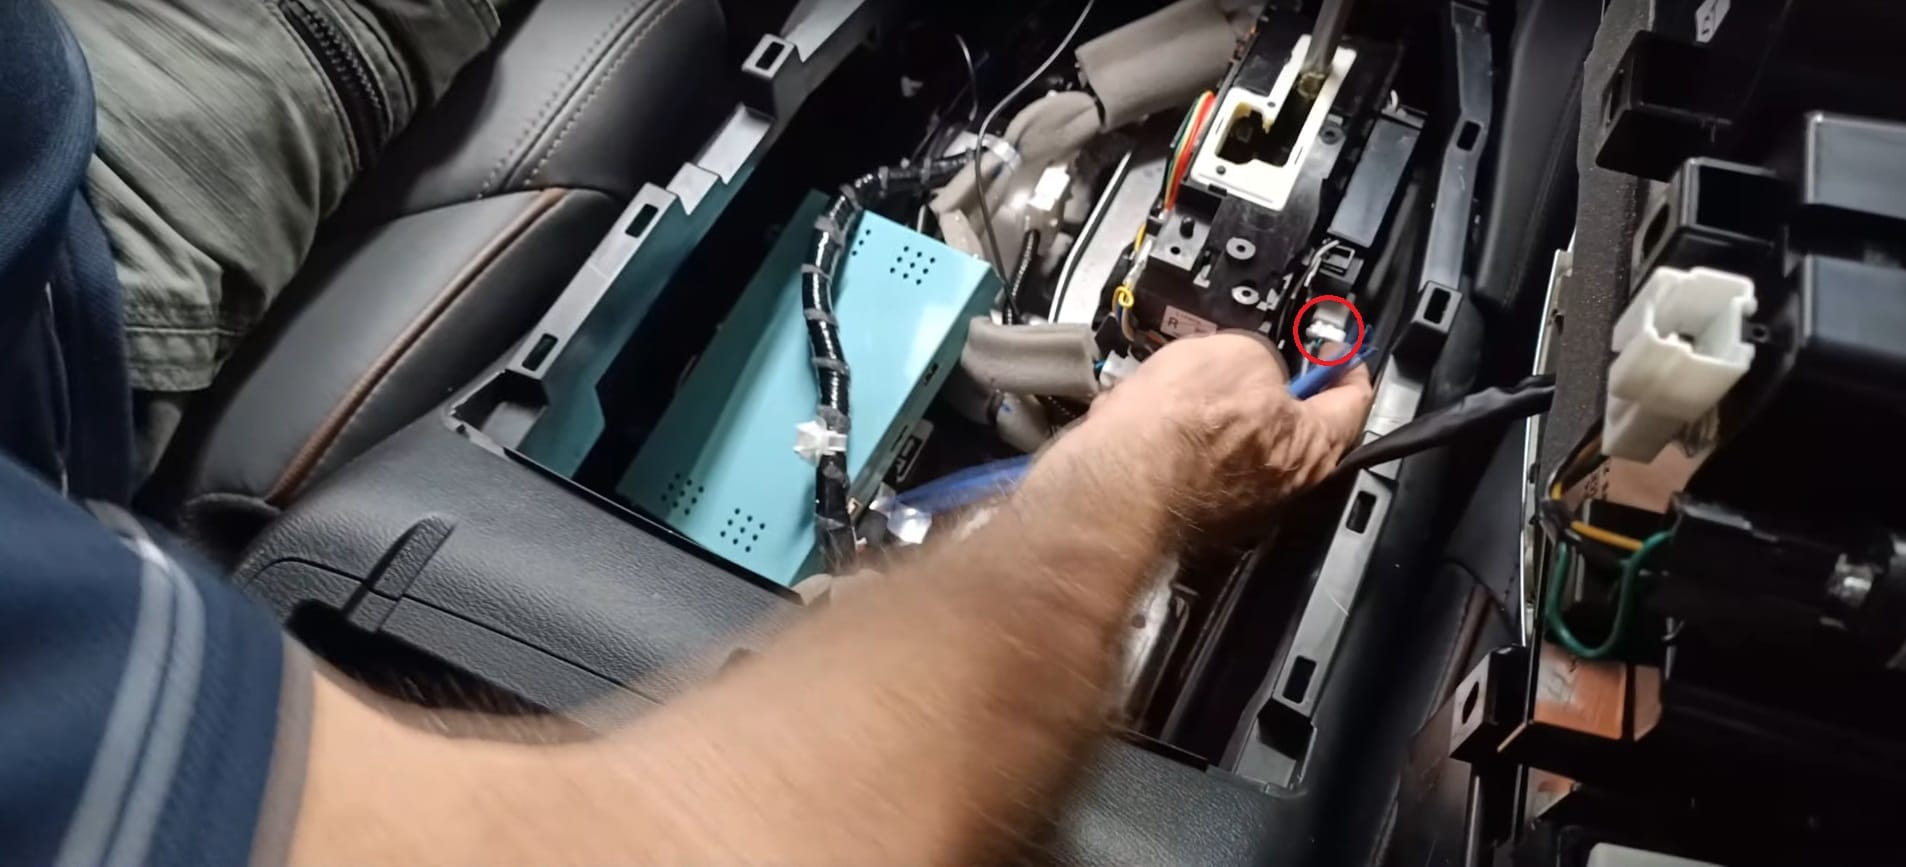
- Step 4: Disconnect the cables from the center console panel, the connectors are highlighted in the photos below.
- Step 5: Remove the soft trim around the infotainment/climate control stack by grabbing at the bottom of the arches and pulling upwards gently. They are hinged at the top, which you can see in the photos below, so the bottom needs to come out before the top does.
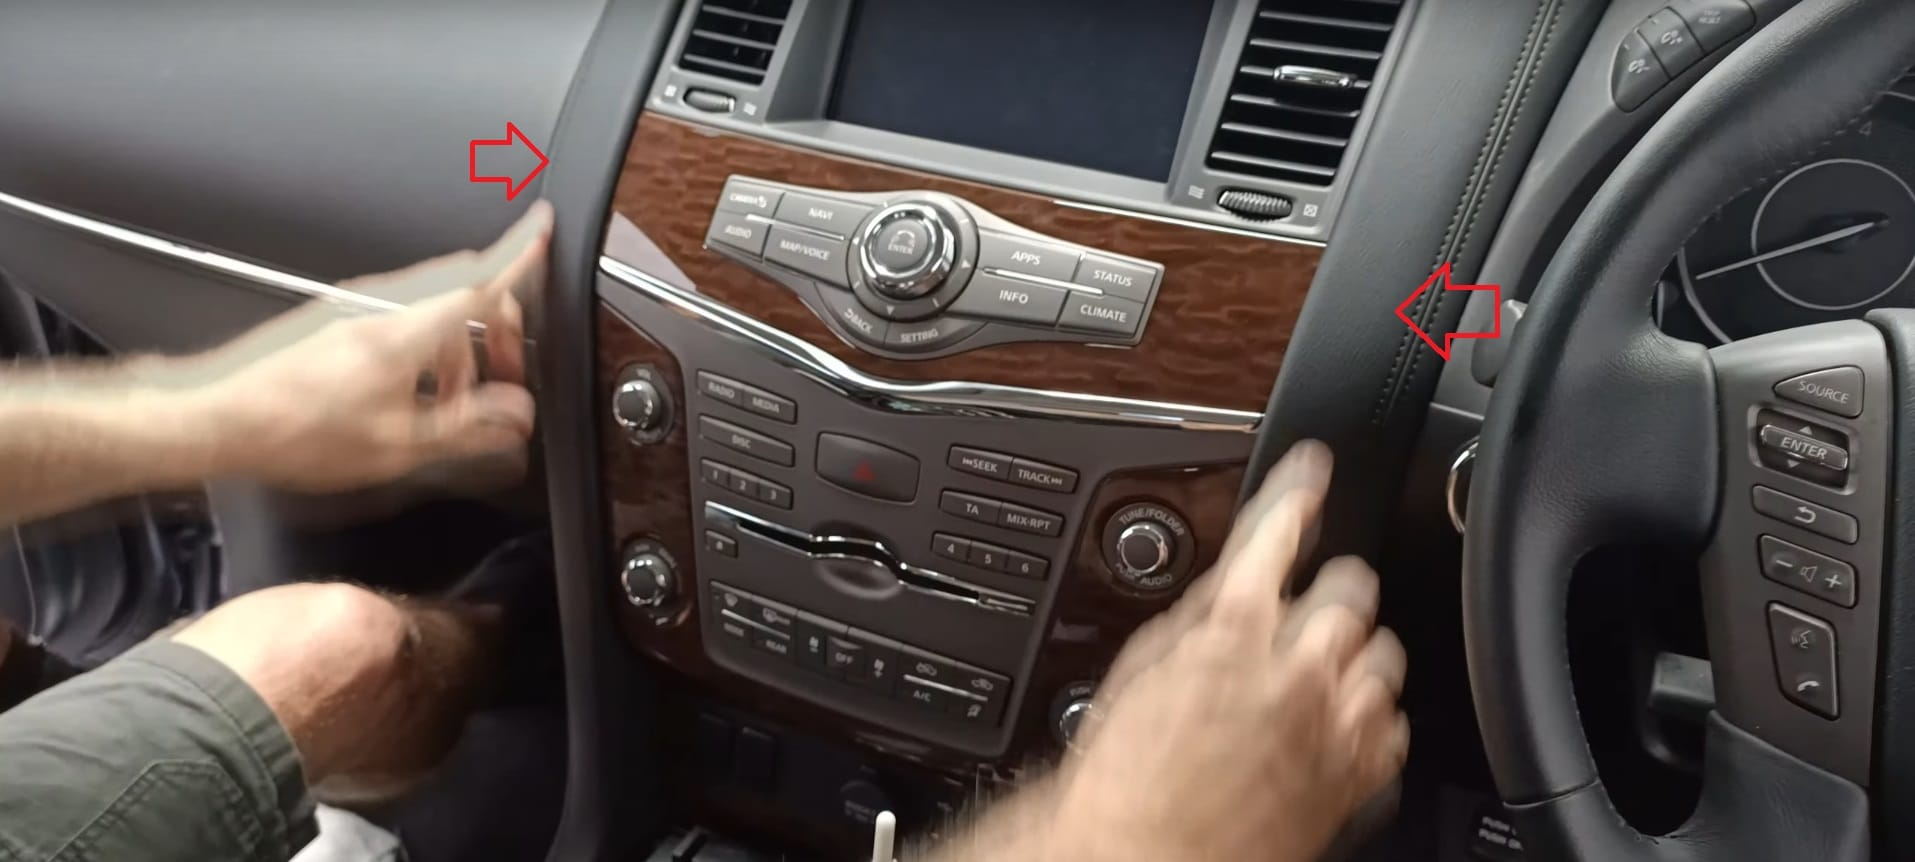
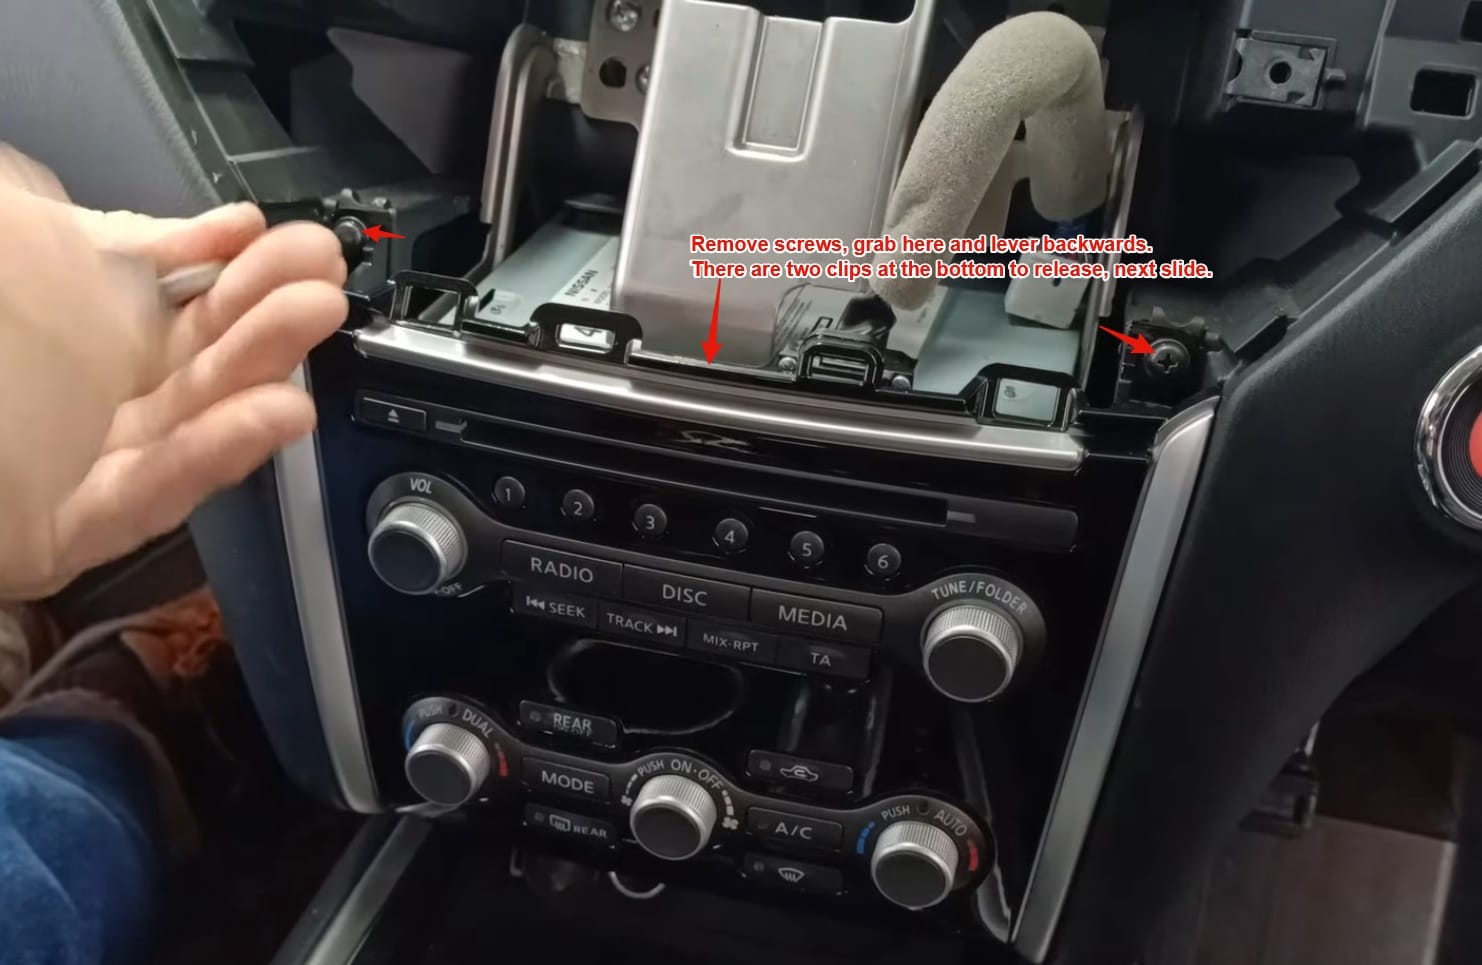
- Step 6: Remove the two screws at the top of the infotainment/climate control stack, using a Philips head Screw driver.
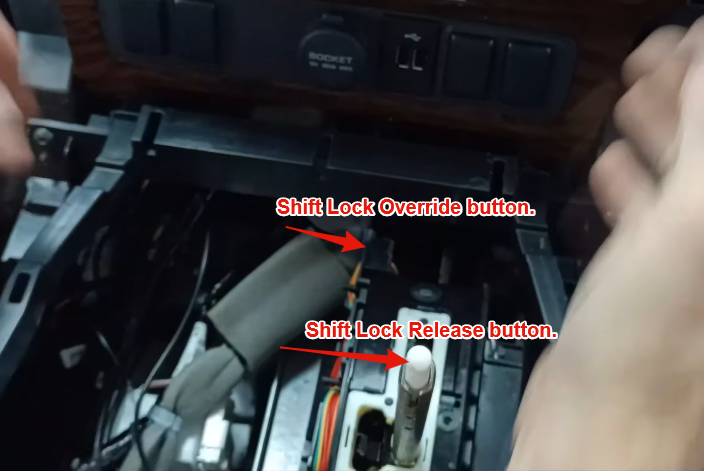
🚧 Before proceeding with the next step, ensure your parking brake is on, you will be placing the vehicle in neutral.
- Step 7: Remove the infotainment/climate control stack.
- Step 7a: Put the parking brake on, and place the vehicle in neutral by pressing down on the shift lock override button and the shift lock release button. Alternatively, you can start the engine and press down on the shift lock release button (the white stem on the shift rod).
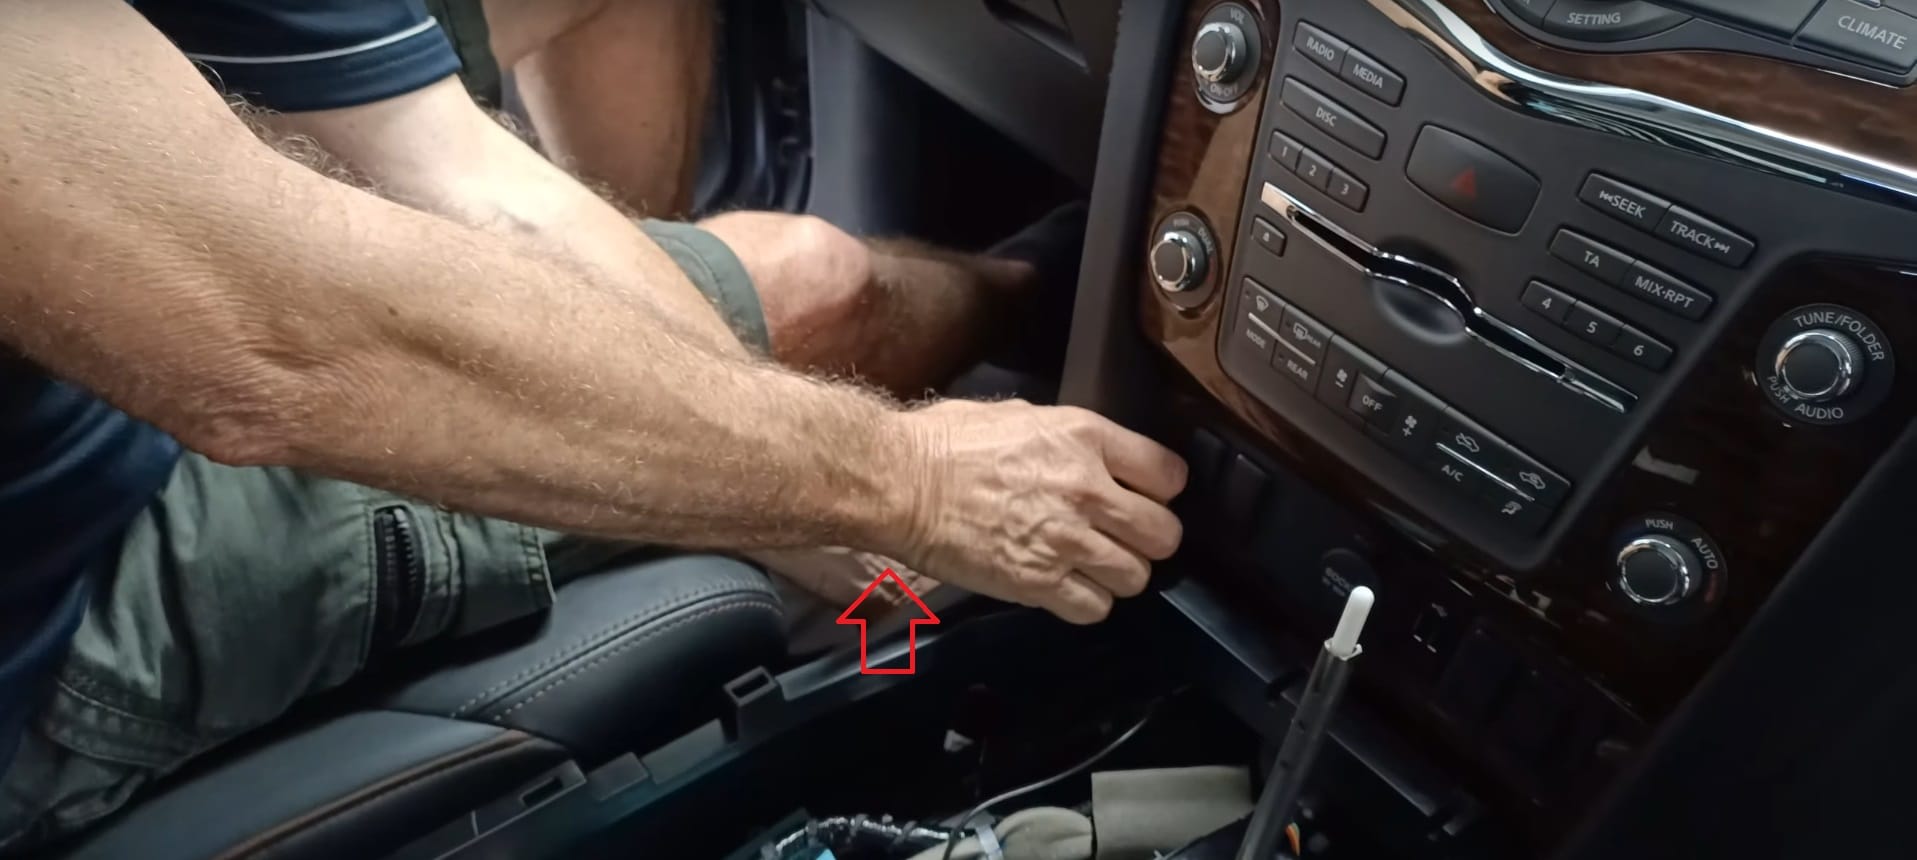
- Step 7b: Grab the infotainment/climate control stack and gently but firmly pull outwards to release the clips.
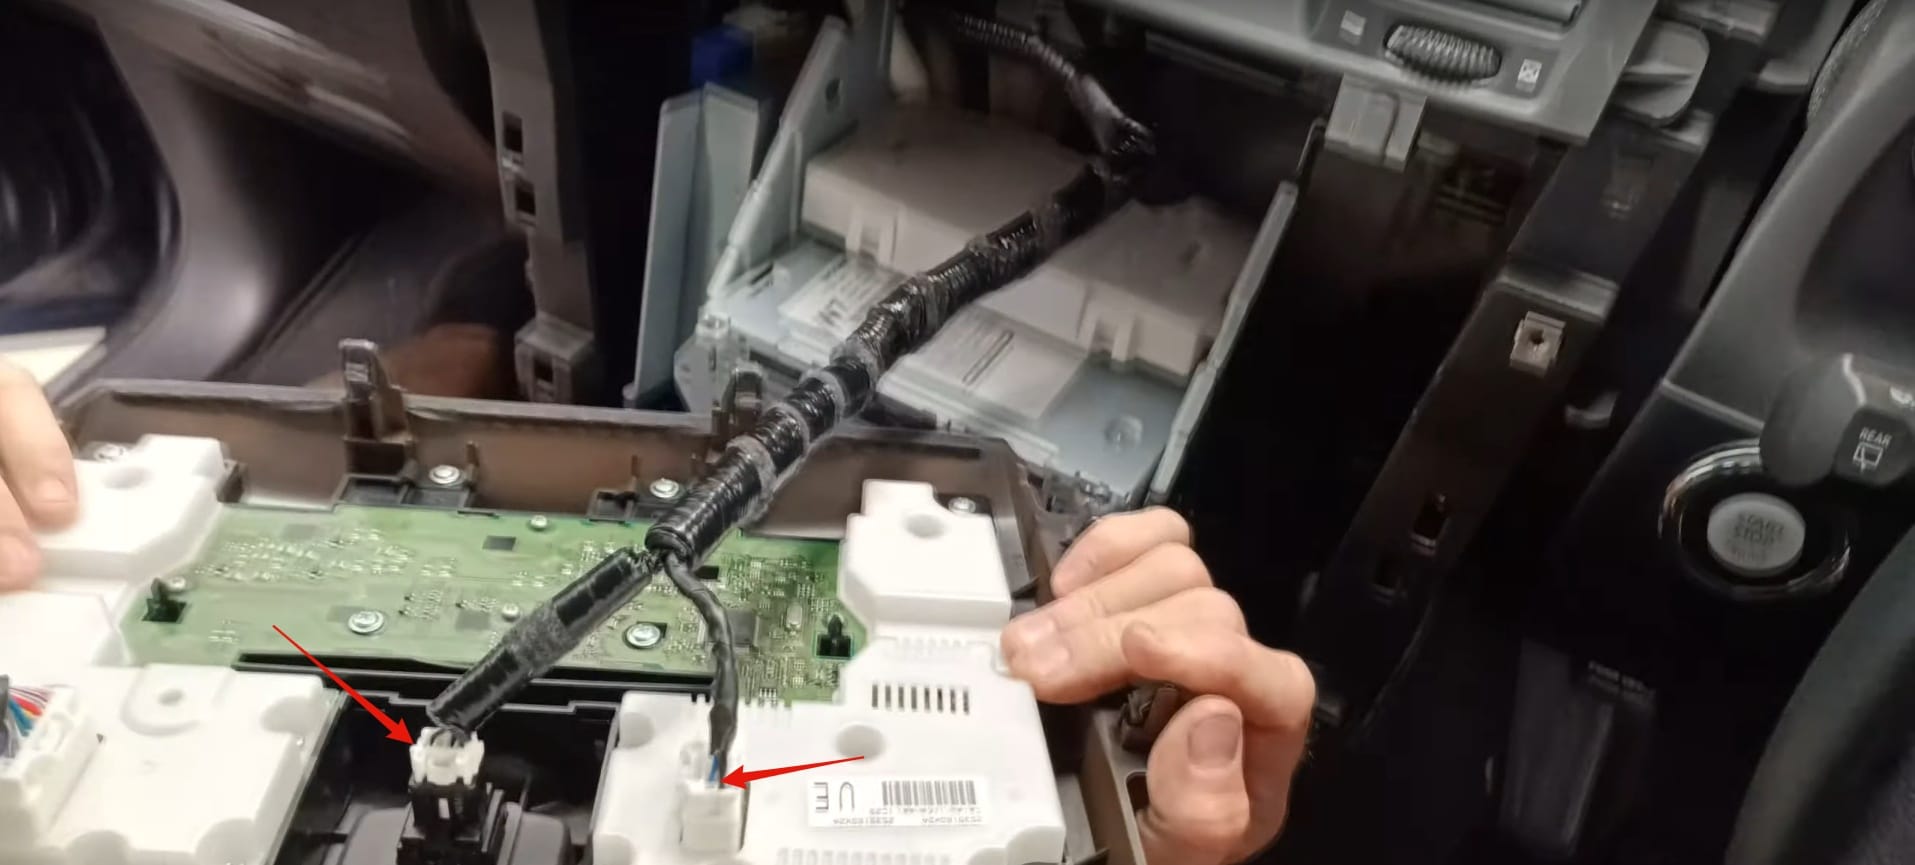
- Step 8: Disconnect the cables on the back of the infotainment/climate control stack, and set it aside.
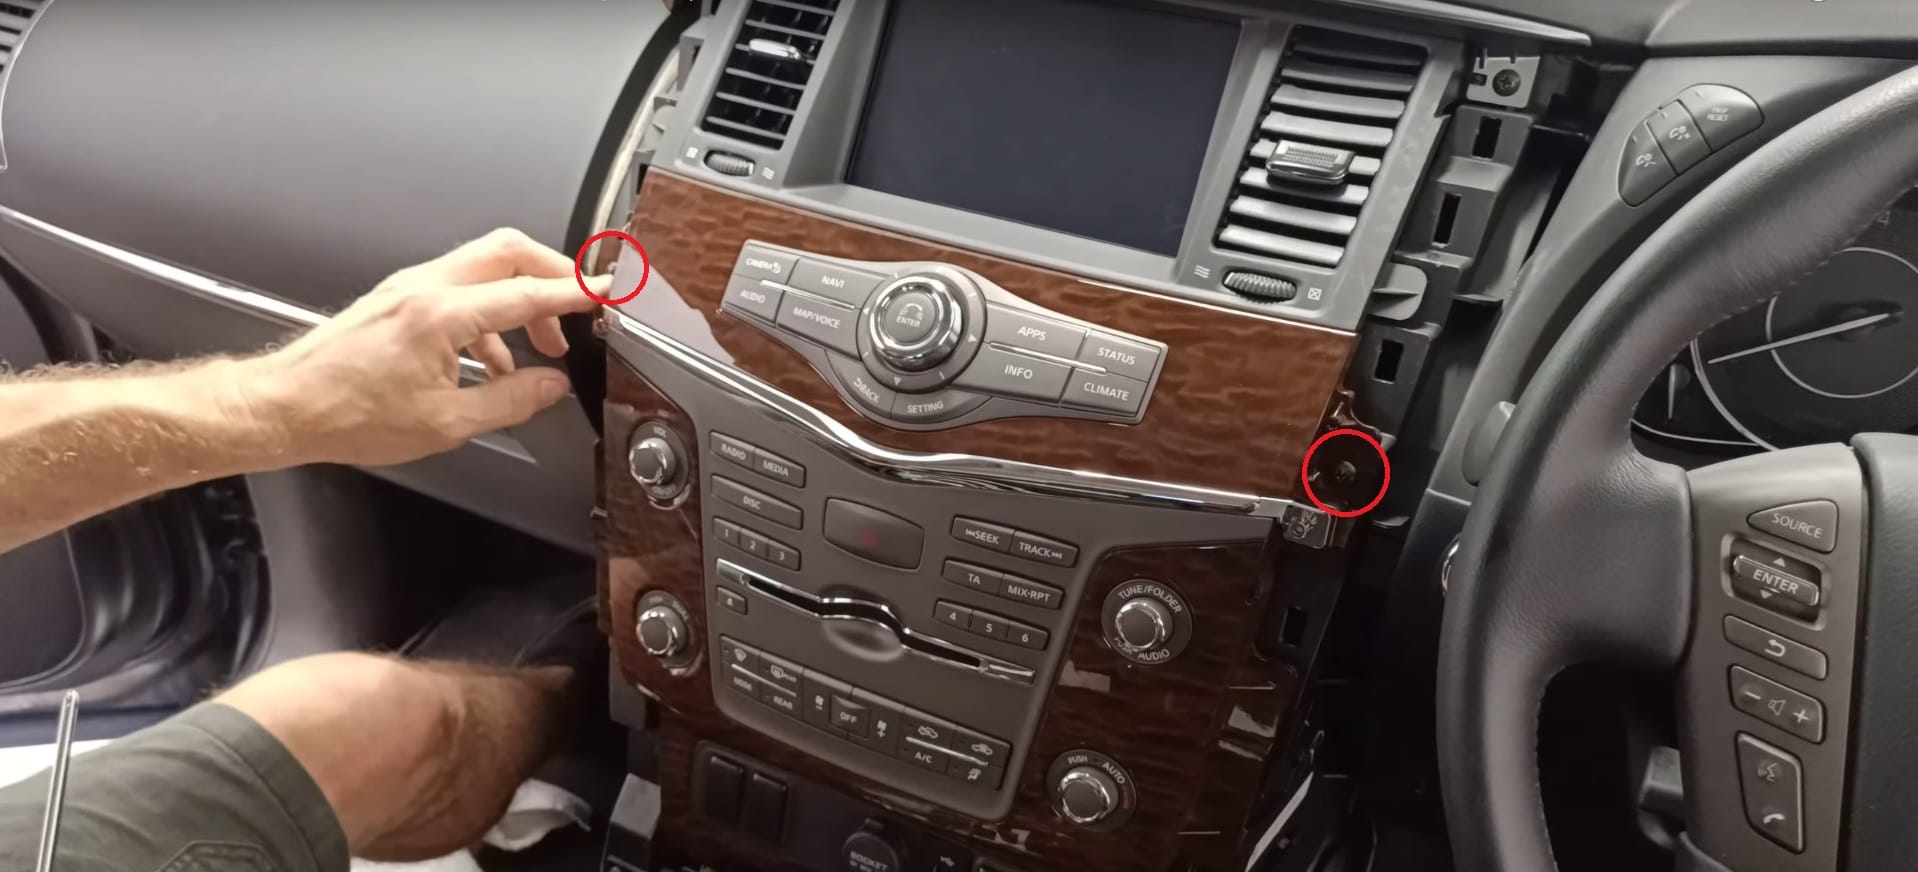
- Step 9: Using a Philips head Screw driver, remove the three screws in the climate vent.
- Step 10: Starting at the bottom, loosen the clips holding the climate vents one by one and then pull straight outwards as shown below. Set it aside.
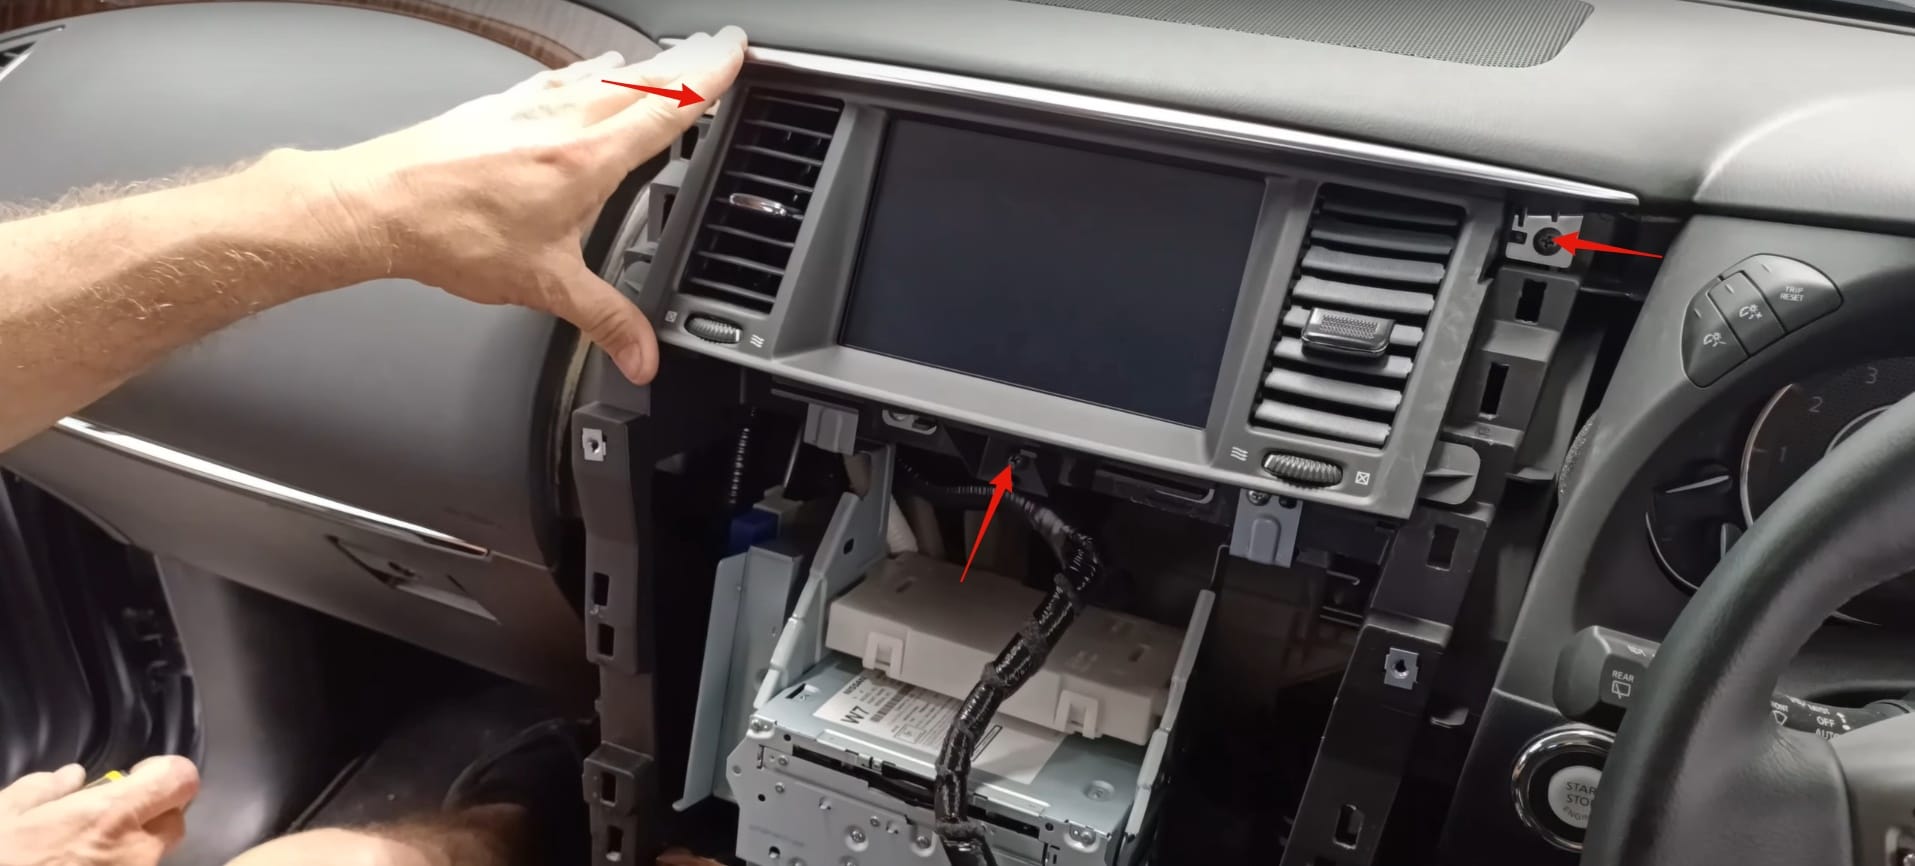
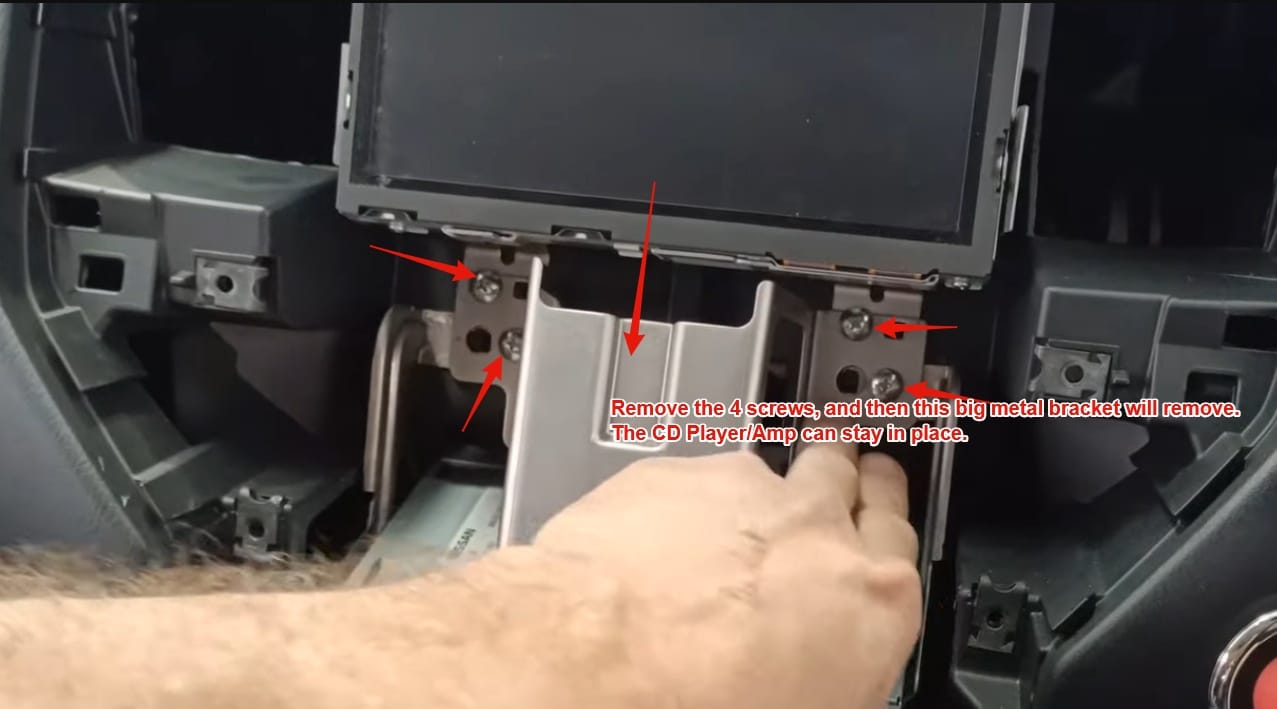
- Step 11: Remove the two screws holding the screen in place, and lift the screen out. (It is hinged at the top, and held in place by two studs on the bottom).
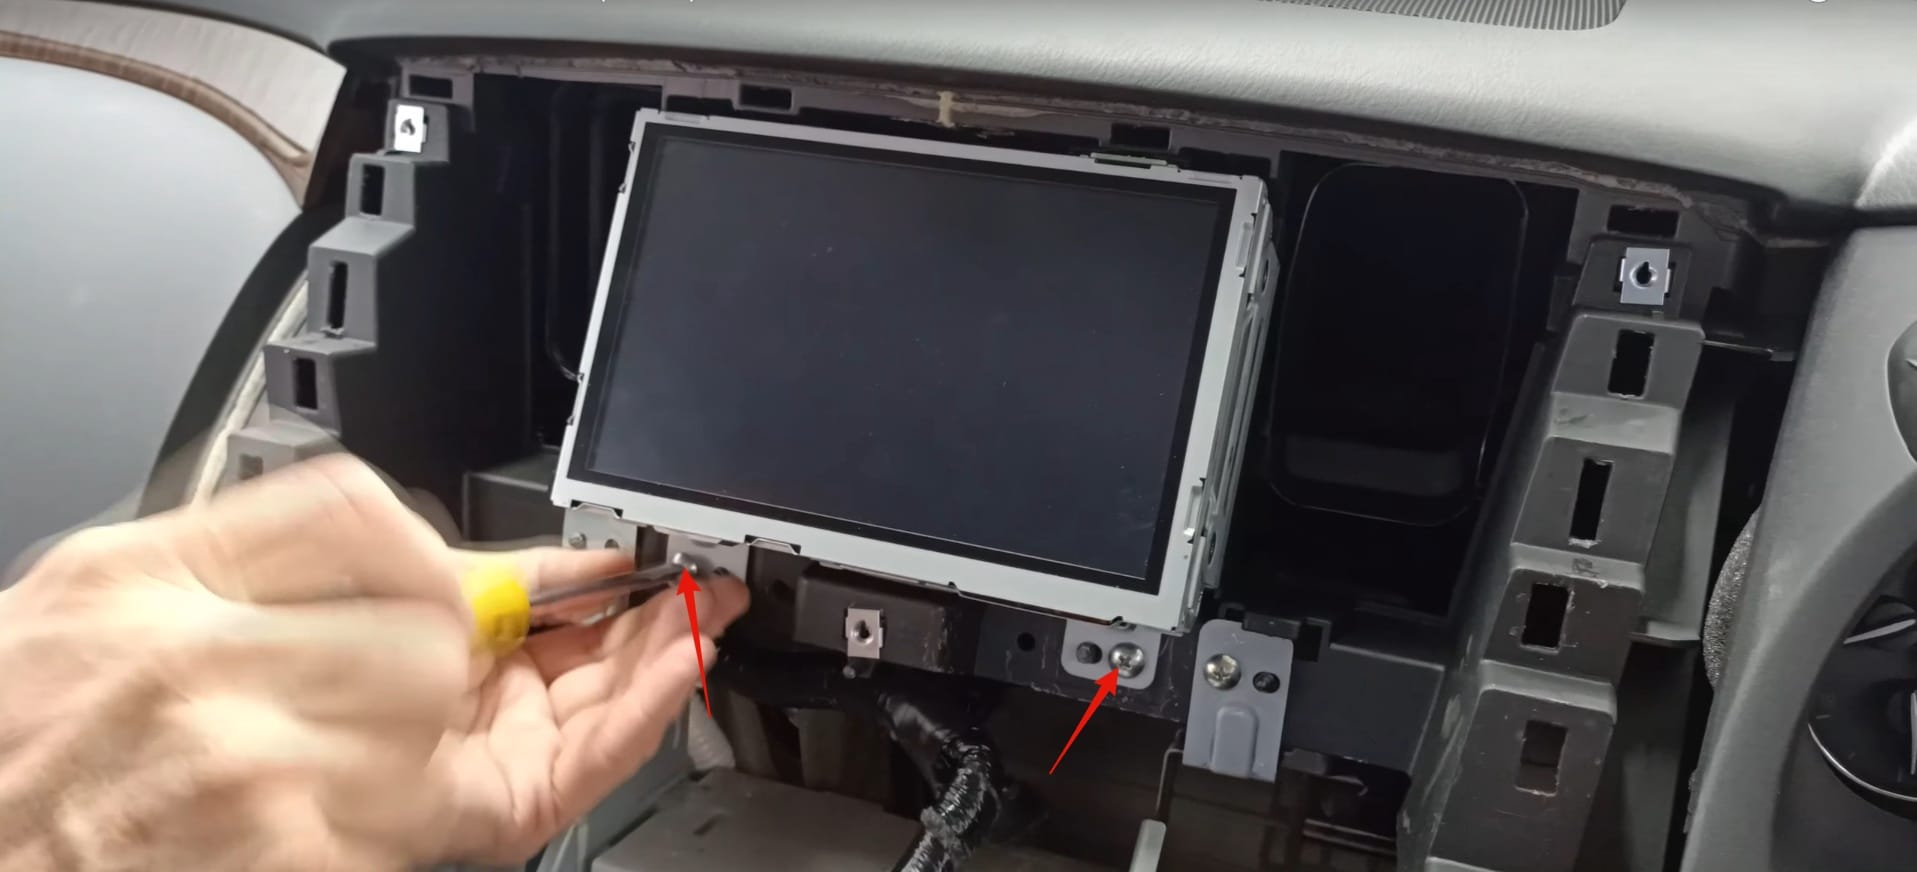
and lift the screen out. (It is hinged at the top, and held in place by two studs on the bottom).
- Step 12: Remove the DCU screen, and unplug any cables on the back. There is plenty of slack on these cables to get your hands behind there and remove them.
💡 Advice: Before disconnecting the cables, take a picture of them! All of the connectors are keyed such that you can’t plug them in wrong, but it’s always good to have a photo to ensure you’ve done it correctly
What’s next?
Now that the DCU Screen has been removed from the vehicle, you can move on to the next stage of repair– replacing the MicroSD Card that’s inside the DCU Screen responsible for it’s failure.
For those that have purchased a Repair Kit for the Infiniti QX80, you can find the guide for that here.
If you have not yet purchased a Repair Kit, but would like to do so now; you can do so here.
If you have access to a Linux machine and would like to perform the repair yourself, you can do so here.
And if you have a different vehicle, check out the list of guides to see if I have one for yours specifically, you can find that here.
L50 Infiniti QX60 Screen Removal:
The images for this guide were taken from an R52 Nissan Pathfinder, however the procedure is the same for the L50 Infiniti QX60. The DCU Screen itself is the same across all models, with only differences in the connectors and what hardware the system is expecting to be connected to it.
Remove DCU from Vehicle
- Step 1: Remove the Vanity cover directly under the screen.

- Step 2: Remove the screw under the vanity cover, set aside.
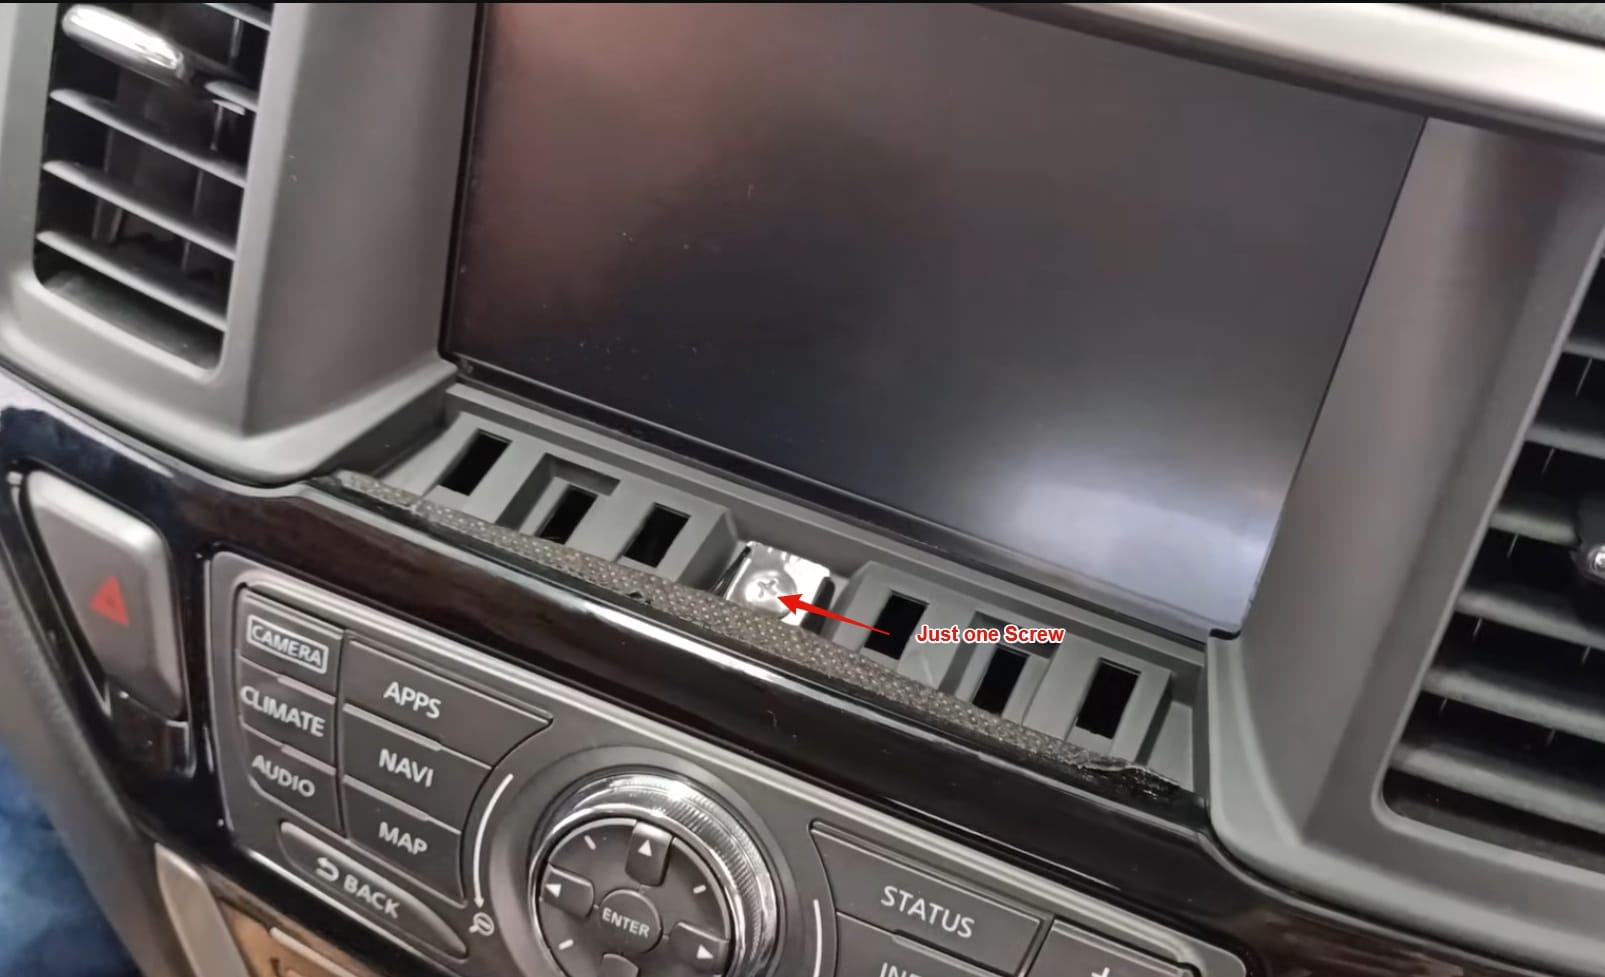
- Step 3: Remove the infotainment control panel trim.
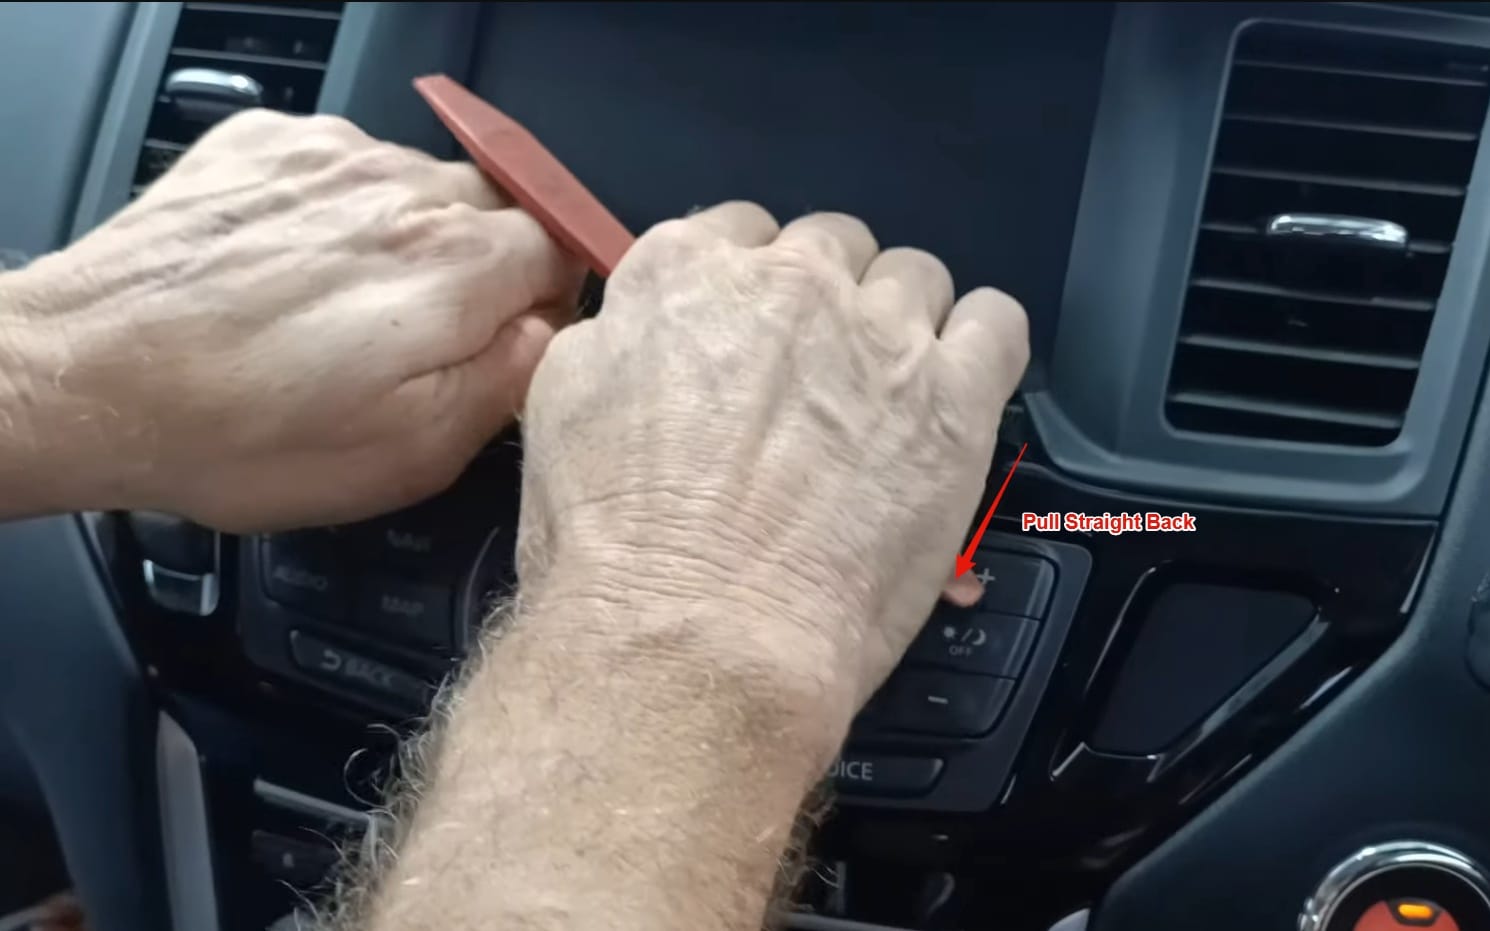
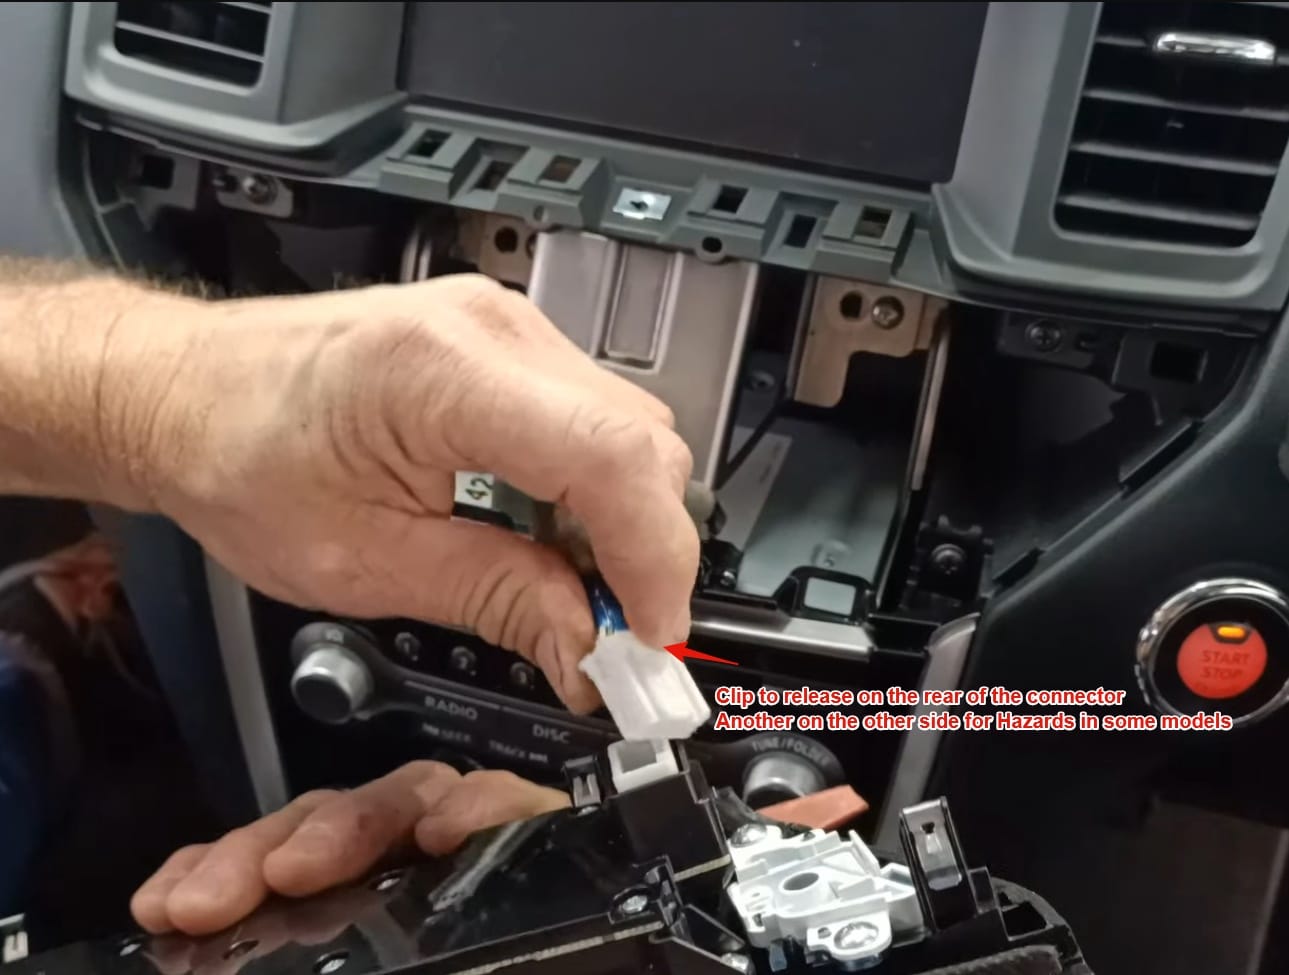
- Step 4: Remove the clips on the back of the control panel, there may be two depending on your region (one for the hazard and one for the airbag light).
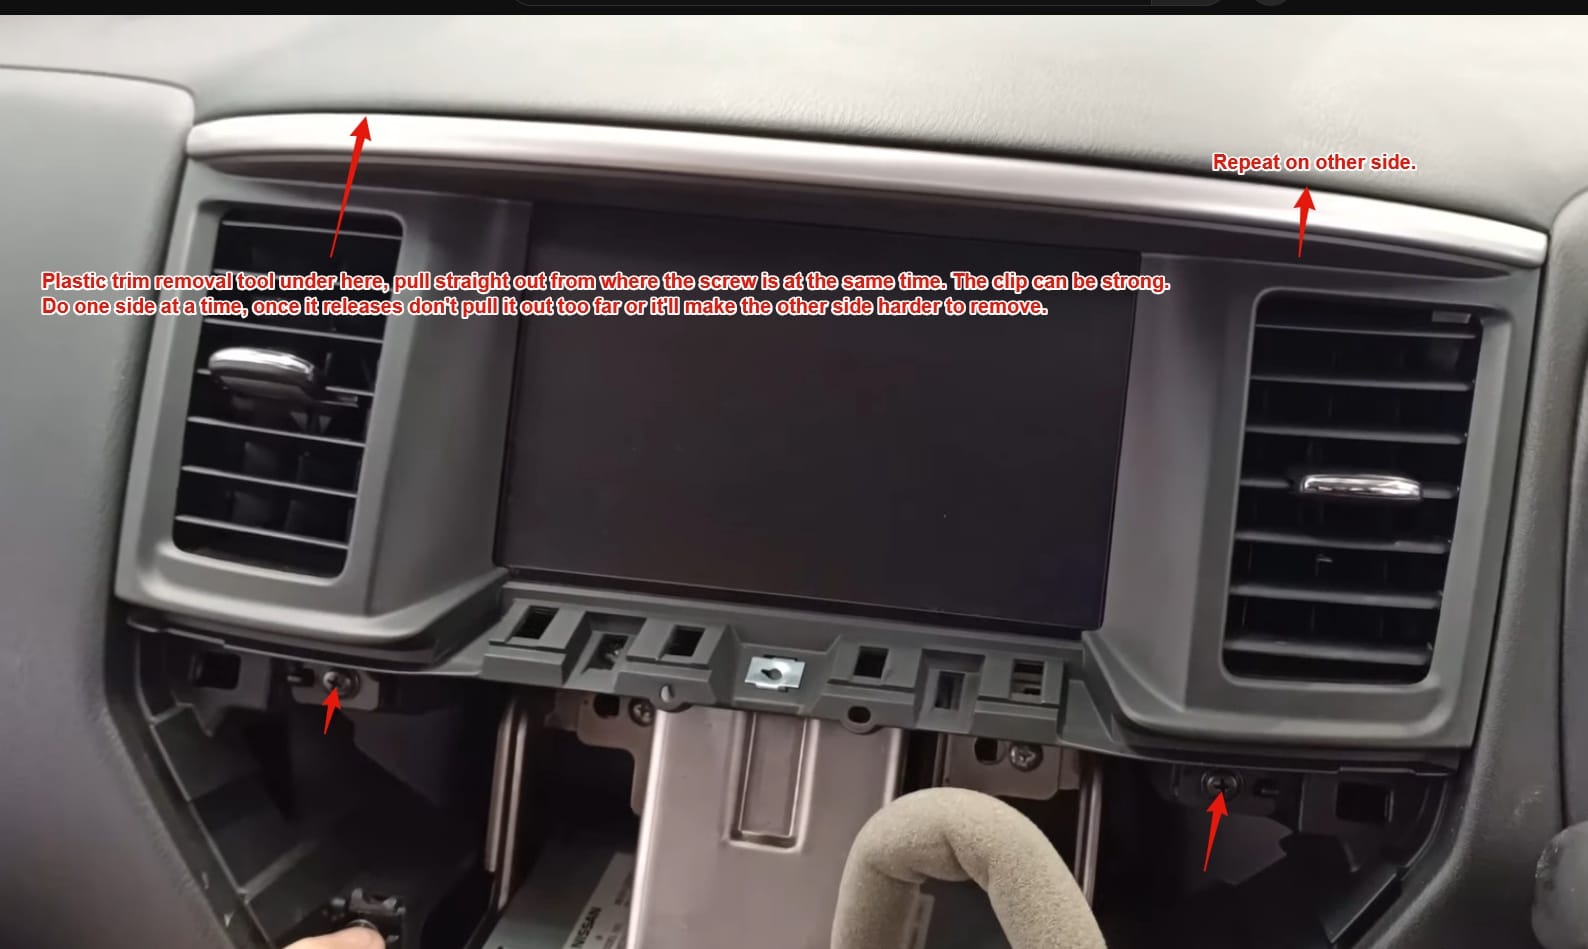
- Step 5: Remove the climate vents and trim. The vents come out with the trim. The top clips can be very strong, be careful not to scratch the screen while doing this.
💡 Advice: You can put some painters tape on the screen during this part to avoid scratching it!
- Step 6: Remove the climate control panel (part 1).
- Step 7: Remove the climate control panel (part 2). You can skip this part if the clips give you trouble, it’s just nice to have it out of the way.

- Step 8: Remove the support brace for the infotainment control trim, it’s in the way of removing the DCU.
- Step 9: Remove the DCU, and unplug any cables on the back. There is plenty of slack on these cables to get your hands behind there and remove them.
💡 Advice: Before disconnecting the cables, take a picture of them! All of the connectors are keyed such that you can’t plug them in wrong, but it’s always good to have a photo to ensure you’ve done it correctly.

What’s next?
Now that the DCU Screen has been removed from the vehicle, you can move on to the next stage of repair– replacing the MicroSD Card that’s inside the DCU Screen responsible for it’s failure.
For those that have purchased a Repair Kit for the Infiniti QX60, you can find the guide for that here.
If you have not yet purchased a Repair Kit, but would like to do so now; you can do so here.
If you have access to a Linux machine and would like to perform the repair yourself, you can do so here.
And if you have a different vehicle, check out the list of guides to see if I have one for yours specifically, you can find that here.
Finally, before you jump to the next article, enjoy a photo of my pathfinder 🙂