R52 Nissan Pathfinder DCU Screen Removal Step-by-Step Guide
This guide is specific to the R52 Nissan Pathfinder, covers all model years of the vehicle (2013-2022). For a full list of other vehicles, including the Y62 Nissan Armada, please check the guides page. Once you have completed the removal of the DCU (Screen), follow this link (or the one at the bottom of this page) to find the guide for replacing the MicroSD Card inside it.
This guide also assumes you’ve already diagnosed your DCU Screen issue, confirmed that it’s failed due to the common systemic flaw that affects any vehicle using this Denso DCU Screen; and acquired a replacement MicroSD Boot Drive for it– which can be done either by purchasing a repair kit, or following my DIY guide here.
Required parts & Tools
Before jumping in, I’ll give a list of parts needed and useful tools for getting at the DCU.
Parts needed for repair:
or
Tools needed:
Time Needed:
- Estimated 30-60 Minutes
Done with the preamble, let’s begin with the guide!
Remove DCU from Vehicle
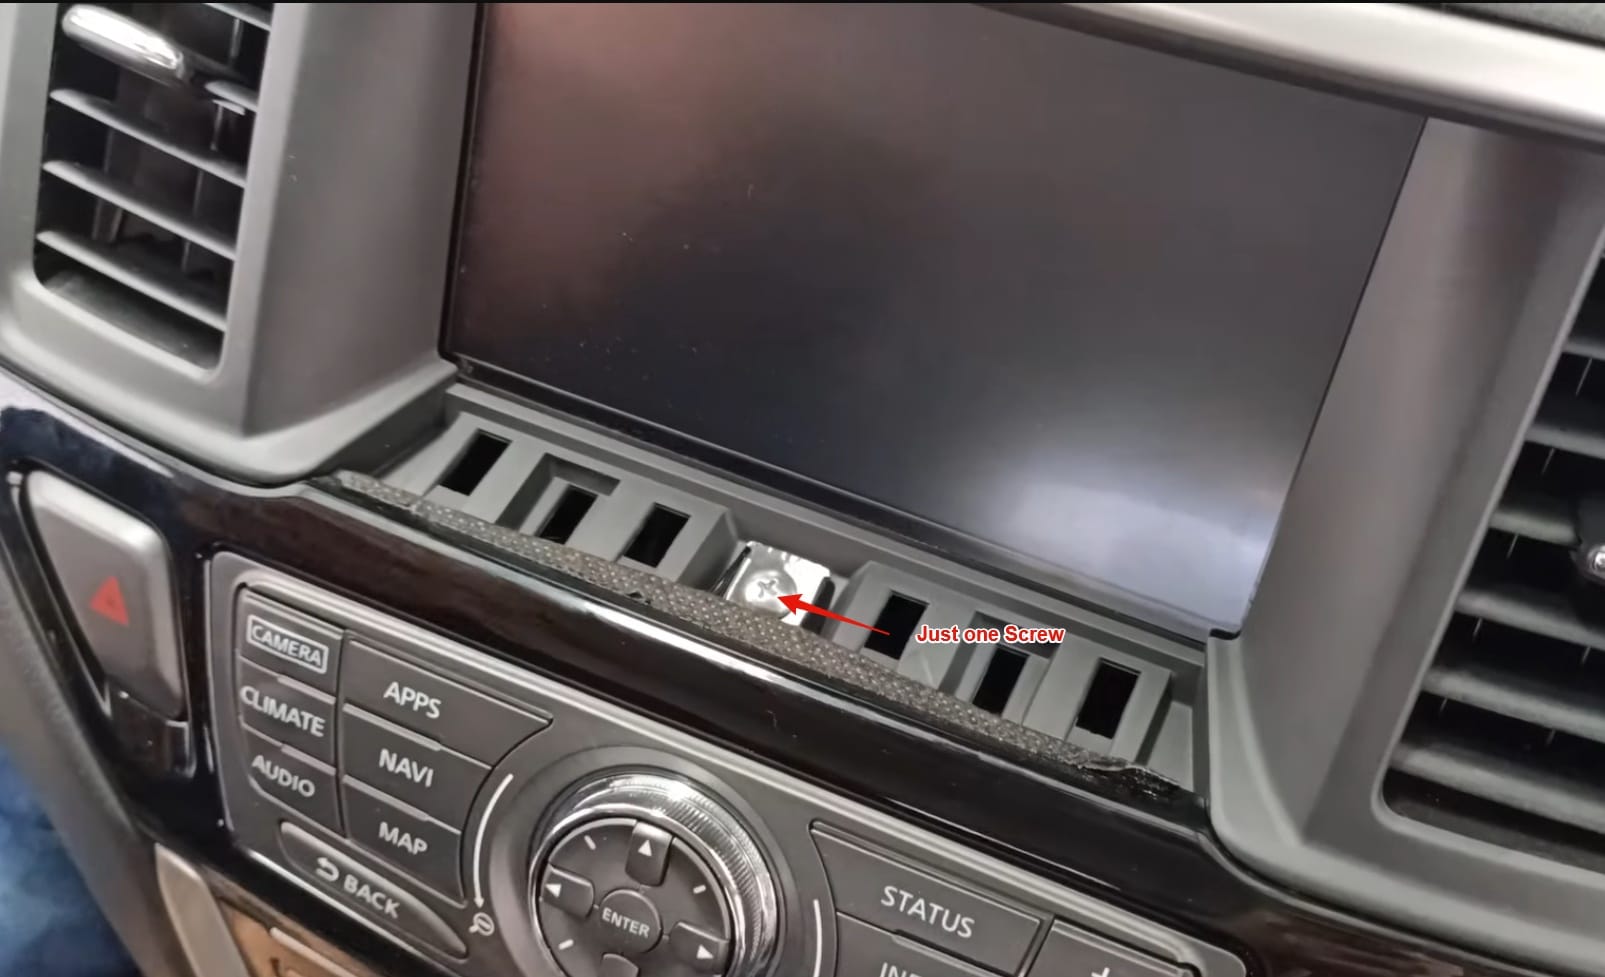
- Step 1: Remove the Vanity cover directly under the screen.
- Step 2: Remove the screw under the vanity cover, set aside.
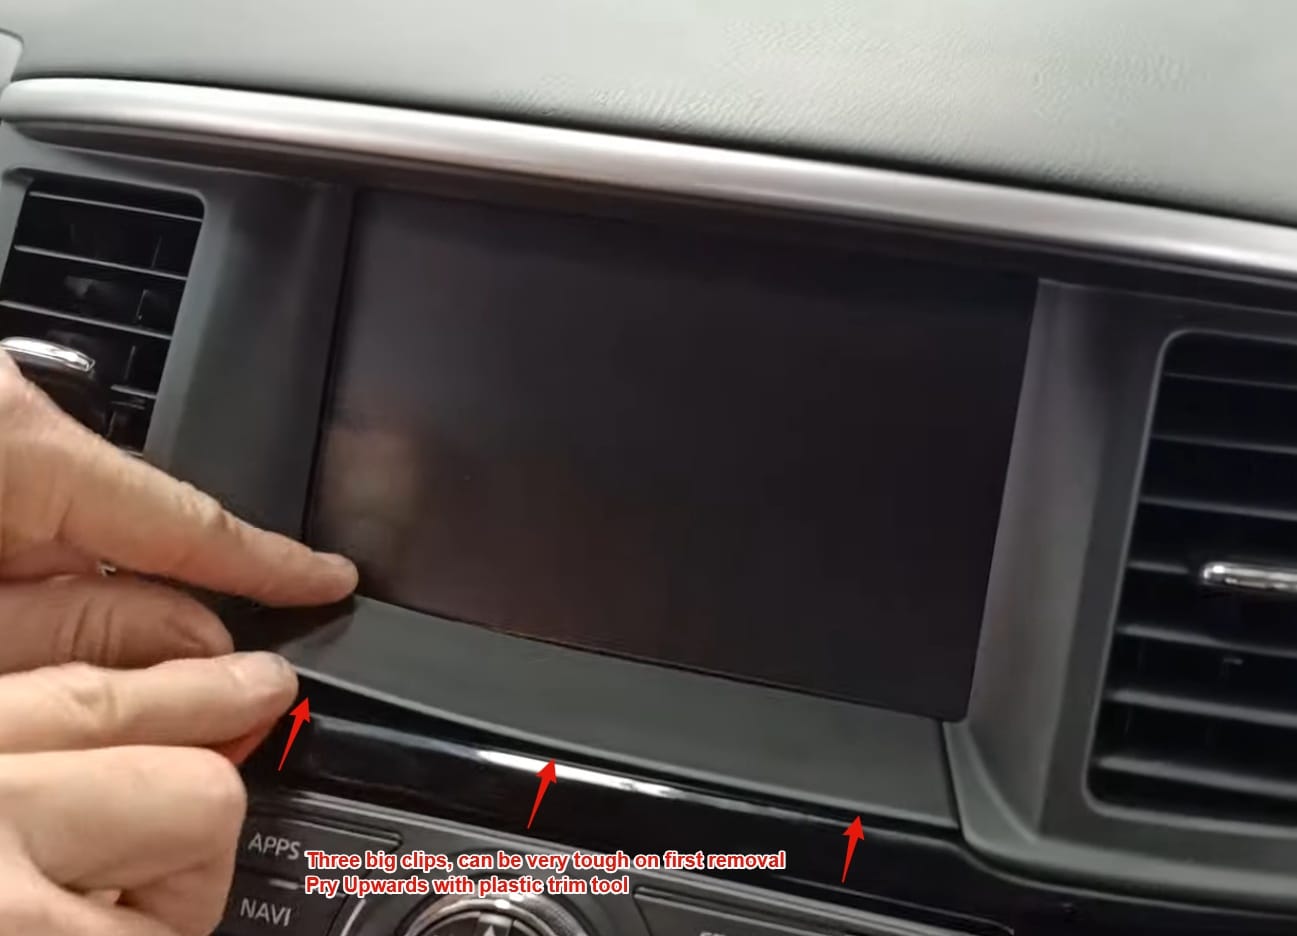
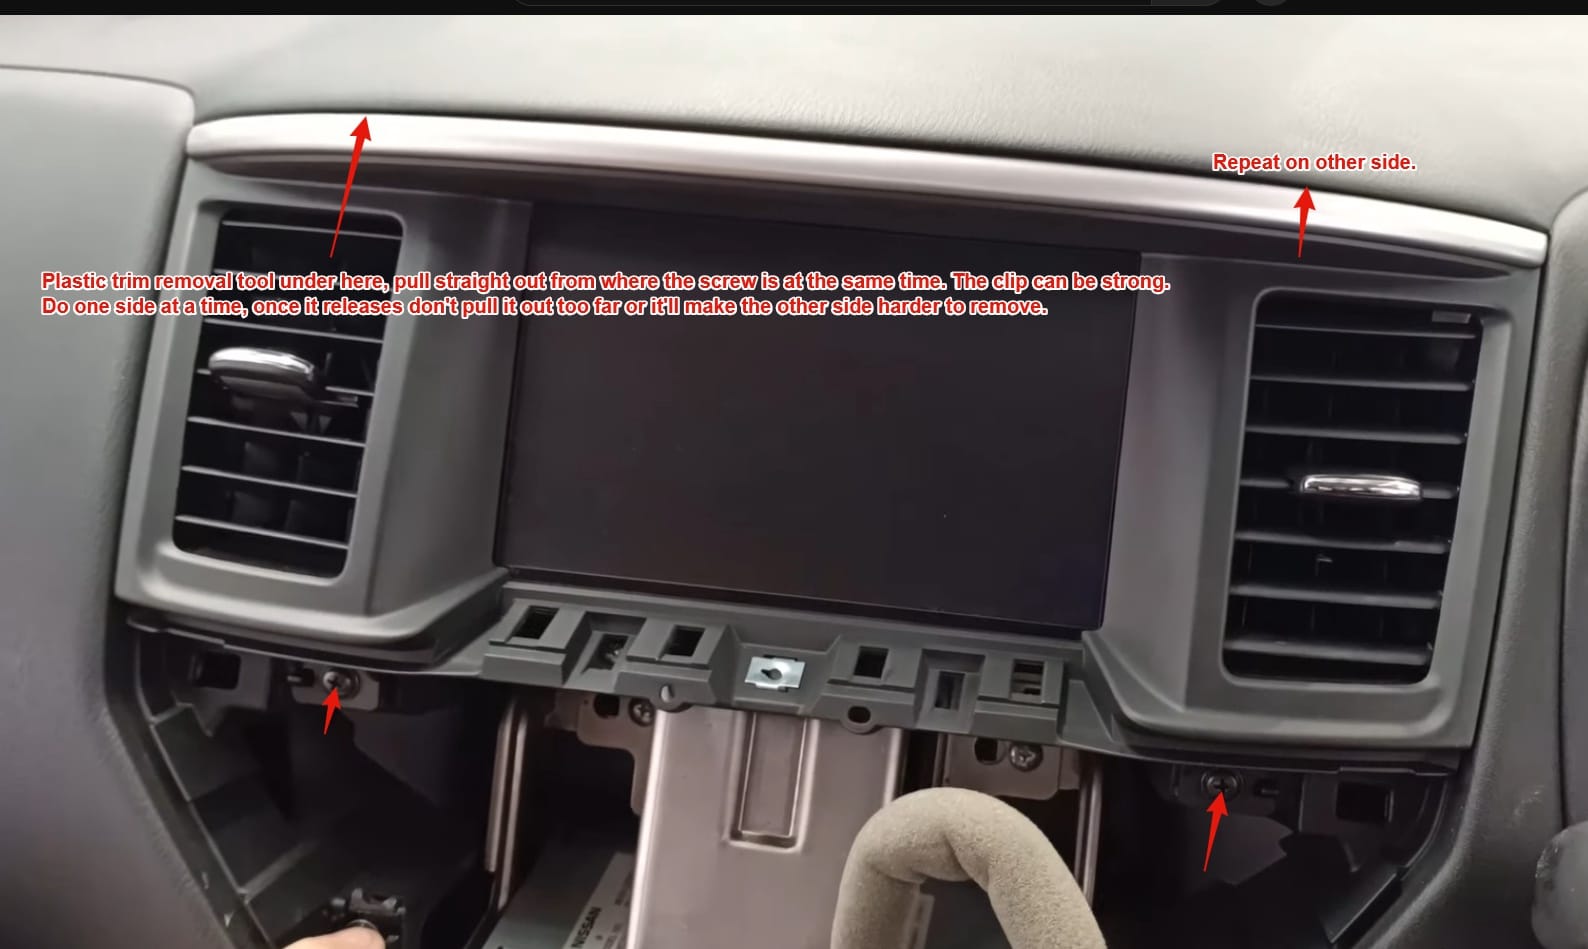
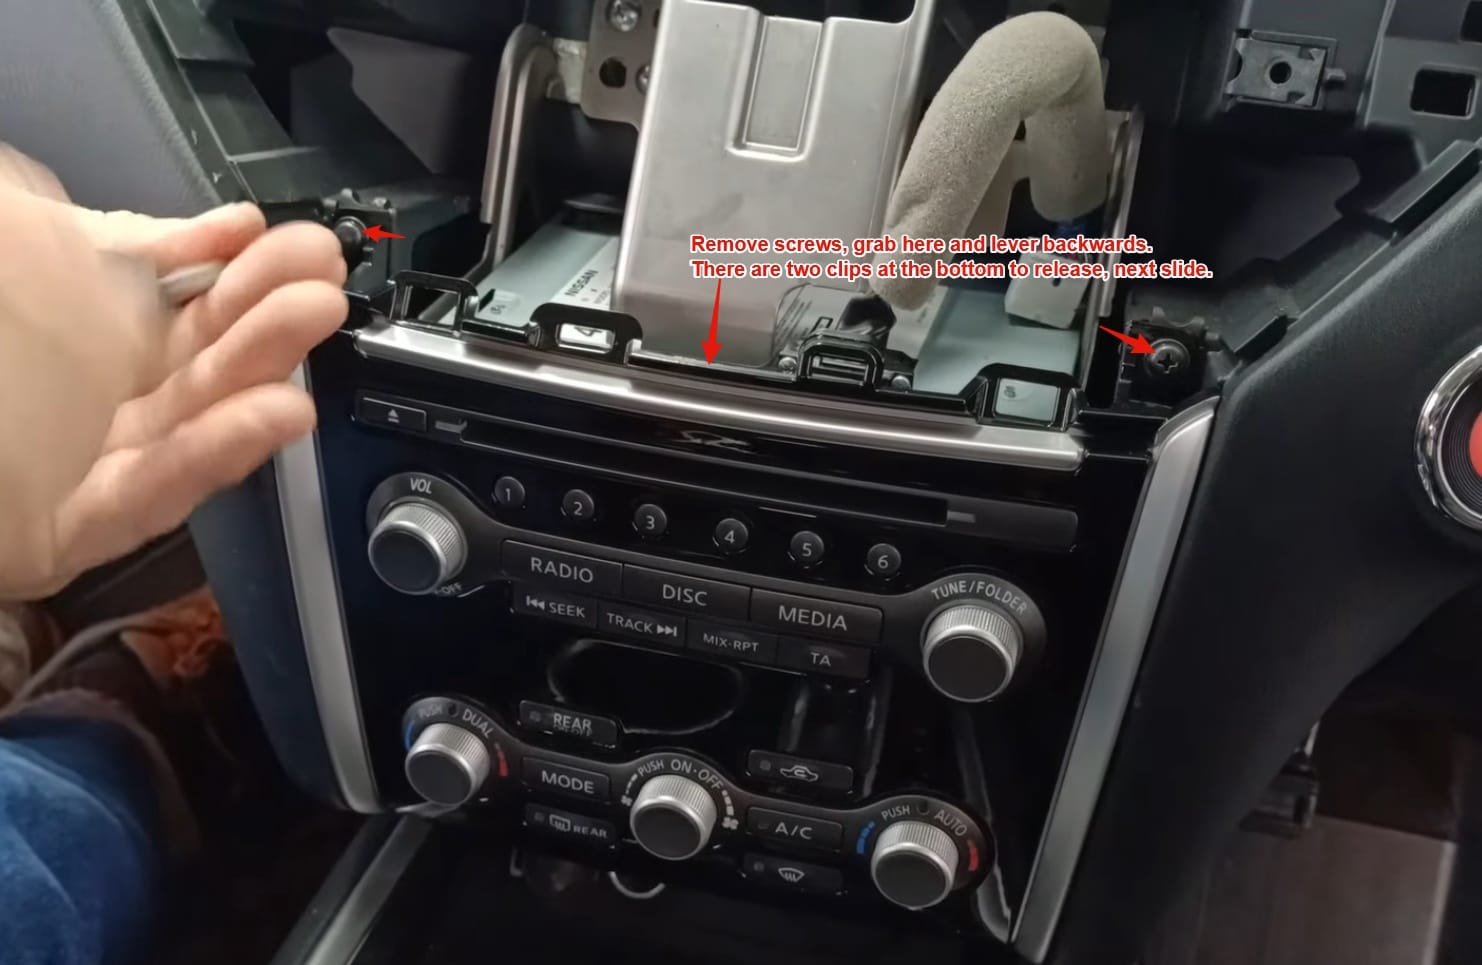
- Step 3: Remove the infotainment control panel trim.

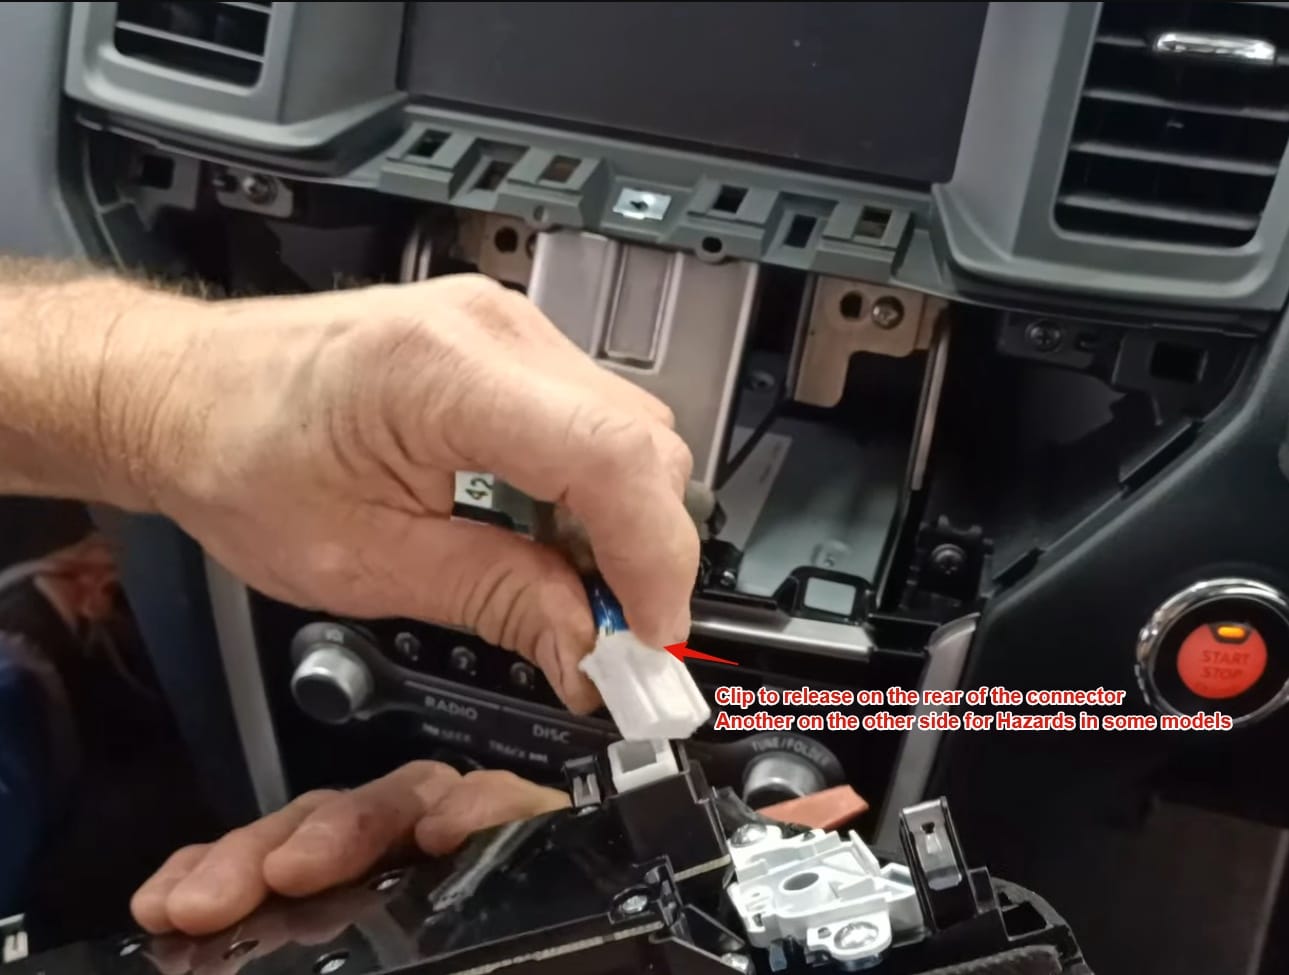
- Step 4: Remove the clips on the back of the control panel, there may be two depending on your region (one for the hazard and one for the airbag light).
- Step 5: Remove the climate vents and trim. The vents come out with the trim. The top clips can be very strong, be careful not to scratch the screen while doing this.
💡 Advice: You can put some painters tape on the screen during this part to avoid scratching it!
- Step 6: Remove the climate control panel (part 1).
- Step 7: Remove the climate control panel (part 2). You can skip this part if the clips give you trouble, it’s just nice to have it out of the way.
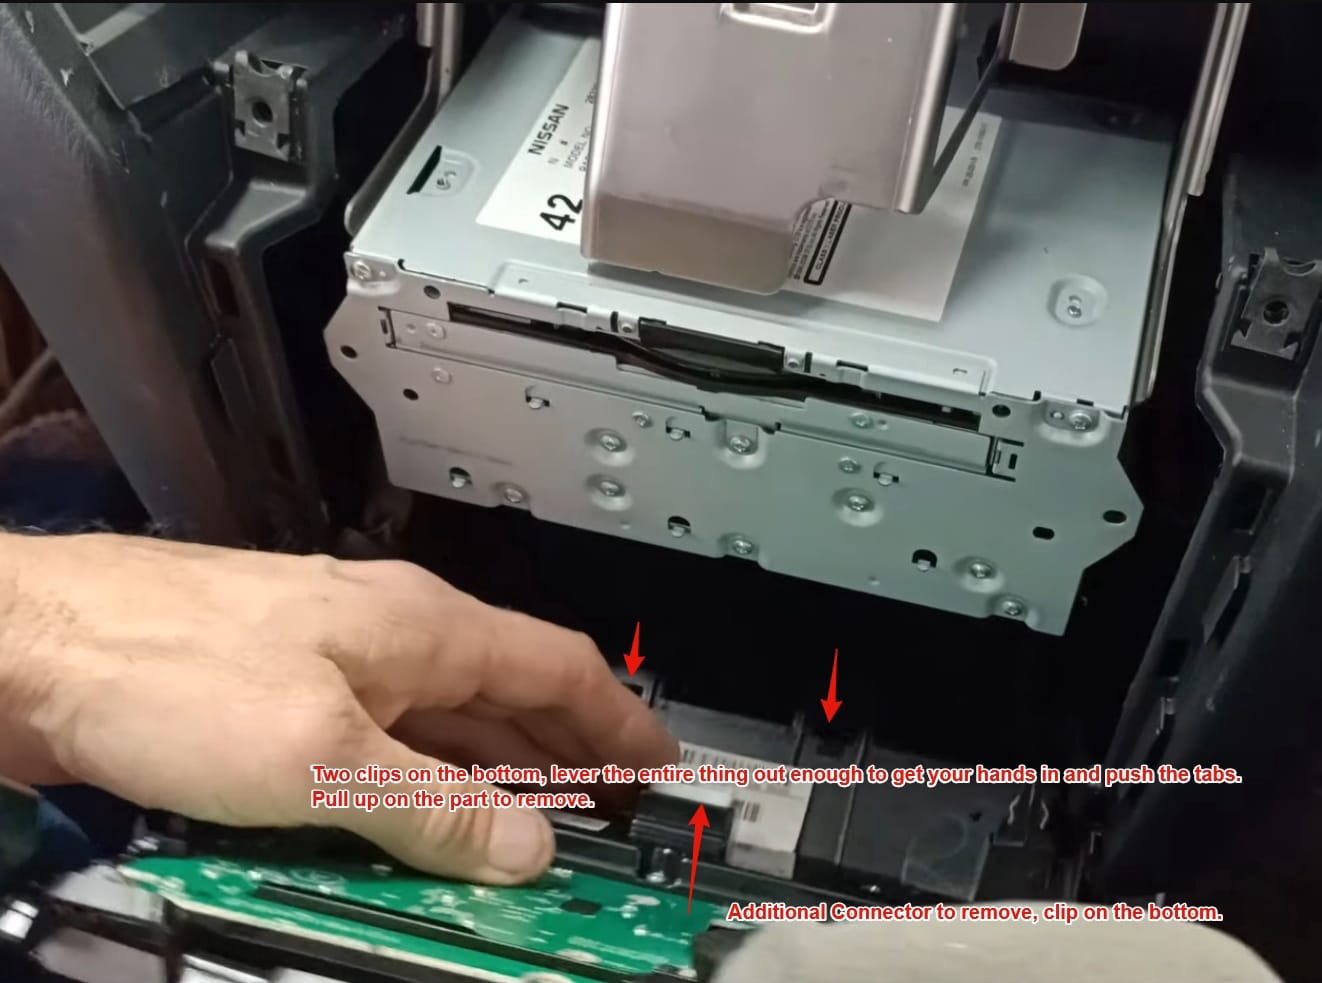
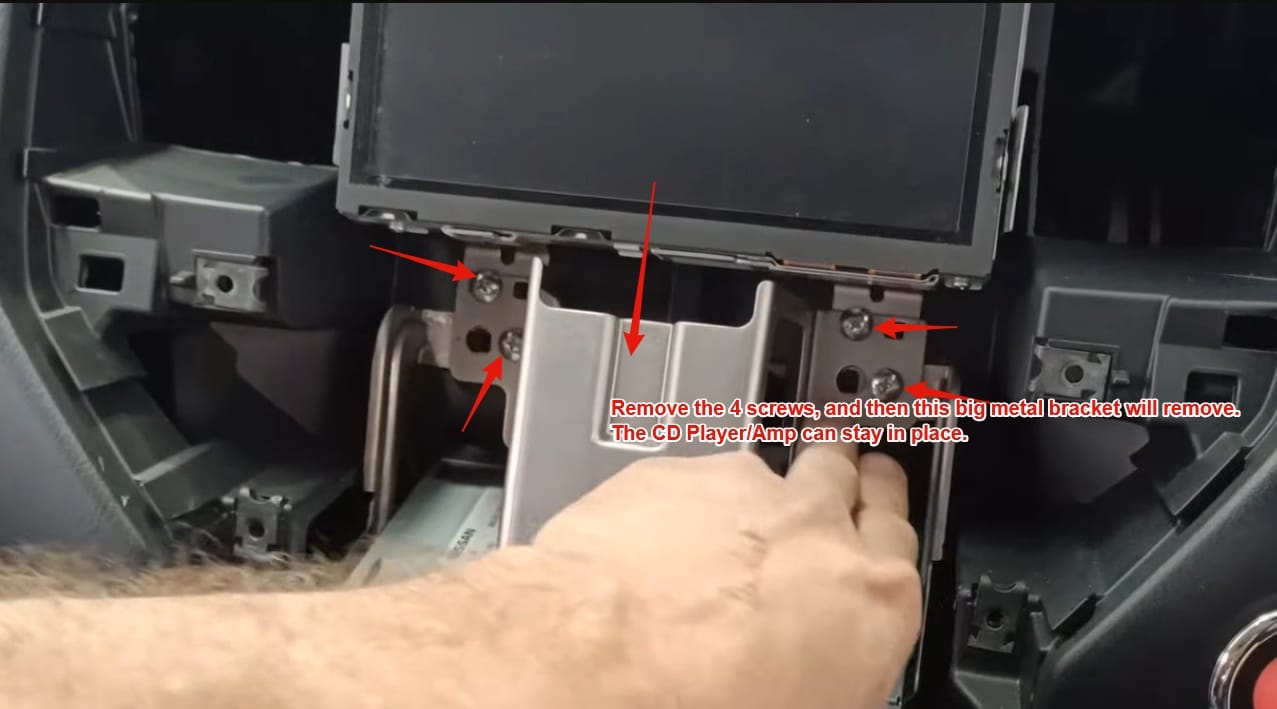
- Step 8: Remove the support brace for the infotainment control trim, it’s in the way of removing the DCU.
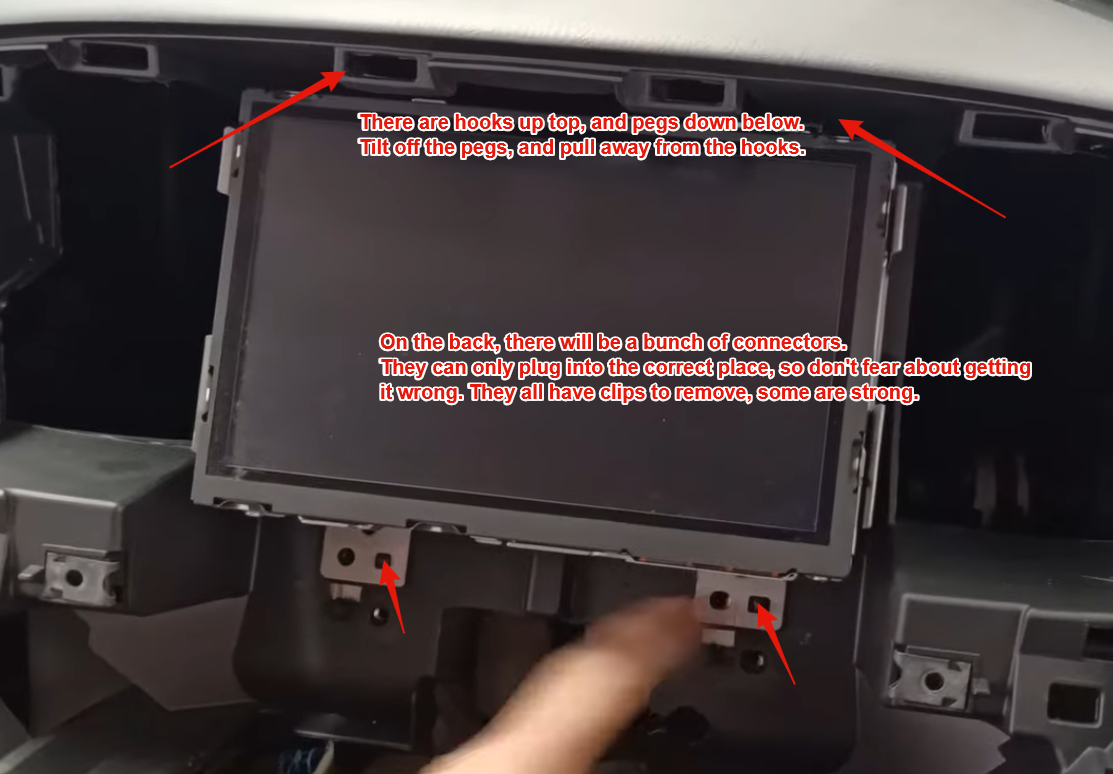
- Step 9: Remove the DCU, and unplug any cables on the back. There is plenty of slack on these cables to get your hands behind there and remove them.
💡 Advice: Before disconnecting the cables, take a picture of them! All of the connectors are keyed such that you can’t plug them in wrong, but it’s always good to have a photo to ensure you’ve done it correctly.
What’s next?
Now that the DCU Screen has been removed from the vehicle, you can move on to the next stage of repair– replacing the MicroSD Card that’s inside the DCU Screen responsible for it’s failure.
For those that have purchased a Repair Kit for the pathfinder, you can find the guide for that here.
If you have not yet purchased a Repair Kit, but would like to do so now; you can do so here.
If you have access to a Linux machine and would like to perform the repair yourself, you can do so here.
And if you have a different vehicle, check out the list of guides to see if I have one for yours specifically, you can find that here.
Finally, as is tradition, enjoy a photo of my pathfinder 🙂

I have a 2018 pathfinder that the lose BT, radio cuts out, screen reboots. Will this fix my issue. Do I need another DCU before I start ?
Thanks
Hi Jody,
That does sound like the SD Card failure, you can double check the list of known symptoms over at the diagnosis guide, if any or all of them sound familiar you can be sure that you fall under this issue category!
Thanks,
I had this exact issue (2018 Pathfinder), ordered your repair kit, and made the repair last night. Everything works great and the instructions were excellent. Getting the piece of trim with the vents on it (that surrounds the monitor) was the hardest part of the repair (those clips were really hard to get to release), but everything was straight forward. Thanks for the help!
Glad to hear it, thanks for the comment!
-Quinn
Is the repair kit available for a 2018 Nissan Titan with the same issue?
Hey, I don’t currently have the Nissan Titan repair kits, can you reach out to me via the Contact Request form so we try to get yours fixed?
2017 Pathfinder no screen, back up worked. Order the kit done with an hour absolutely works. Thanks so much, just saved me a ton of money!!!!!
Thank you for the instructions, they are very clear. I tried to program my SD card according to your instructions, but unfortunately it didn’t work… Nissan Pathfinder 2017. Thank you very much.
Hello!
Sometimes if the sd card is too far damaged (too many of the partitions are affected by the corruption), the fix above described is unable to restore it.
In this case, you can download a known working image from the repository on gumroad, the links for these are in the discord server linked at the top of the website. You can pick the image appropriate to the vehicle you’re working on. If you’re still having issues, I can lend a hand over in the discord server!
Thanks for the tutorial! The screen was black and only working when in reverse (camera without guide lines).
I just created an image of my 2017 Nissan Pathfinder after changing line 4, and now the screen is back with everything back to normal again, except the camera image only comes on for a second when I put it in reverse and after that it just shows the hide lines.
Do you think I should download a new image from the server and try that instead of my own?
Hello,
I would double check the connector for the reverse camera on the rear of the DCU to ensure it’s fully plugged in, as it sounds like it might not be seen by the DCU!
Thanks,