These instructions are intended to be provided alongside a working, pre-configured MicroSD Card for any of the vehicles included on this compatibility list. If you have not yet purchased a repair kit for your vehicle, you can do so here:
These instructions are specifically for installing the SD Card from your repair kit into the DCU (Screen), assuming you’ve already removed it from your vehicle. For specific instructions on removing the DCU from your vehicle, check the guides page to find the guide for your vehicle, and then return here.
Before jumping in, I’ll give a list of parts needed and useful tools for getting at the DCU.
Parts needed:
Tools needed:
Time Needed:
- DCU Repair: 10-15 Minutes
- Removal/Installation from vehicle: Estimated 30-60 Minutes
The guide begins here:
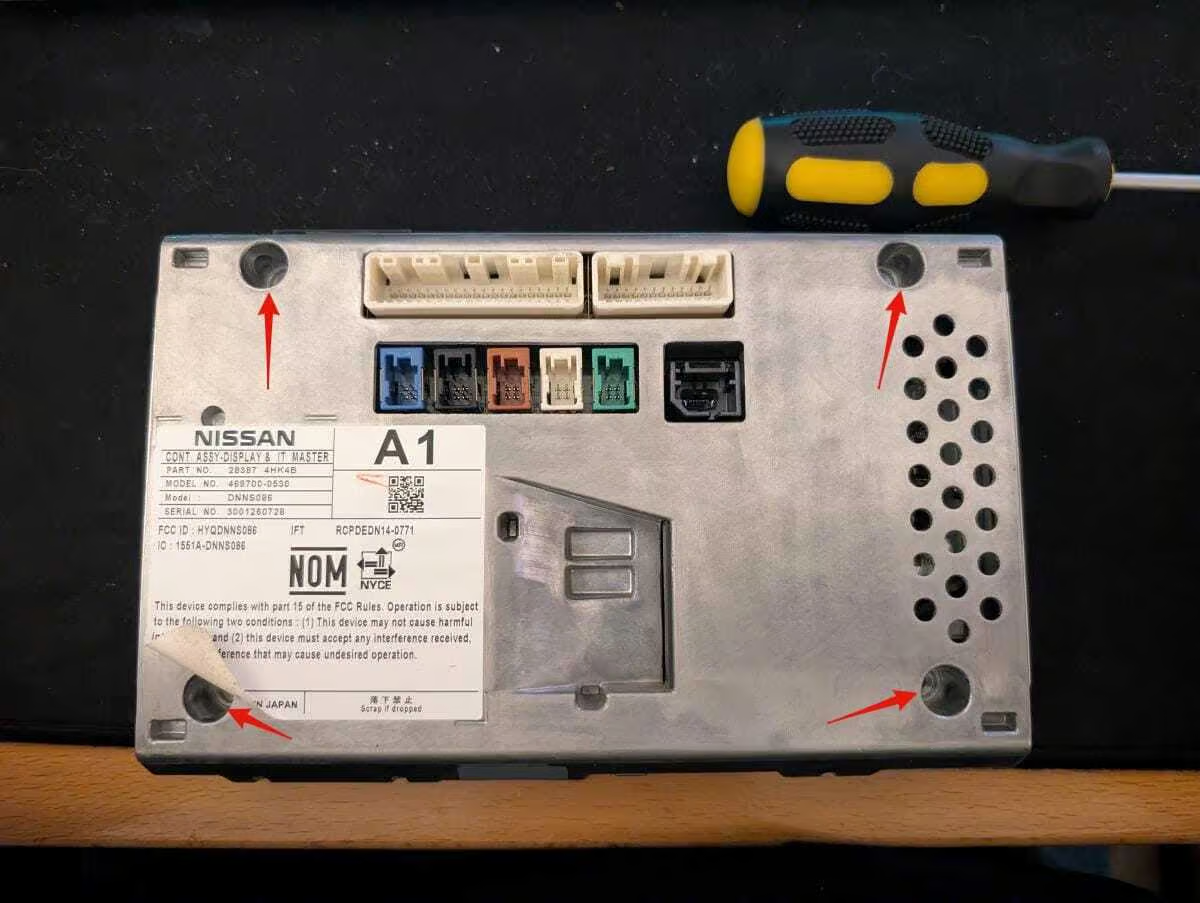
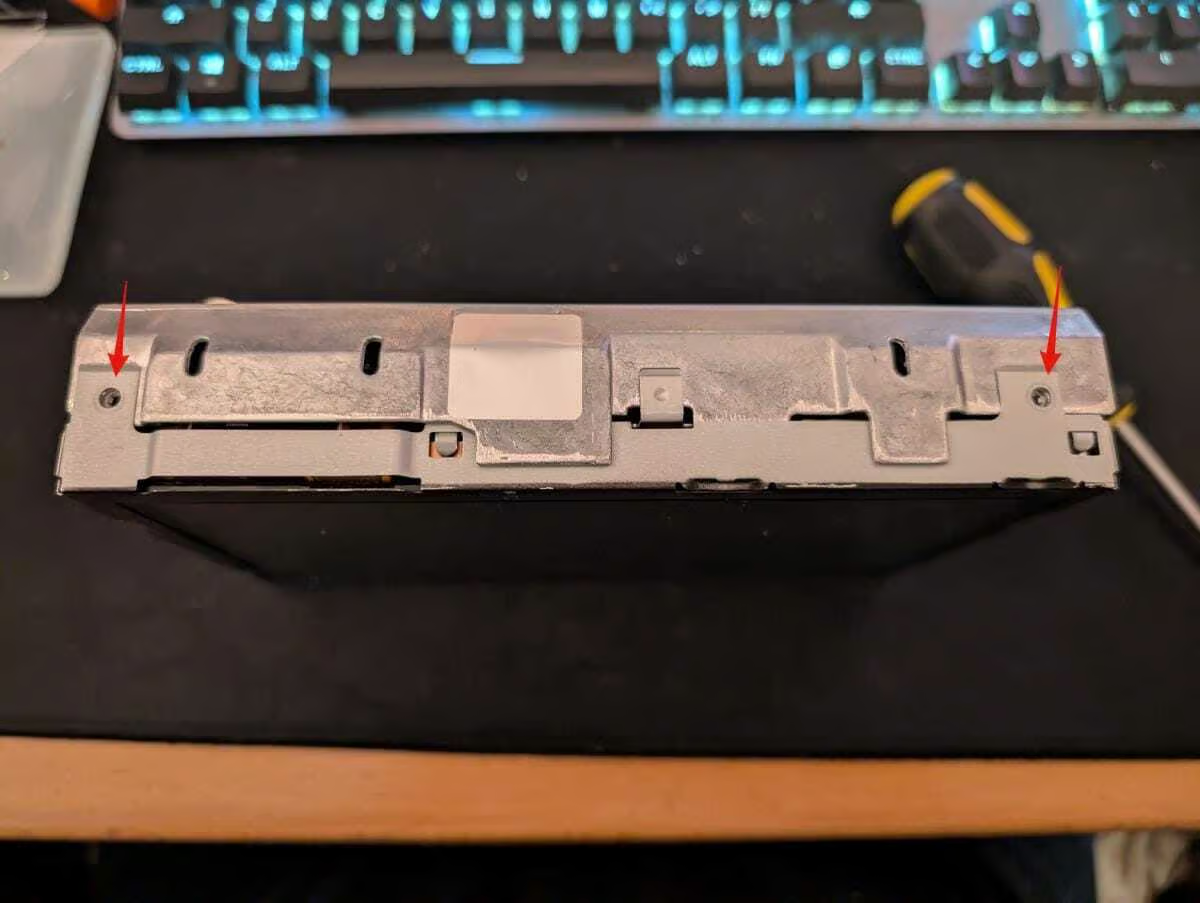
- Step 1: Remove the first set of screws from the DCU
- Step 1a: Remove the first four screws on the back of the unit, one of them is under the Denso logo on the label.
-
- Step 1b: Remove the screws, and metal bracket from the first side.
-
-
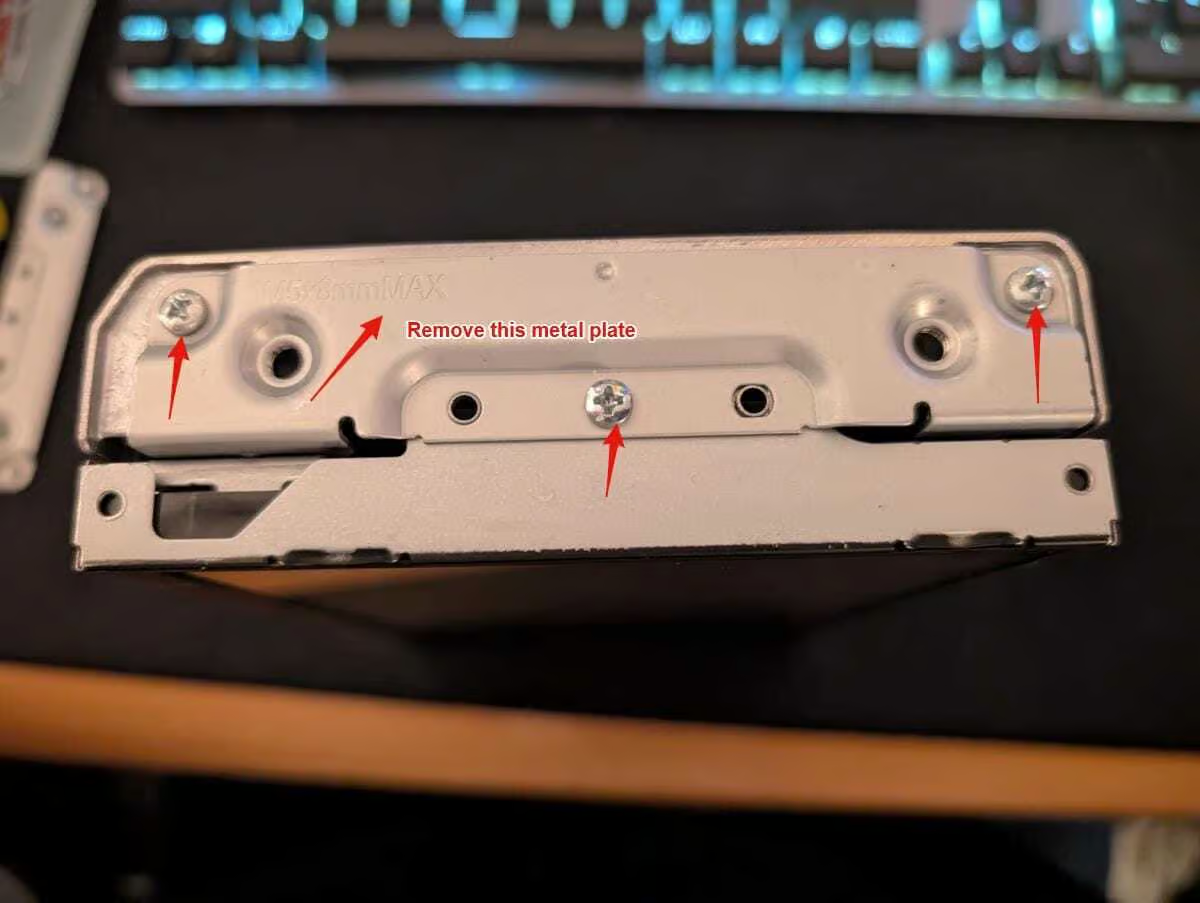
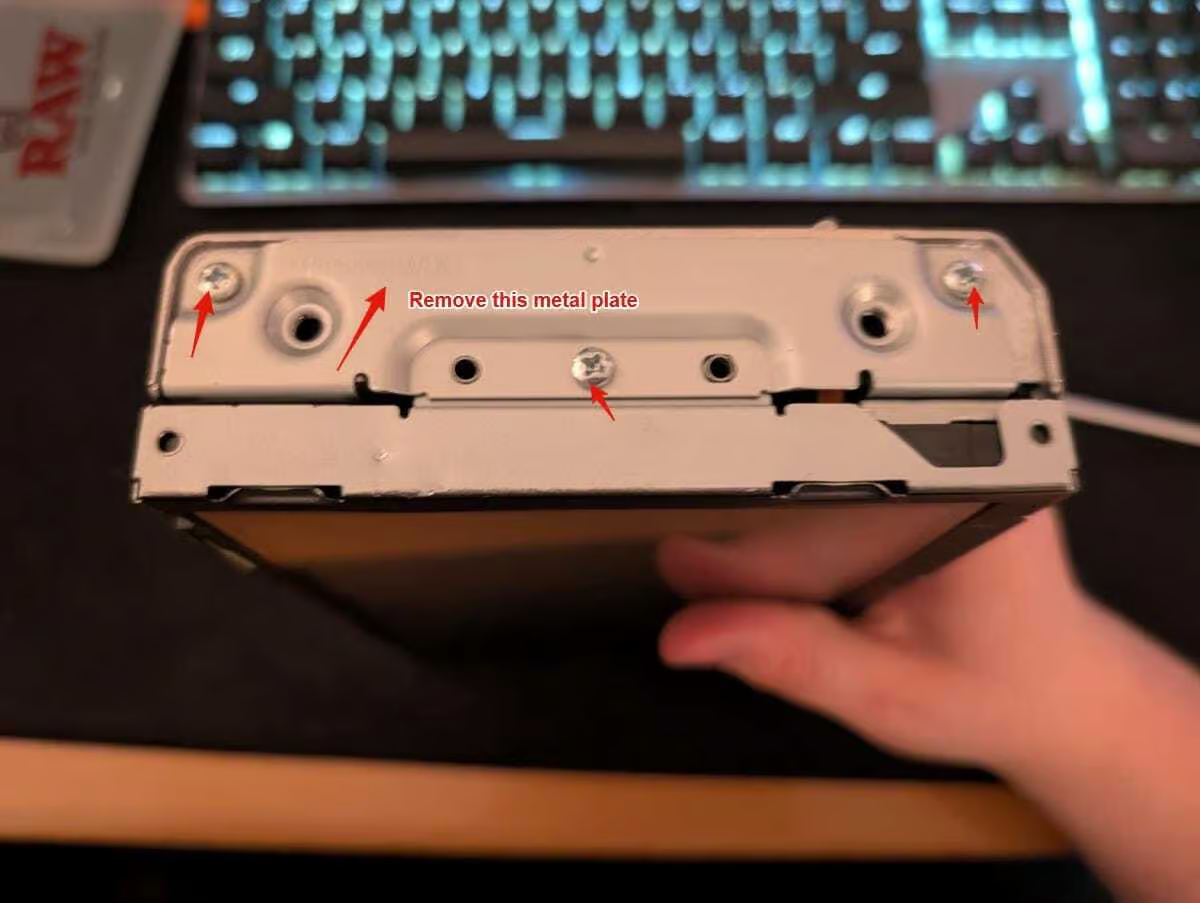
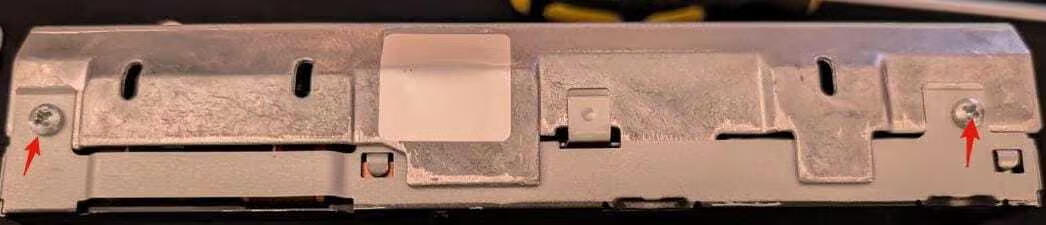
- Step 1c: Remove the screws, and metal bracket from the second side.
-
-
-
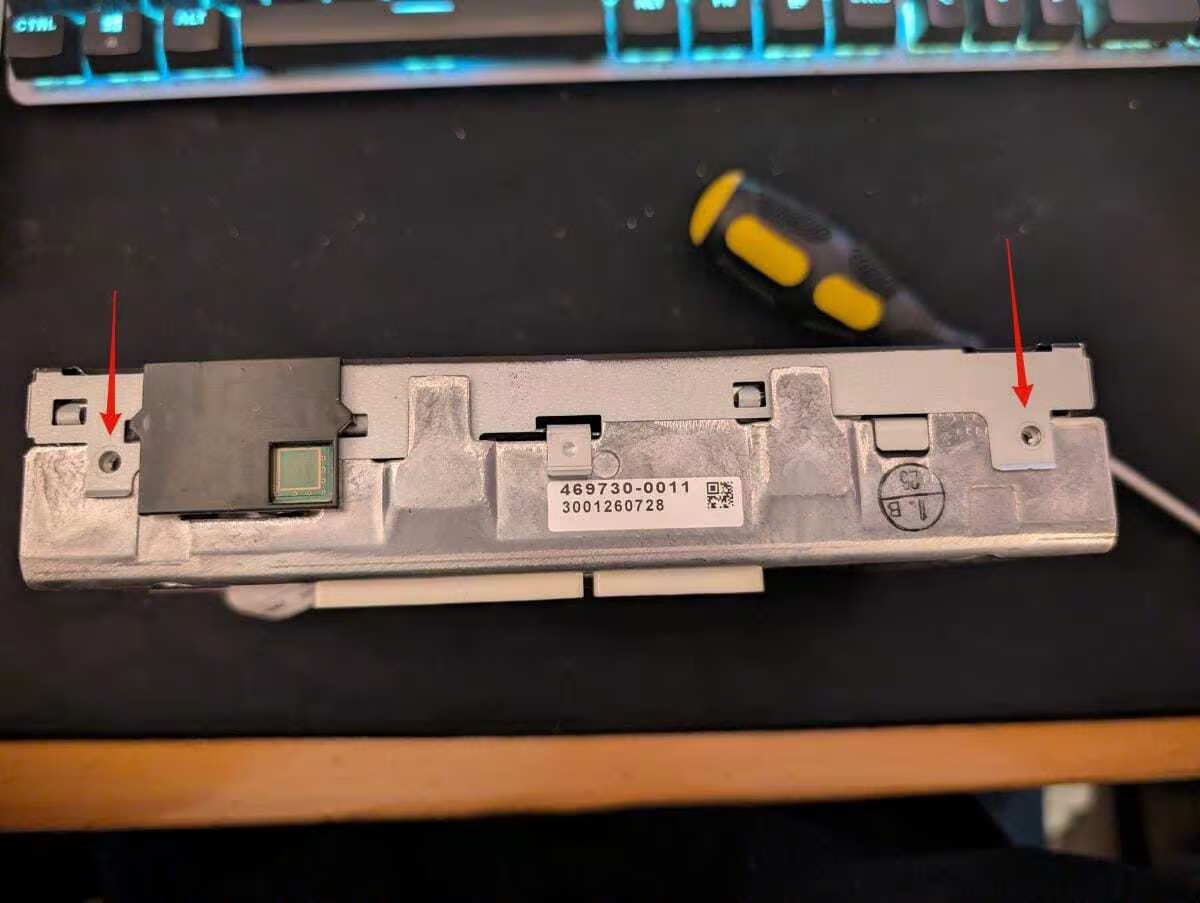
- Step 1d: Remove the two screws from the top.
-
-
-
- Step 1e: Remove the two screws from the bottom.
-
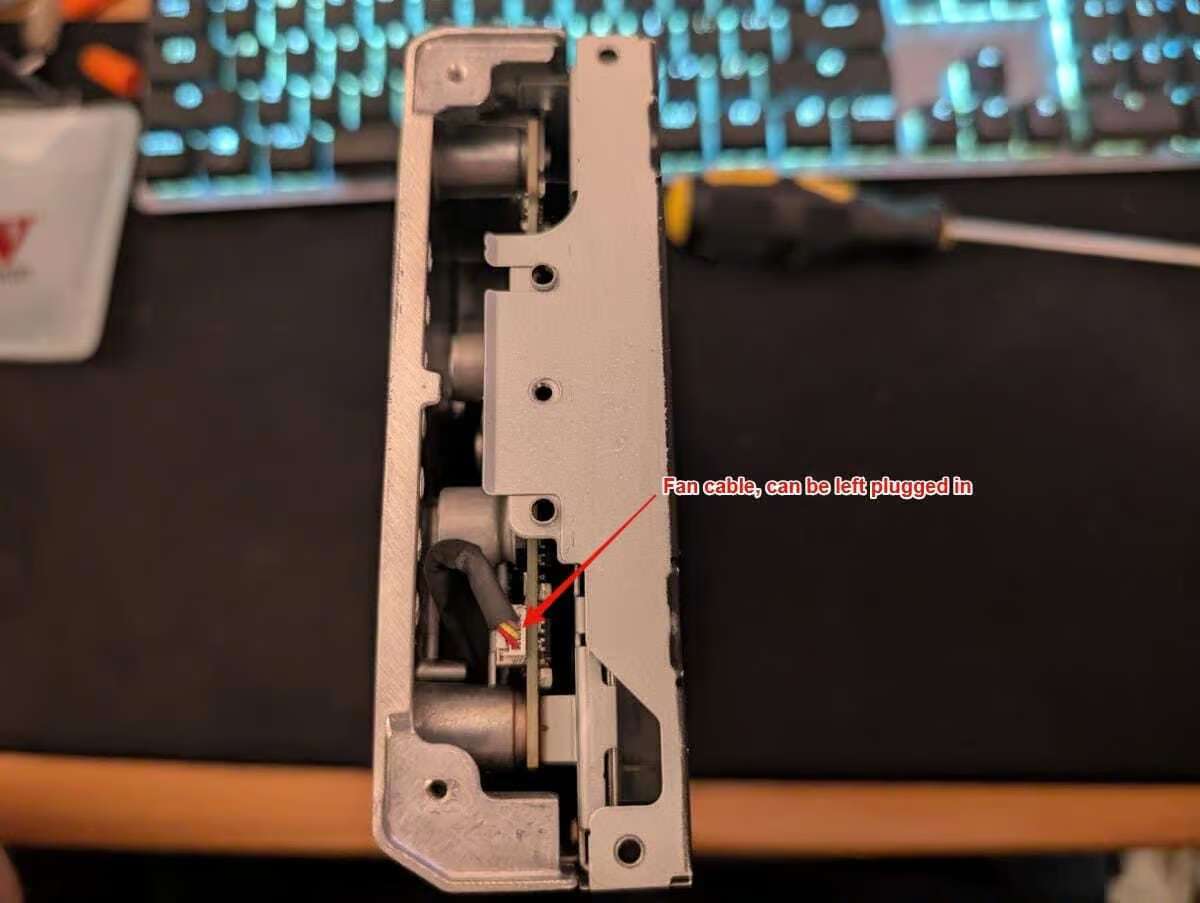
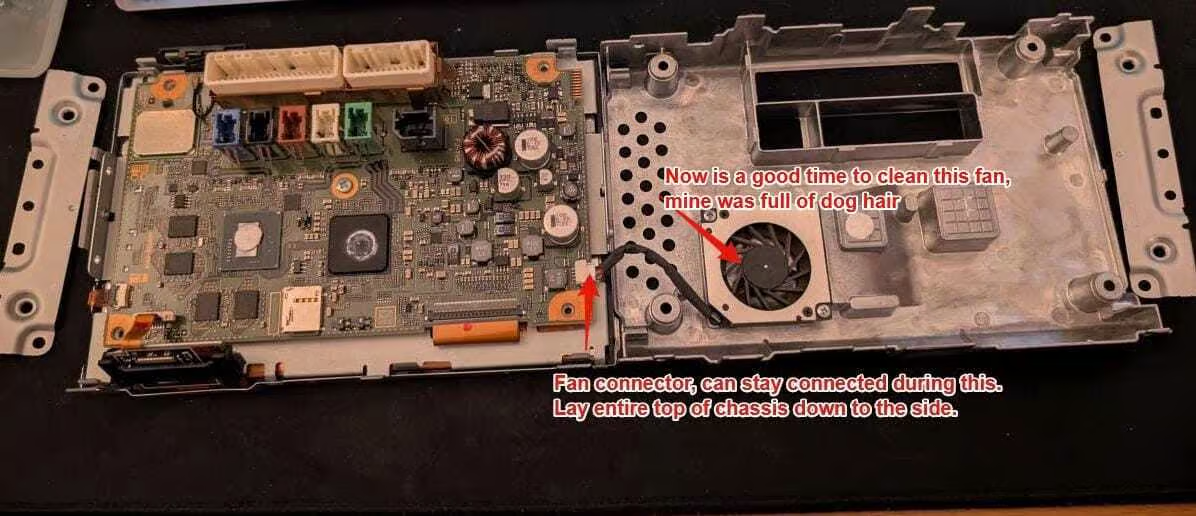
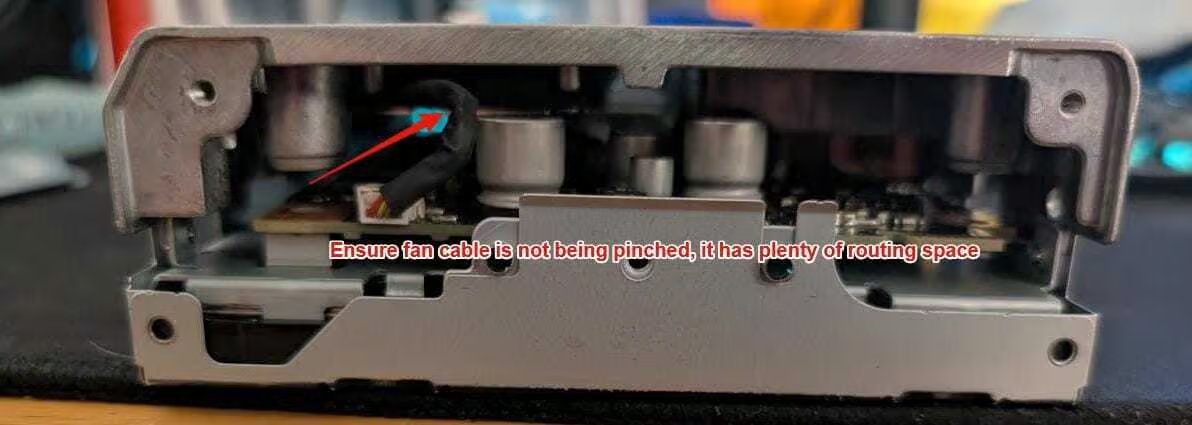
💡Info: This fan cable can be left plugged in, or you can unplug it if you’re concerned about breaking it. There’s plenty of extra cable as you’ll see later.
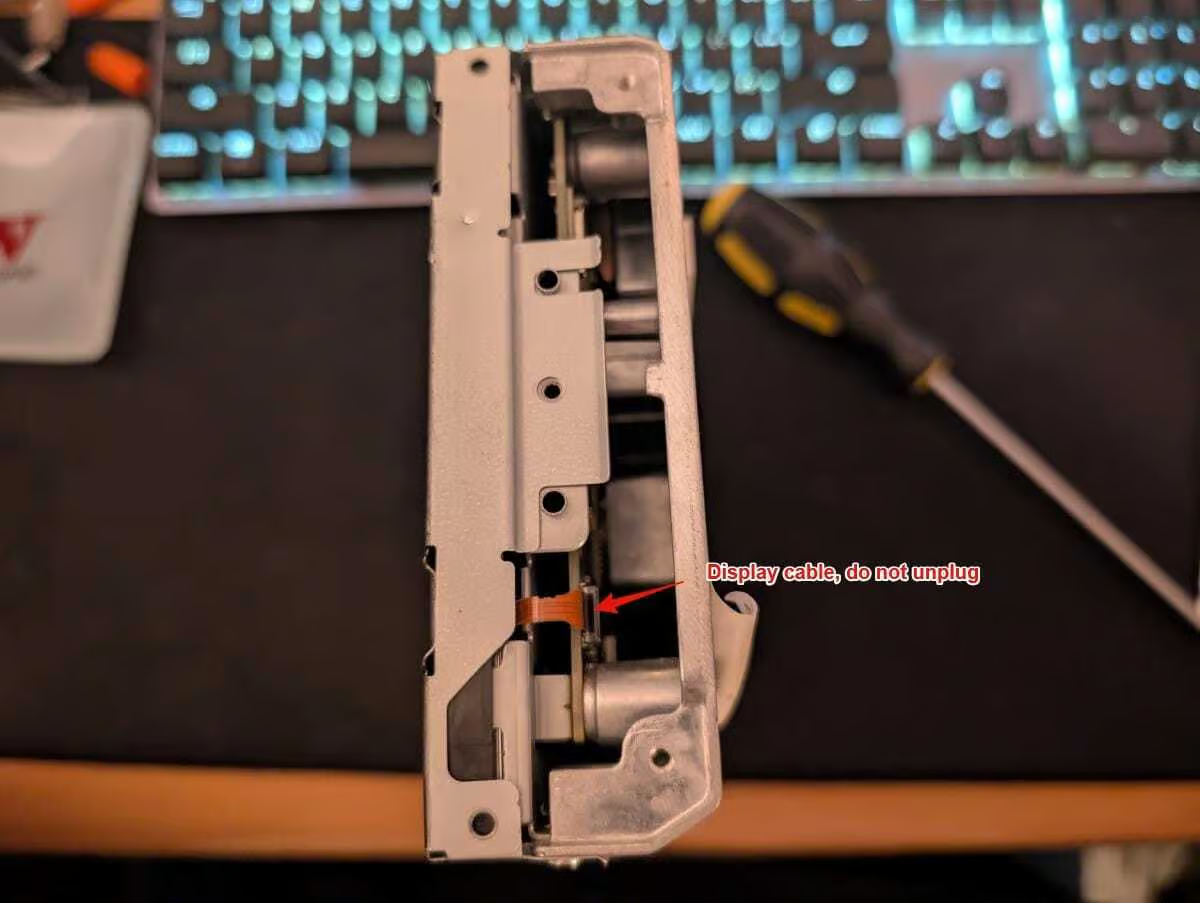
💡Info: This display cable should be left plugged in, as it never moves with the top case.
- Step 2: Split the DCU apart and replace the SD Card
-
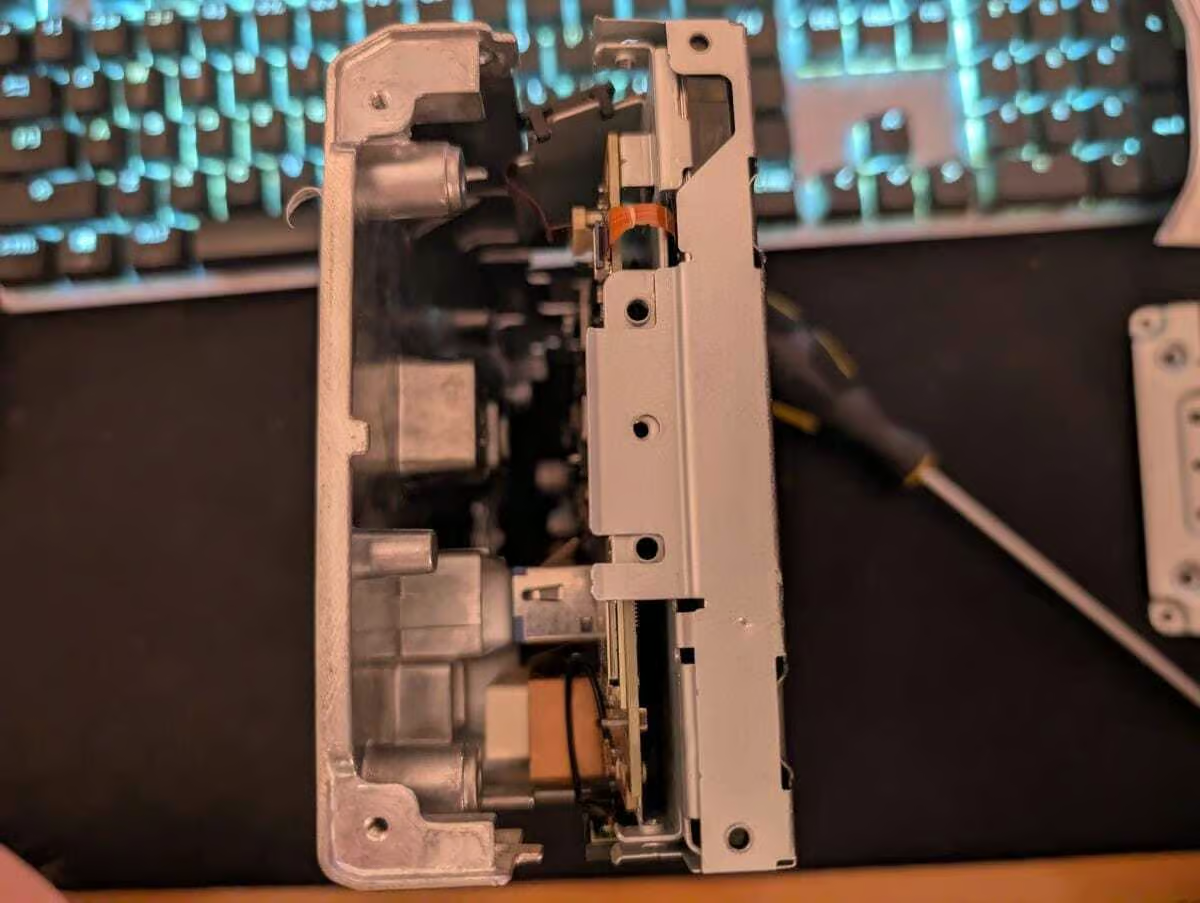
- Step 2a: Stand the unit up on it’s end, and gently but firmly split the unit. Pull only straight out, and once it splits, stop pulling. You’re got extra cable slack on the fan but there’s no need to go any further than this. (You can lever one side slightly if you need to, but do not use tools)
-
-
-
- Step 2b: A view from the side, you can see the dimples holding the halves together, they’re not large.
-
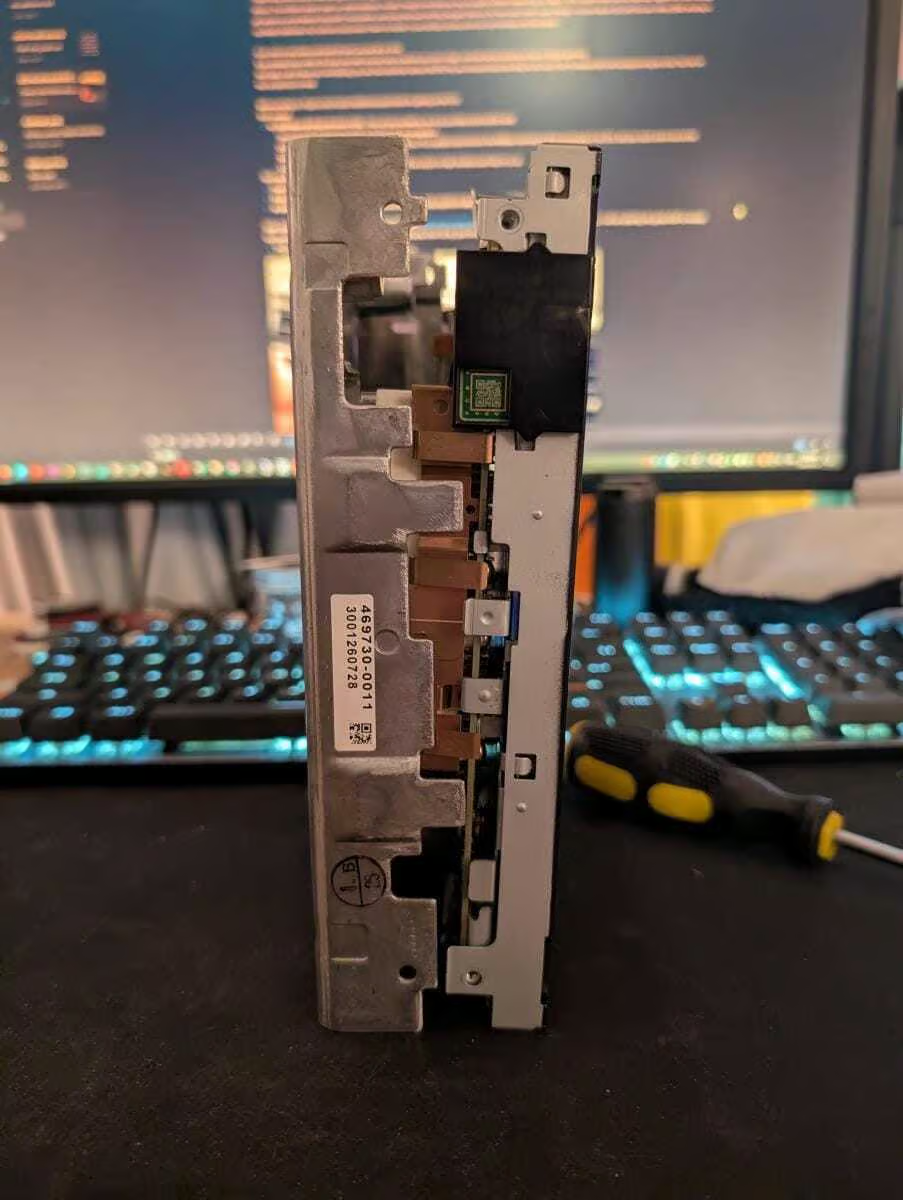
-
-
- Step 2c: Lay the display down on something soft like a cloth or mouse pad, and the metal shell with the fan can be laid down to the side. If you’ve left the connector for the fan on, it should look like this.
-
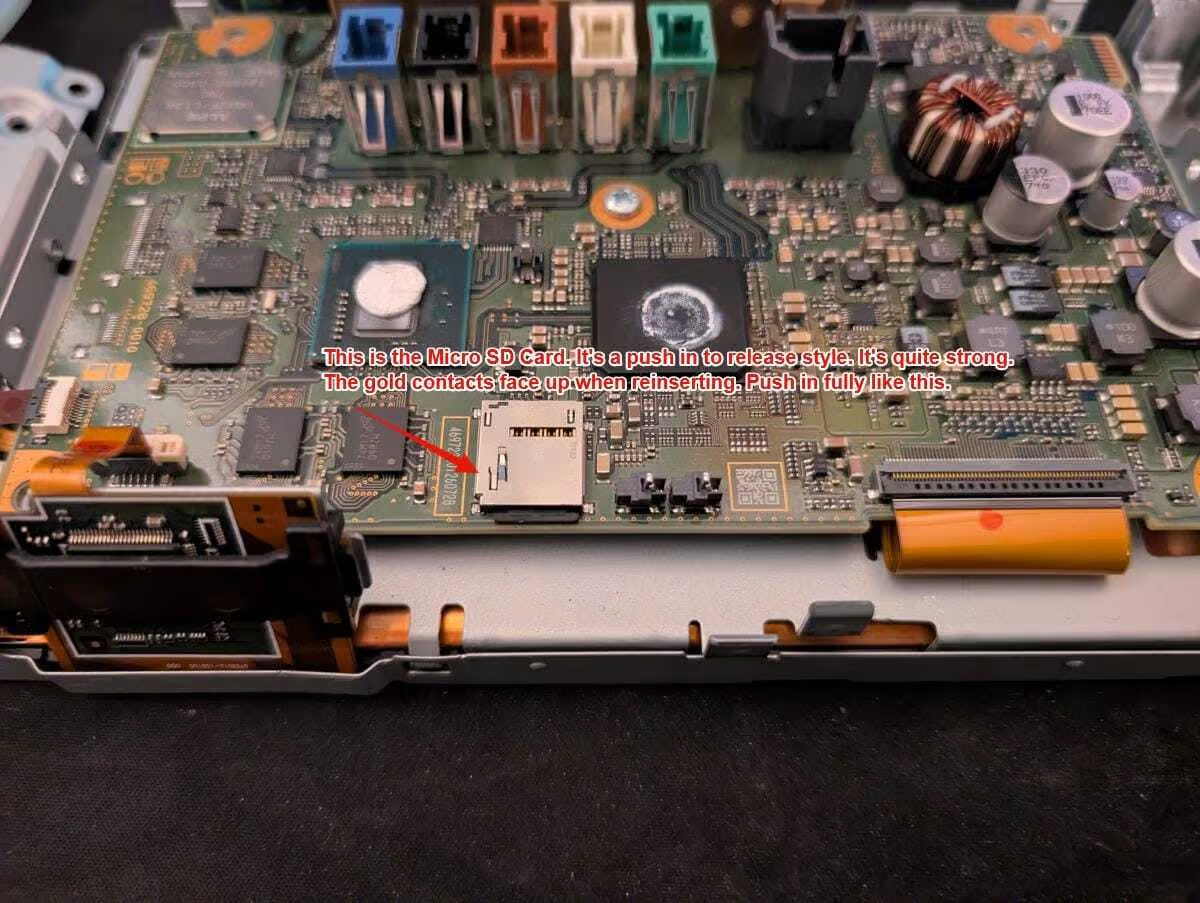
- Step 3: Replace the MicroSD Card with the one from your Repair Kit.
-
- Step 3a: Here is the MicroSD Card you need to replace. Push the card in with your fingernail until it clicks, and then release. The card will pop out. Replace with the new card, gold contacts facing up.
-
- Step 4: Reassemble the DCU
-
- Step 4a: Close the shell, and line up all the dots, screw holes and tabs around the device.
-
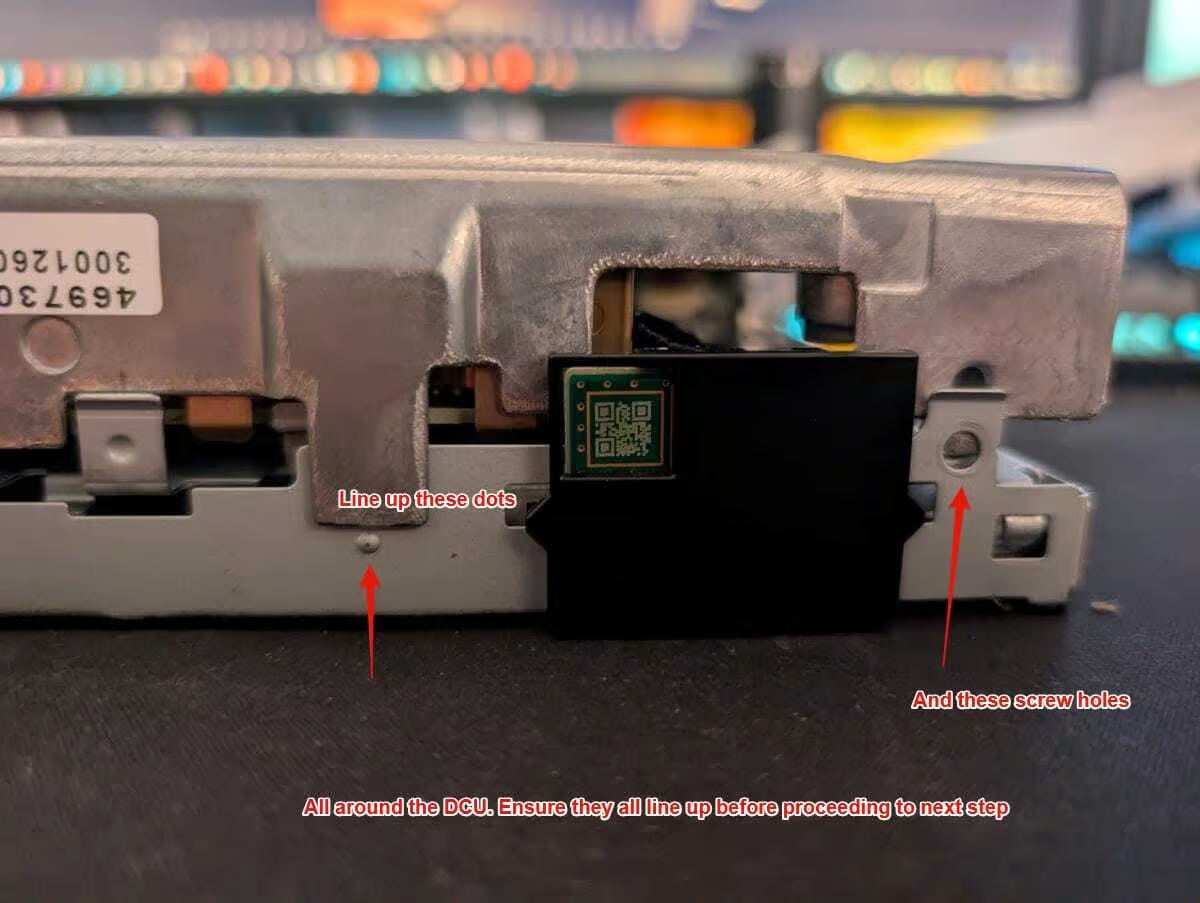
-
-
- Step 4b: Ensure the fan cable is not being pinched.
-
-
-
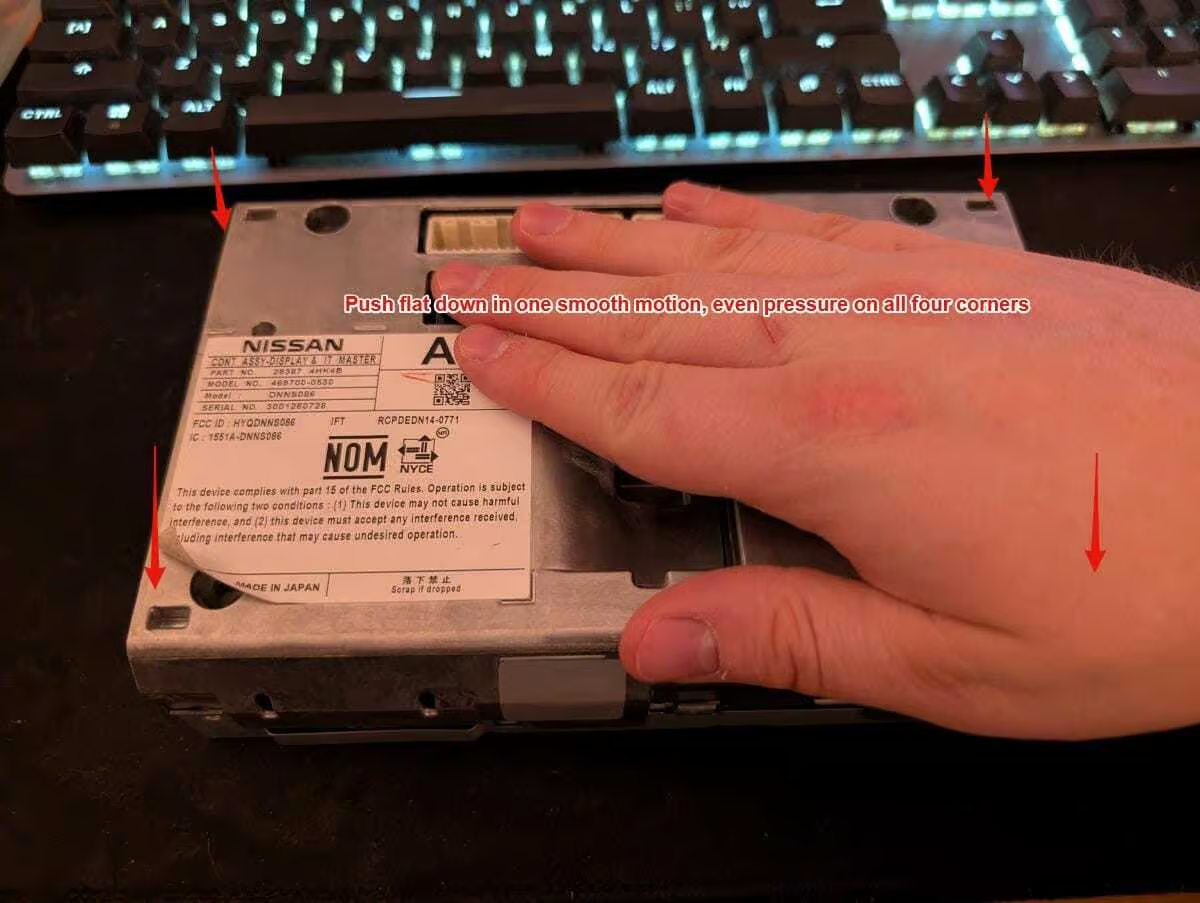
- Step 4c: Apply even pressure on the back of the DCU, in one smooth motion. It requires some force but not enough to break anything. If it feels like you’re breaking something, stop and reassess.
-
-
-
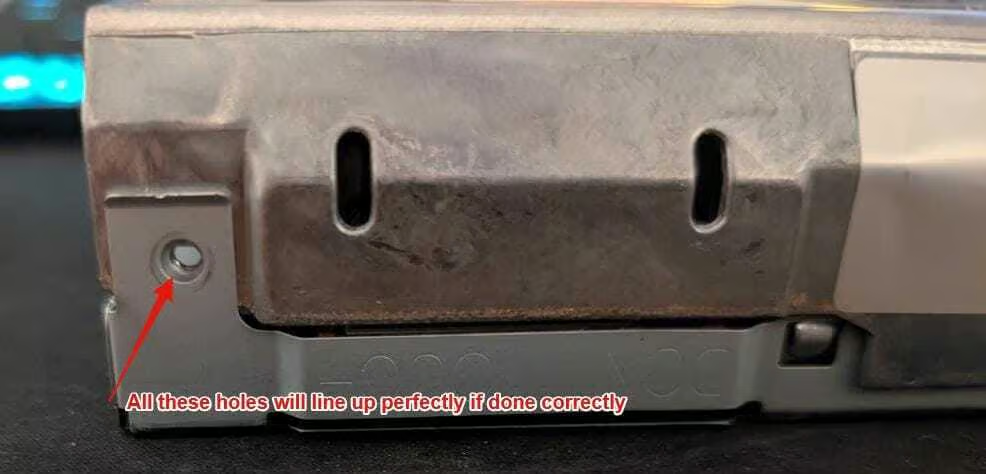
- Step 4d: All these holes should line up perfectly for your screws to go back into.
-
-
-
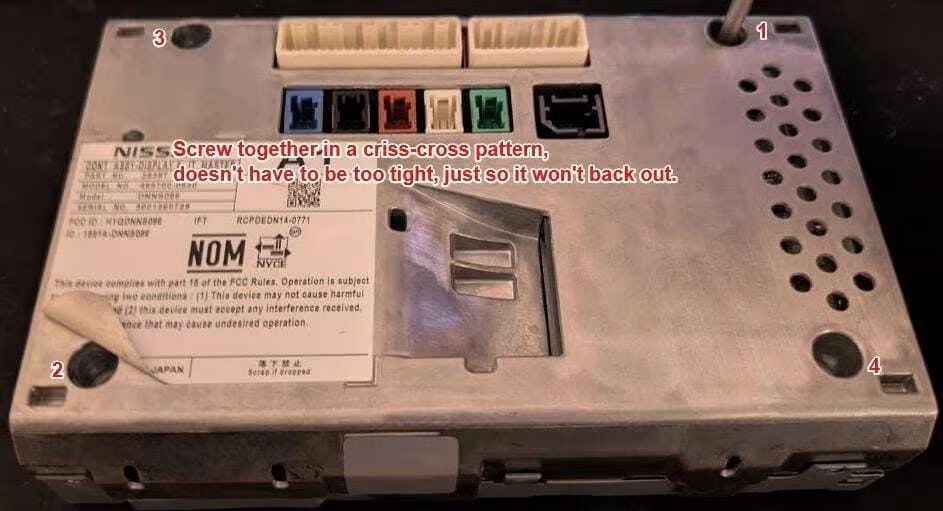
- Step 4e: Screw the back four screws in, in a criss-cross pattern.
-
-
-
- Step 4f: Do the top two screws.
-
-
-
- Step 4g: And the bottom two screws.
-

-
-
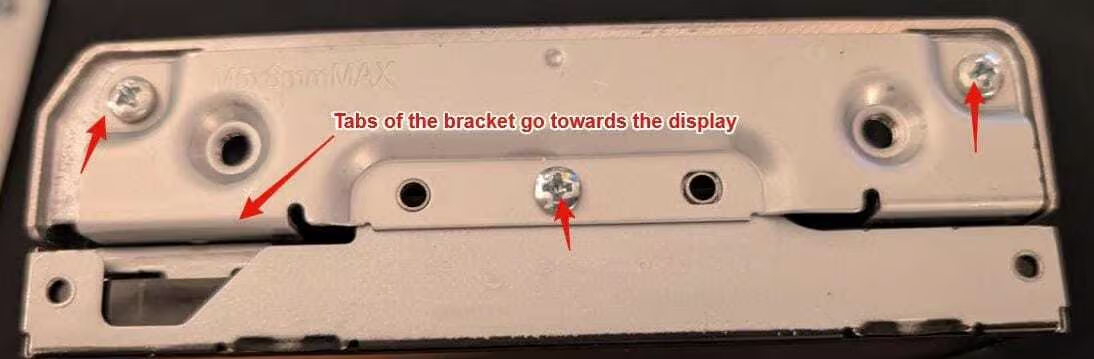
- Step 4h: Now put one of the side brackets on, the tabs of the brackets go towards the display inwards as shown.
-
-
-
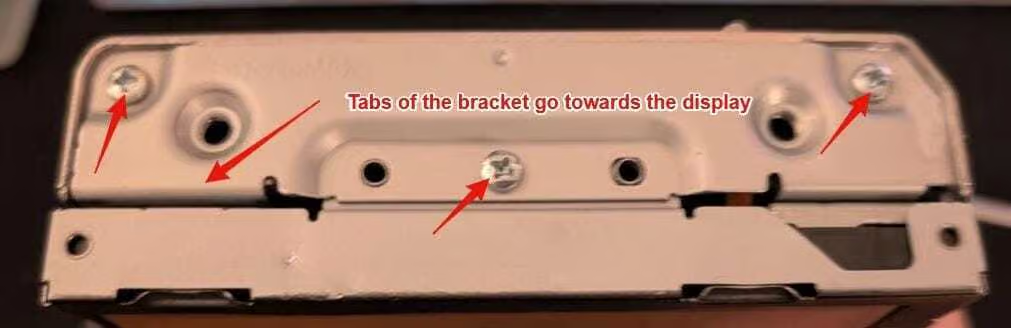
- Step 4i: And the other side, same as before.
-
- Step 5: Test DCU in Vehicle
- Step 5a: Plug in all the cables for the DCU, and mount it with one screw so it doesn’t fall out.
- Step 5b: Plug in all the cables for the Infotainment control trim.
- Step 5c: Plug in all the cables for the Climate control panel.
- Step 5d: Start the car (Engine, not just battery, we want full alternator voltage), and verify the functionality of the DCU.
- Step 5e: Following a successful test, reassemble the vehicle following the guide appropriate for your vehicle– which you can find here.
- Step 6: ???
- Step 6a: Do a little dance because you just saved $4000 USD + labour and that was really easy. (Hint: Most of the work on your car is that easy or easier)
- Step 7: Profit
- Step 7a: Remove any old phone from the Bluetooth connection screen and add yours back in.
- Step 7d: If you require some additional support, reach out to me on the pathfinder forums, or join the discord. I’m happy to lend a hand with diagnostics.
- Step 8: Enjoy this picture of my Pathfinder 🙂

Guide (v1.2)
My son and I just put the chip in. Instructions made it simple and it works great!
Glad to hear it Paul, thanks!
Received the kit in the mail I assume the blue plastic box is a holder for the SD card? I didn’t want to pry that box apart until I knew for sure
Hey John, the plastic case that says “Product of Canada” and has the model of repair kit you ordered does indeed contain the SD card, once you pry it open you’ll find the SD card securely held in a small slot that you can push out with your thumb or one of the included plastic pry tools!
-Quinn
I am here in the states folks. Works like a charm. Thanks for the fix and repair steps.
Just installed the card….AND IT WORKS GREAT !! You rock ! Horrible that this has happened with these cars and that Nissan can’t step to the plate and admit their issue and what to do about it. Usual grumbles and swearing removing the dash trim etc but disassembling the DCU and installing the chip was the easiest part. Thanks again
Everything went great on install except my Bluetooth doesn’t seem to want to work at all.
Two hours start to finish and voila it works!! My local Nissan dealer had quoted me over $5,000. I am so blessed that I found you and your diligent work. Worth every penny to purchase the kit with the micro SD!
Would it be possible to purchase the DCU .img file only? I have successfully got my DCU working using an infinity .img. However, it doesn’t exactly match my 2018 Armada. Thanks!
Hello, the images are available by donation on the discord server for those that need it!
Amazing! I placed my order on 3.10.26, received my tracking # the same day. It was delivered 3.16.26 at 10:25am. It is now 10:58 and installed and working!! Thank you so much! I still need to finish putting the trim in, but it is 3 degrees with the windchill, so that will wait.
Excellent service!