Y62 Nissan Armada DCU Screen Removal Step-by-Step Guide
This guide is specifically tailored to the Y62 Nissan Armada, and includes most production years of the model (2016-2020). For a complete roster of additional cars, please check the guides page. Once you have finished the removal of the DCU (Display), click this link (or the one at the bottom of this webpage) to view the walkthrough for swapping the MicroSD Drive inside it. This walkthrough also assumes you’ve already diagnosed your DCU Display problem, verified that it’s malfunctioned due to the widespread design defect that impacts any automobile featuring this Denso DCU Display; and obtained a replacement MicroSD Boot Drive for it– which may be achieved either by ordering a repair kit, or utilizing my DIY tutorial here.Required parts & Tools
Before jumping in, I’ll give a list of parts needed and useful tools for getting at the DCU. Parts needed for repair: or Tools needed: Time Needed:- Estimated 30-60 Minutes
Enough preamble, let’s begin with the guide!
Remove DCU from Vehicle
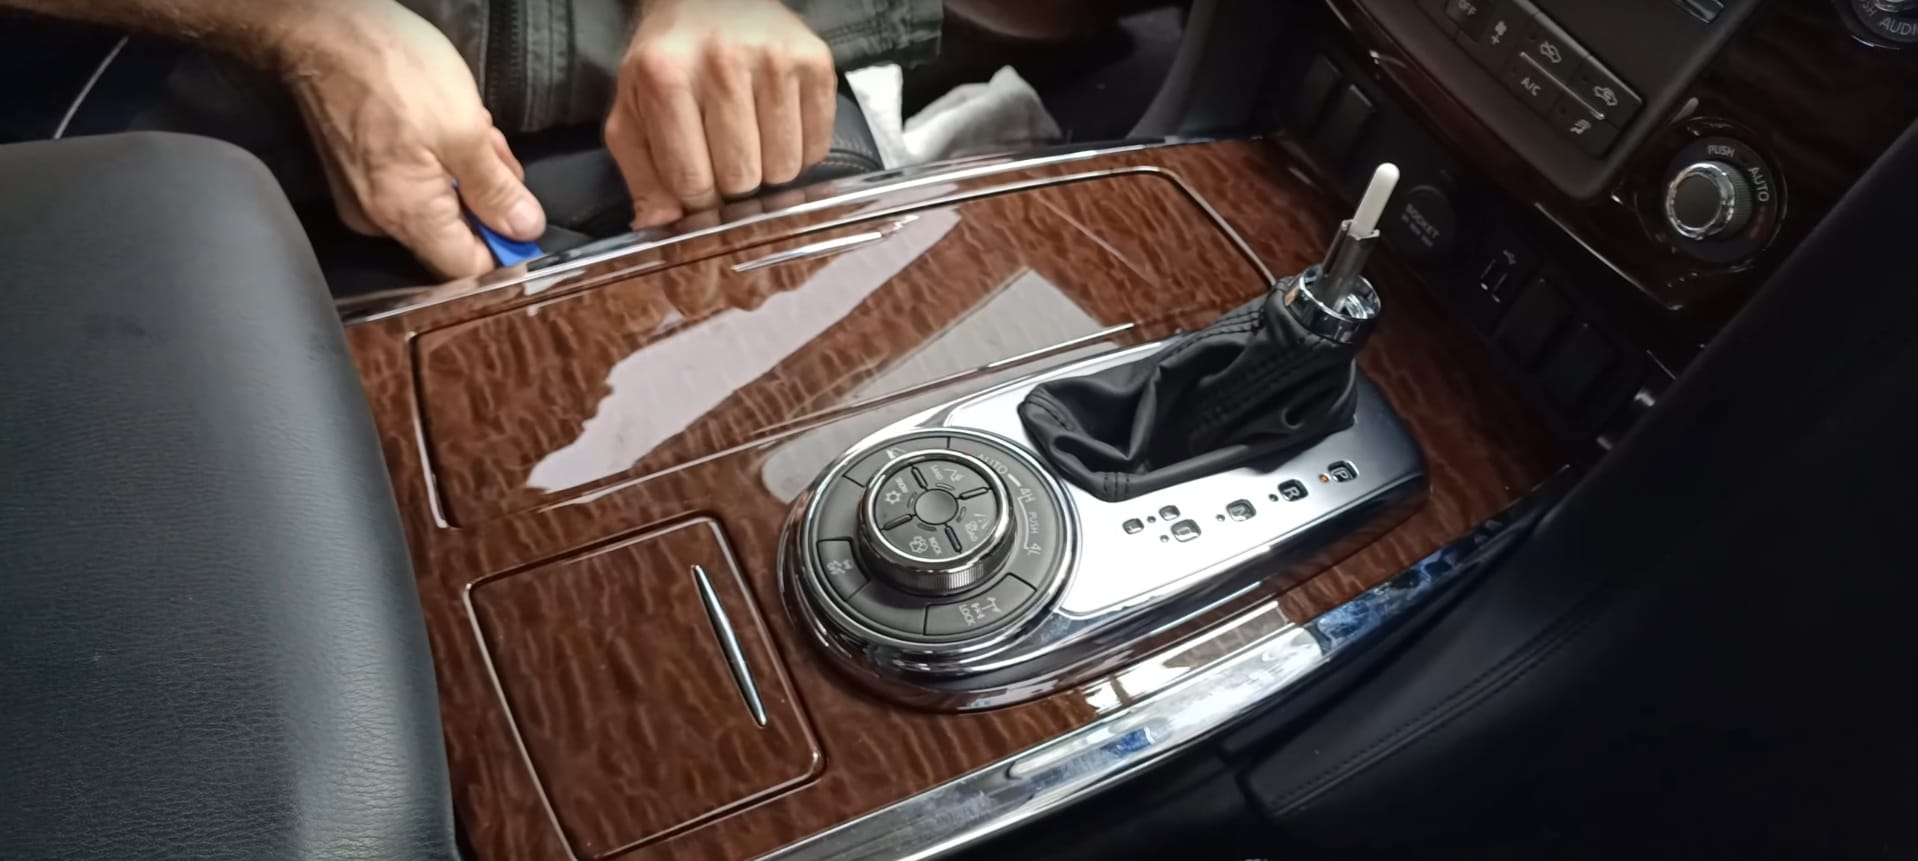
- Step 1: Lower the vanity ring around the shifter boot, remove the snap ring keeping the shift knob in place, and remove the shift knob by pulling straight up
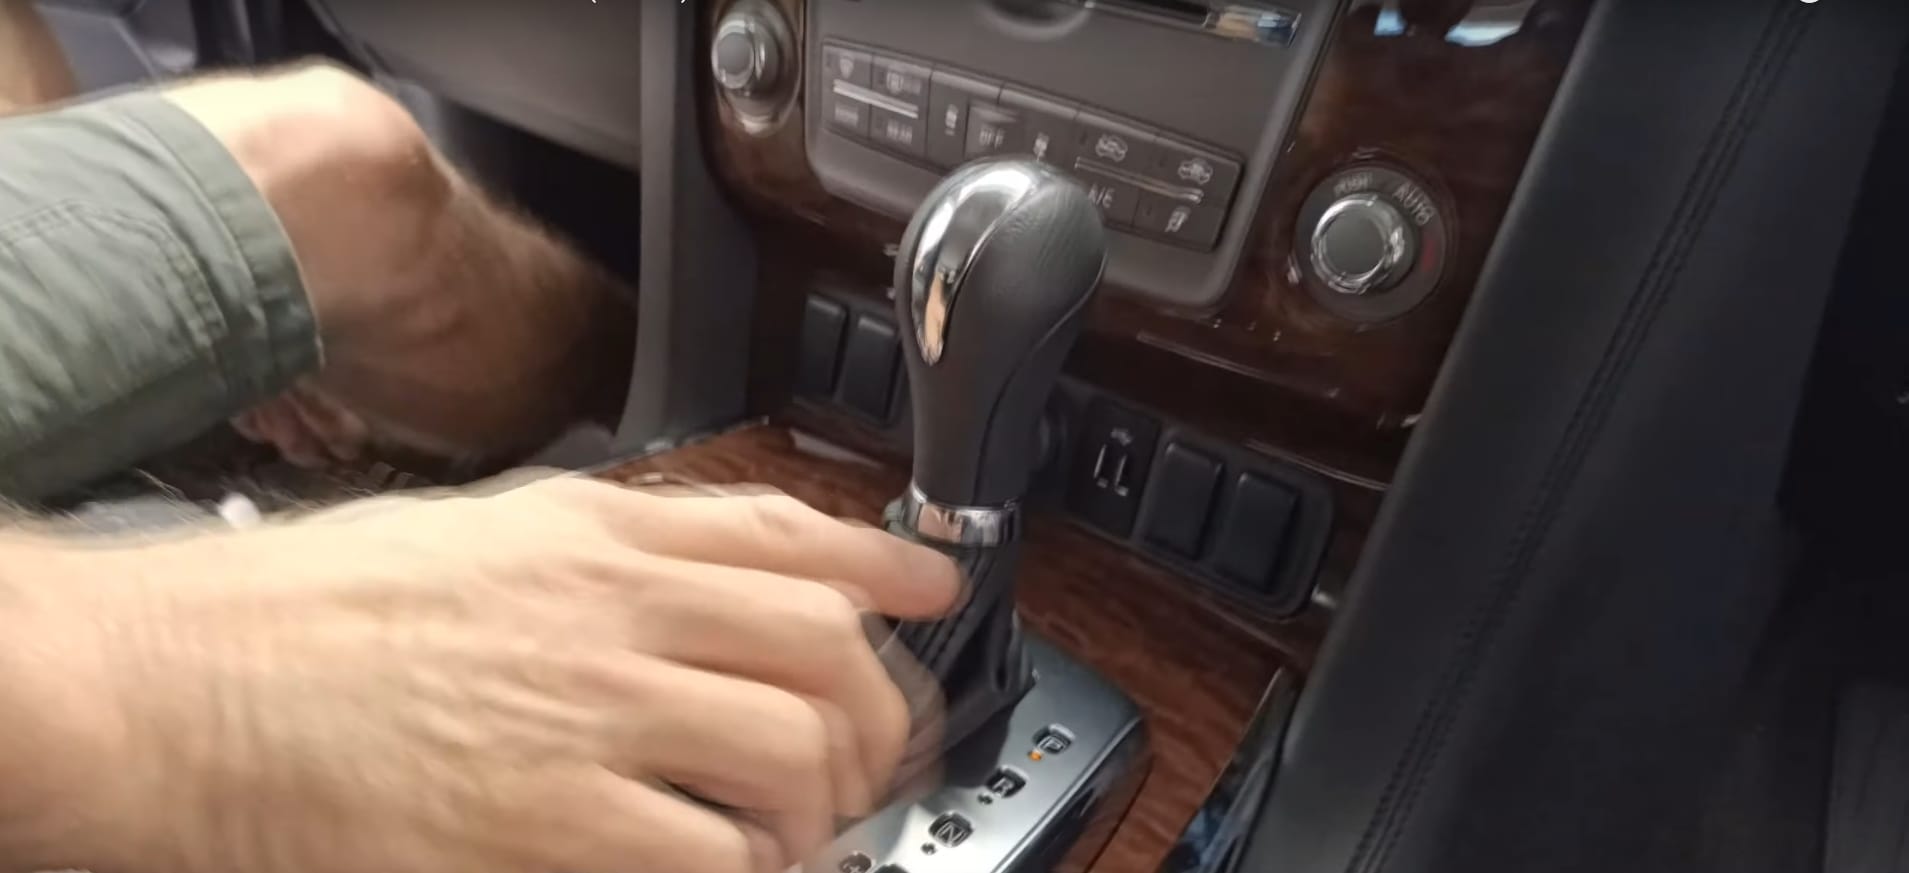
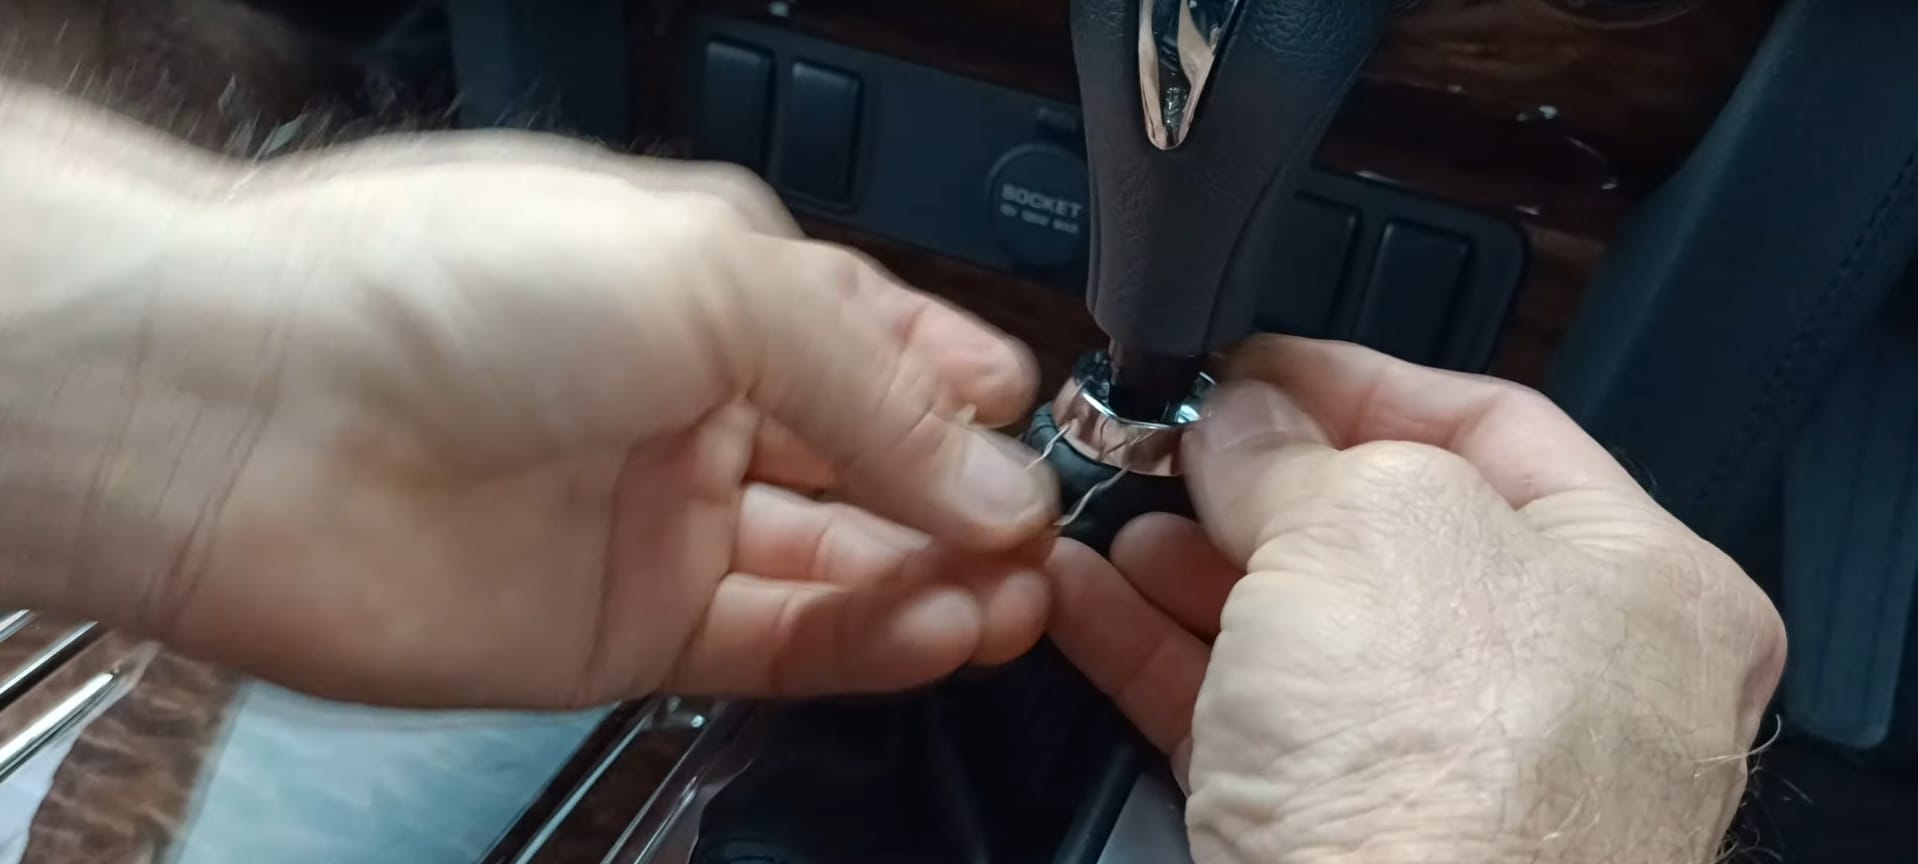
💡 Put the retainer clip back in the shift knob so it doesn’t get lost!
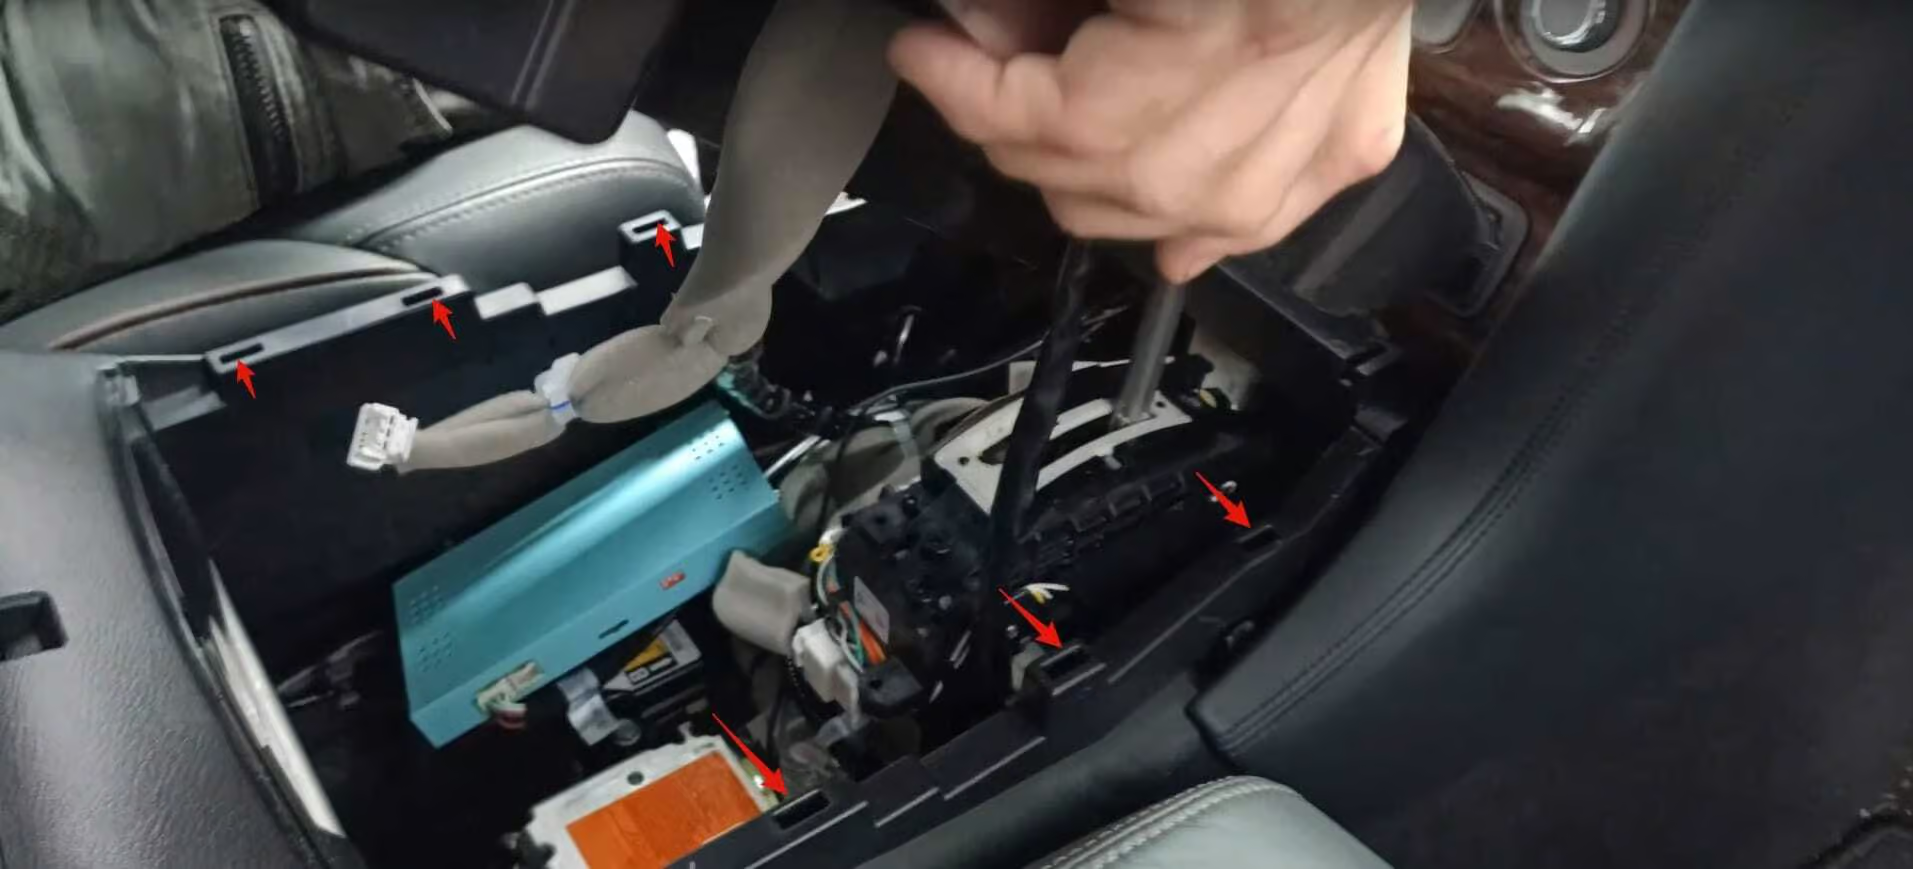
- Step 2: Use a Plastic trim removal tool to unclip the plastic clips in the locations shown. Insert the tool about 1 inch, and gently pull up.
💡 There are four clips, but you’ll likely only need to unclip 3. If one is giving you trouble, move on to another one and come back to that one if necessary.
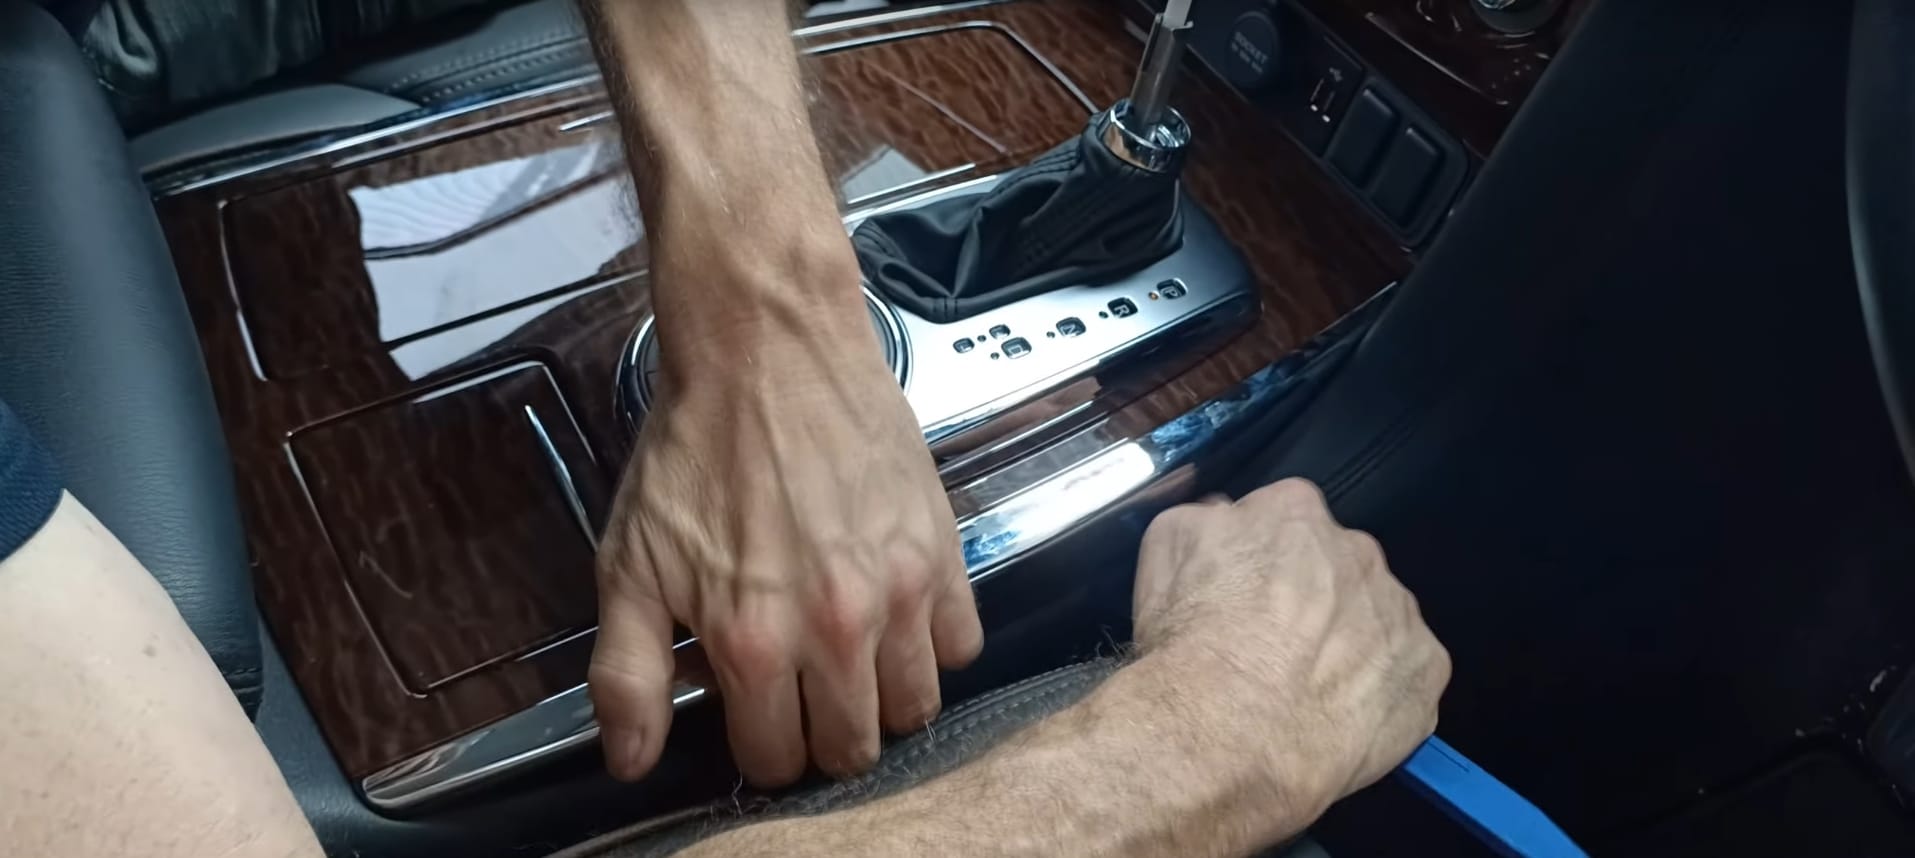
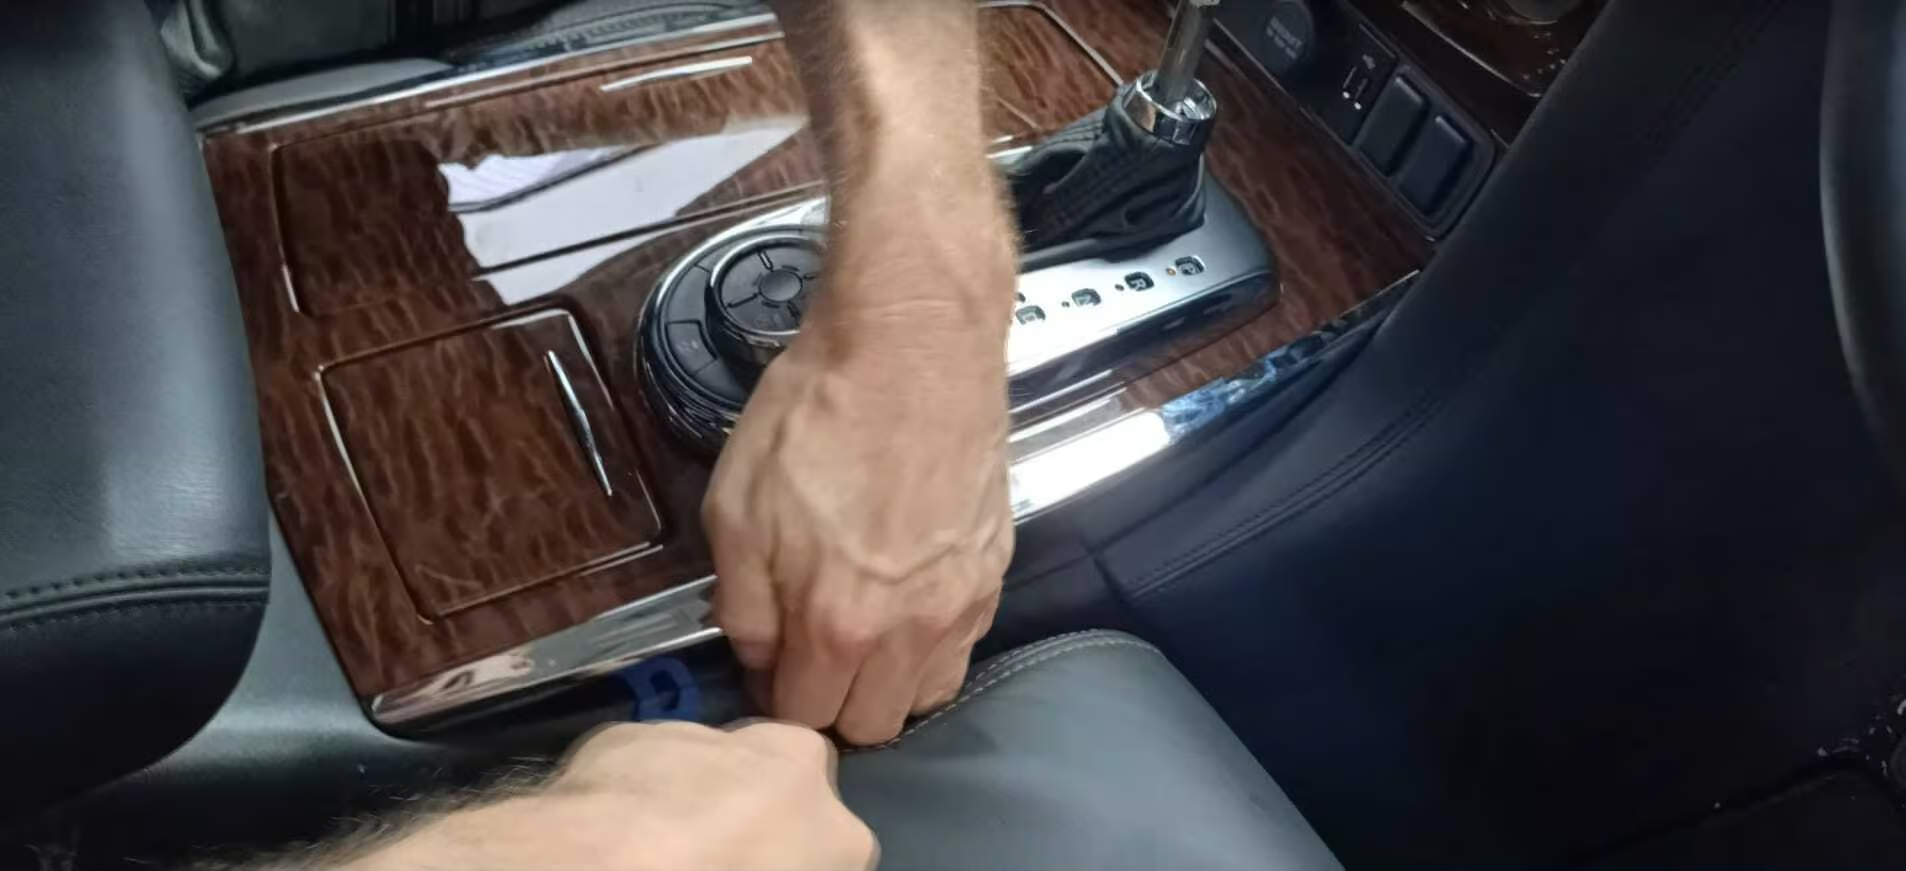
- Step 3: Once the clips are removed, the center console can be lifted out like this. You can also get a better view of the clip positions in this photo.
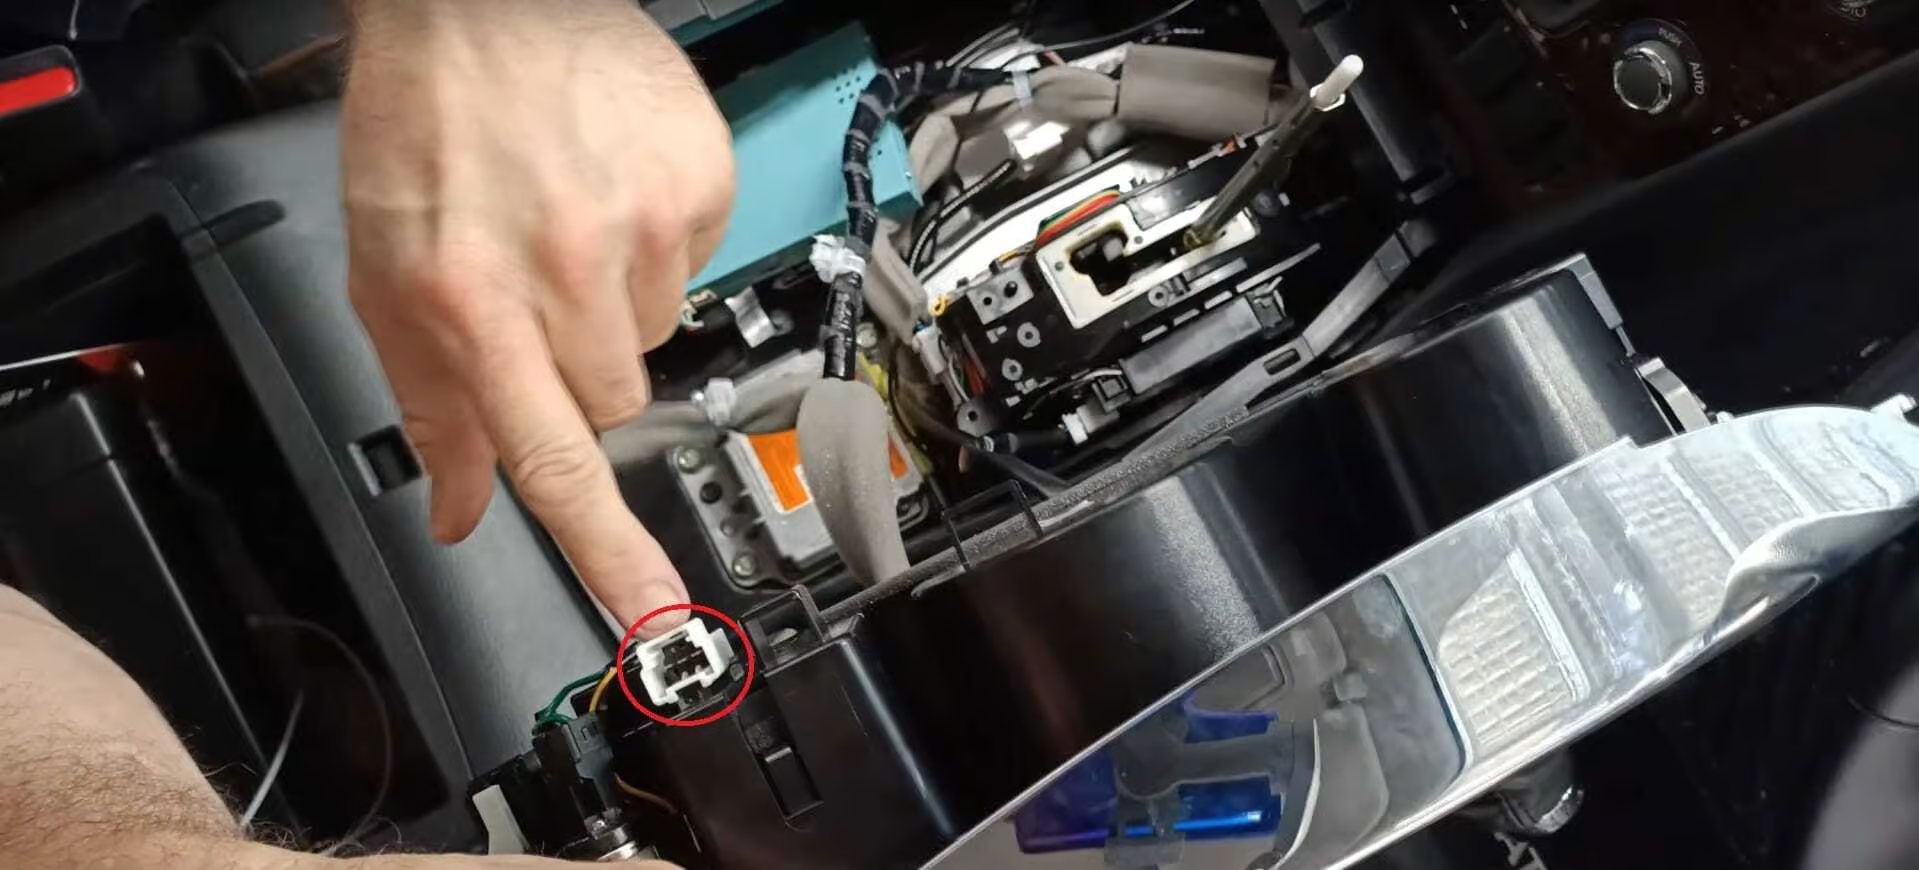
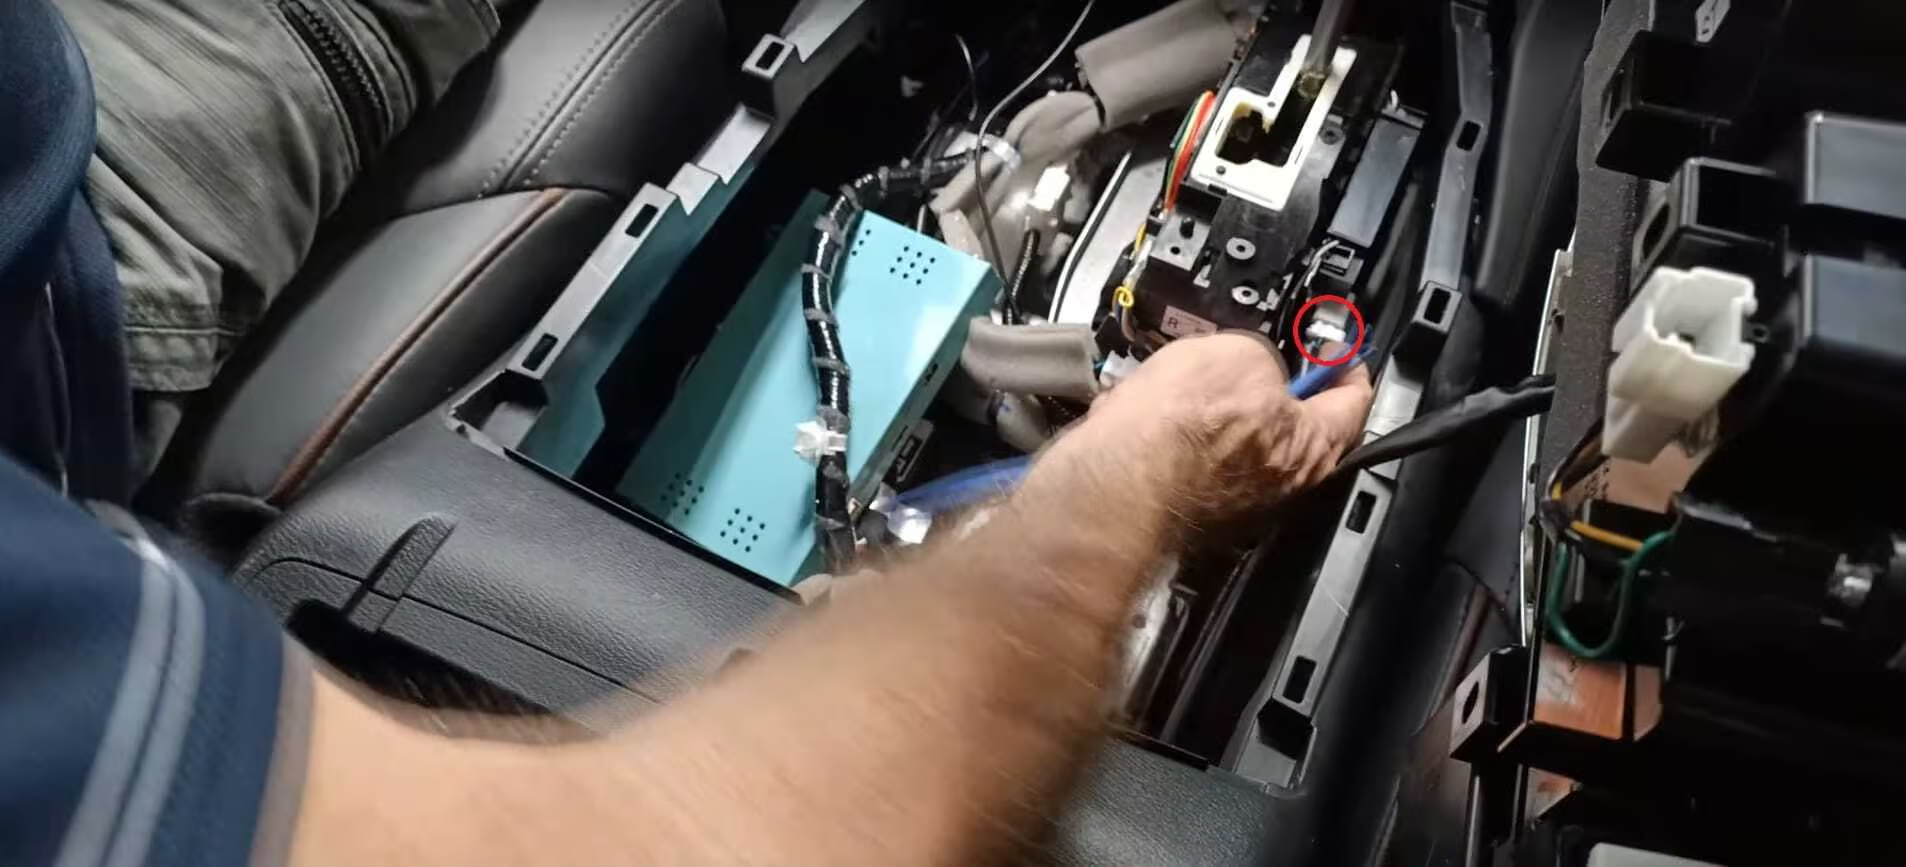
- Step 4: Disconnect the cables from the center console panel, the connectors are highlighted in the photos below.
- Step 5: Remove the soft trim around the infotainment/climate control stack by grabbing at the bottom of the arches and pulling upwards gently. They are hinged at the top, which you can see in the photos below, so the bottom needs to come out before the top does.
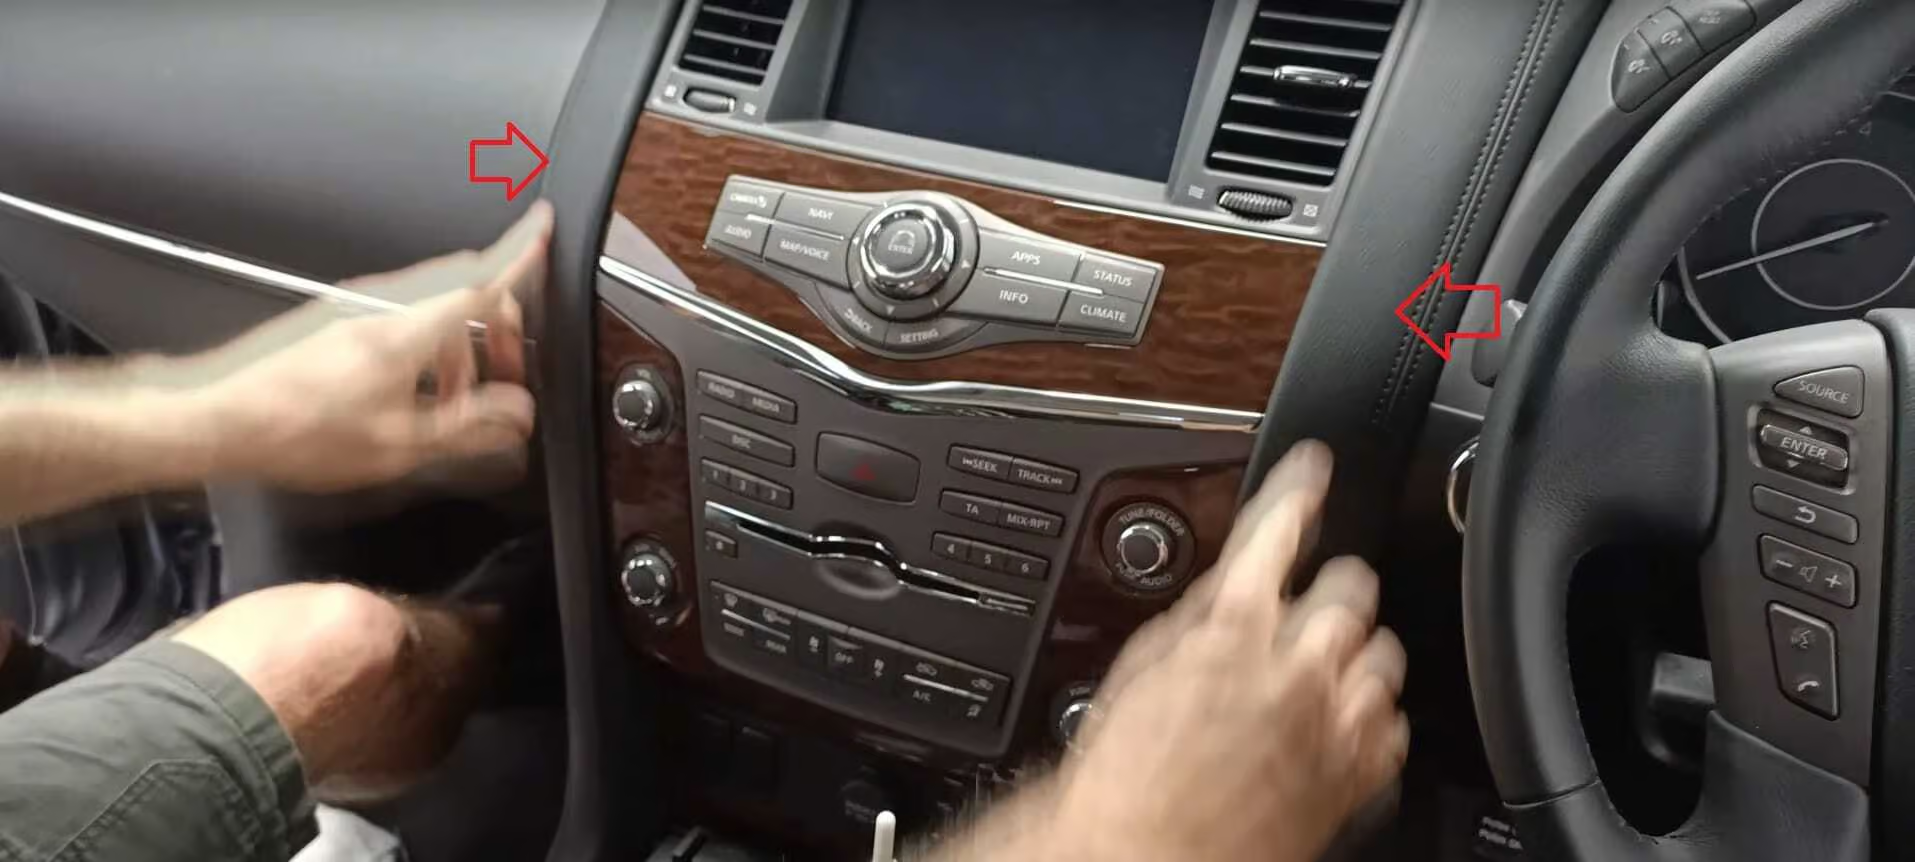
- Step 6: Remove the two screws at the top of the infotainment/climate control stack, using a Philips head Screw driver.
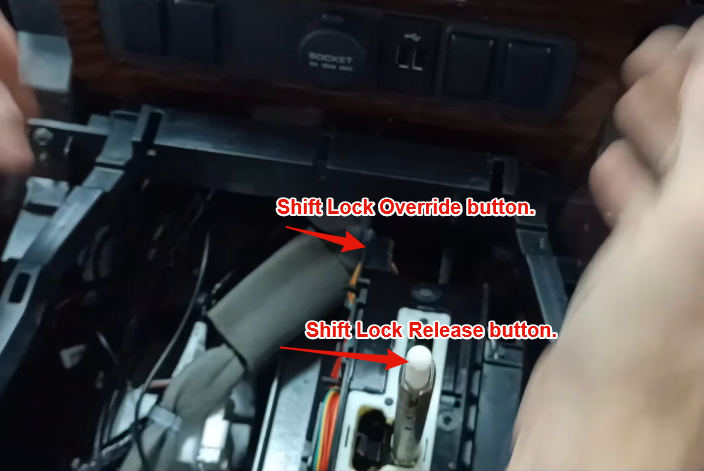
🚧 Before proceding with the next step, ensure your parking brake is on, you will be placing the vehicle in neutral.
- Step 7: Remove the infotainment/climate control stack.
-
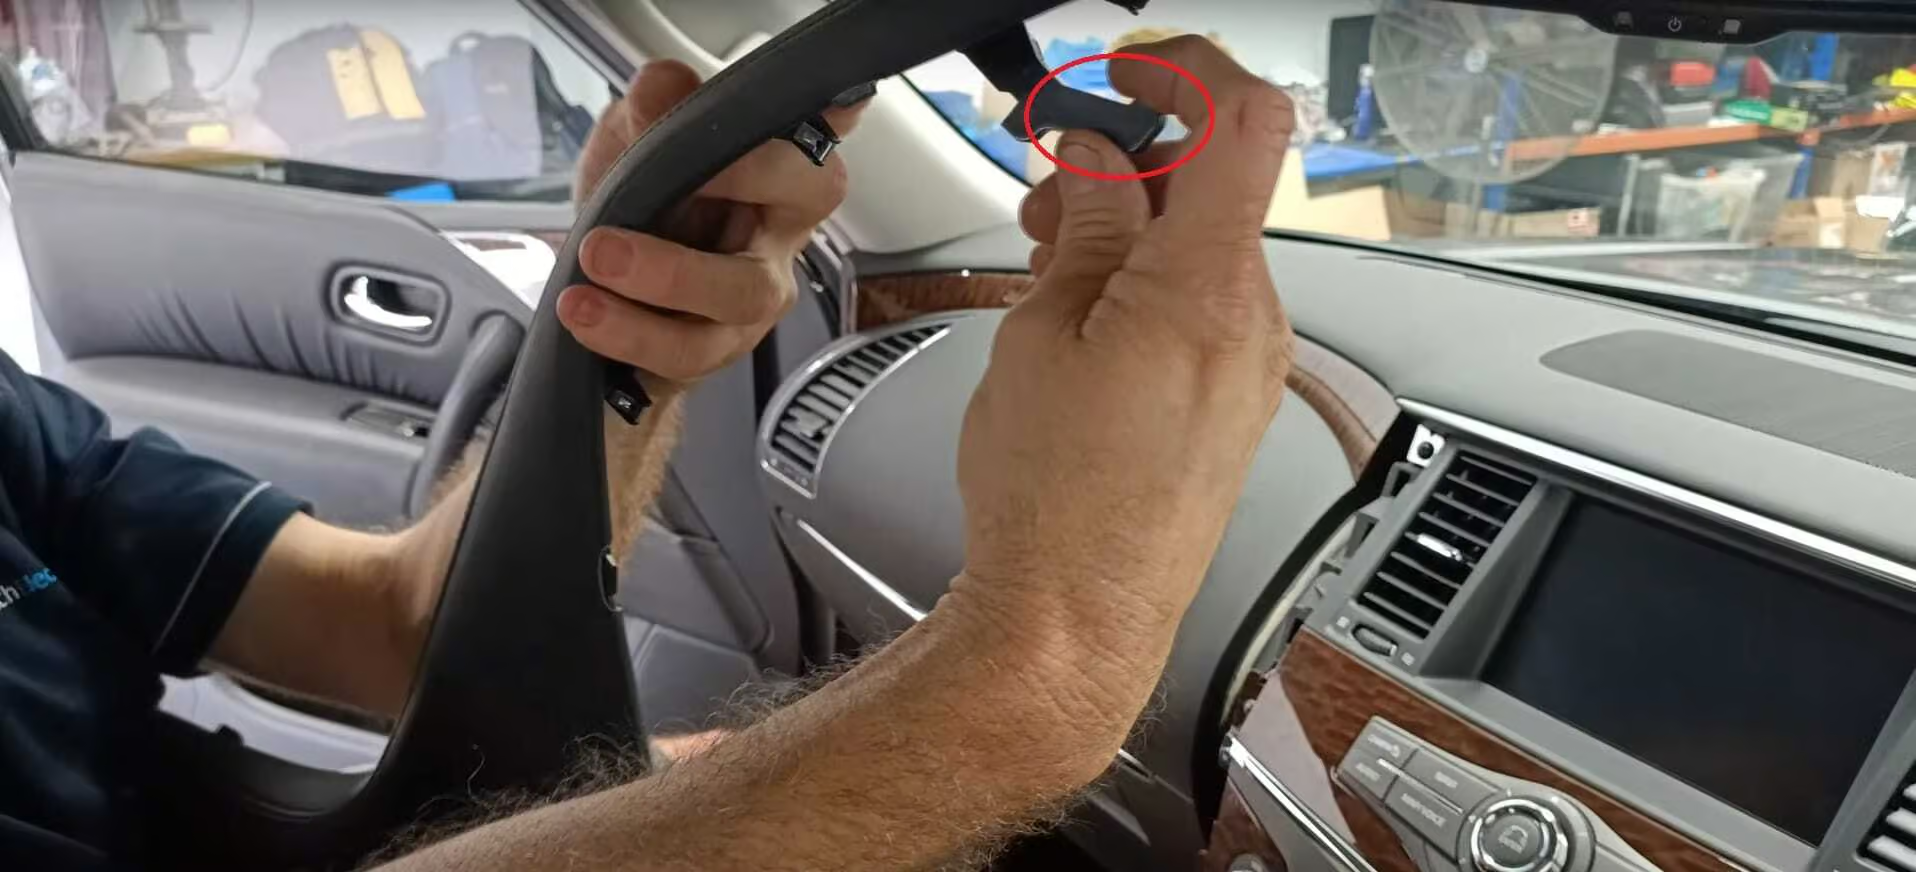
- Step 7a: Put the parking brake on, and place the vehicle in neutral by pressing down on the shift lock override button and the shift lock release button. Alternatively, you can start the engine and press down on the shift lock release button (the white stem on the shift rod).
-
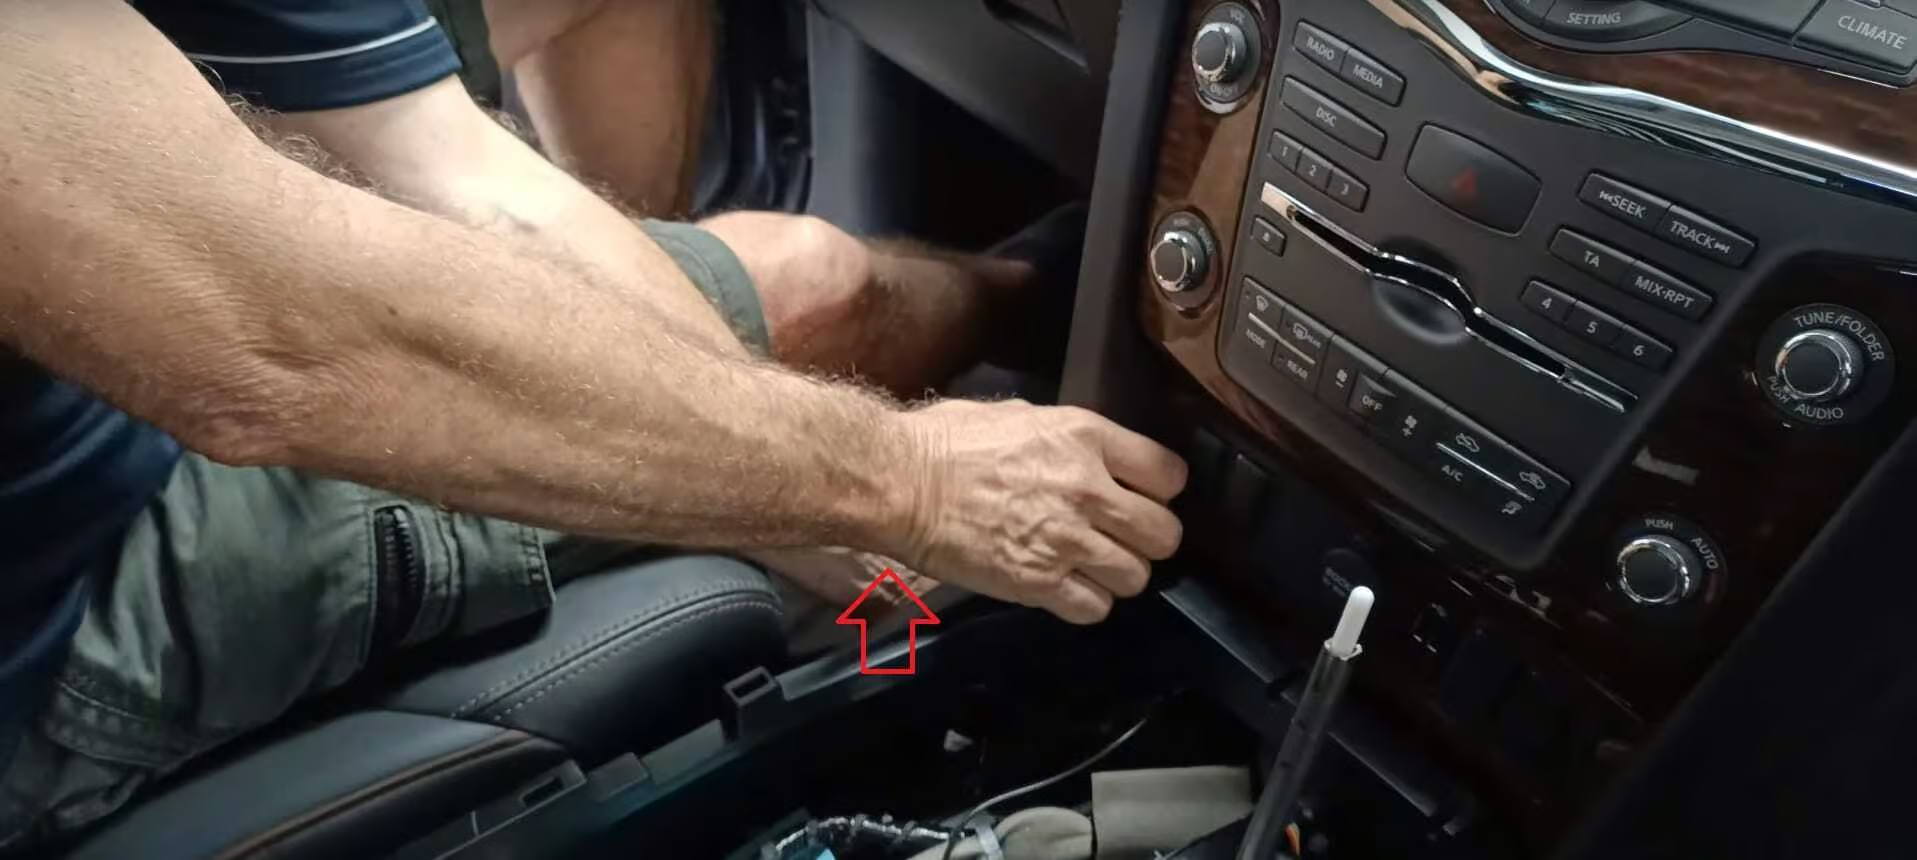
- Step 7b: Grab the infotainment/climate control stack and gently but firmly pull outwards to release the clips.
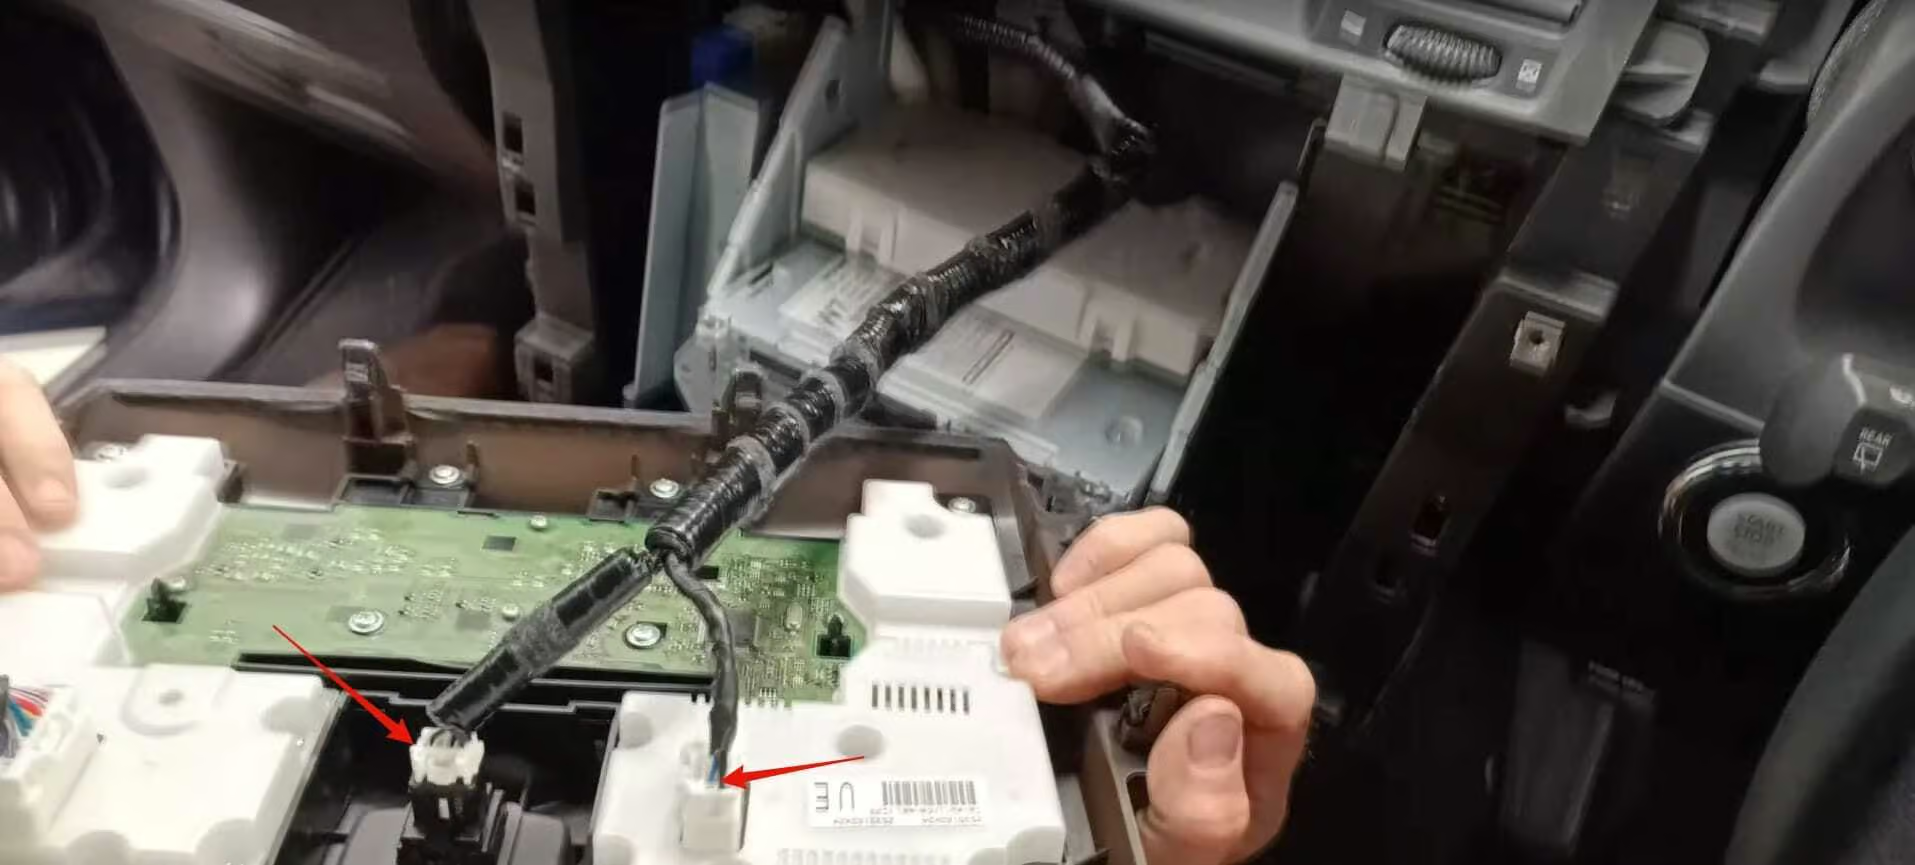
- Step 8: Disconnect the cables on the back of the infotainment/climate control stack, and set it aside.
- Step 9: Using a Philips head Screw driver, remove the three screws in the climate vent.
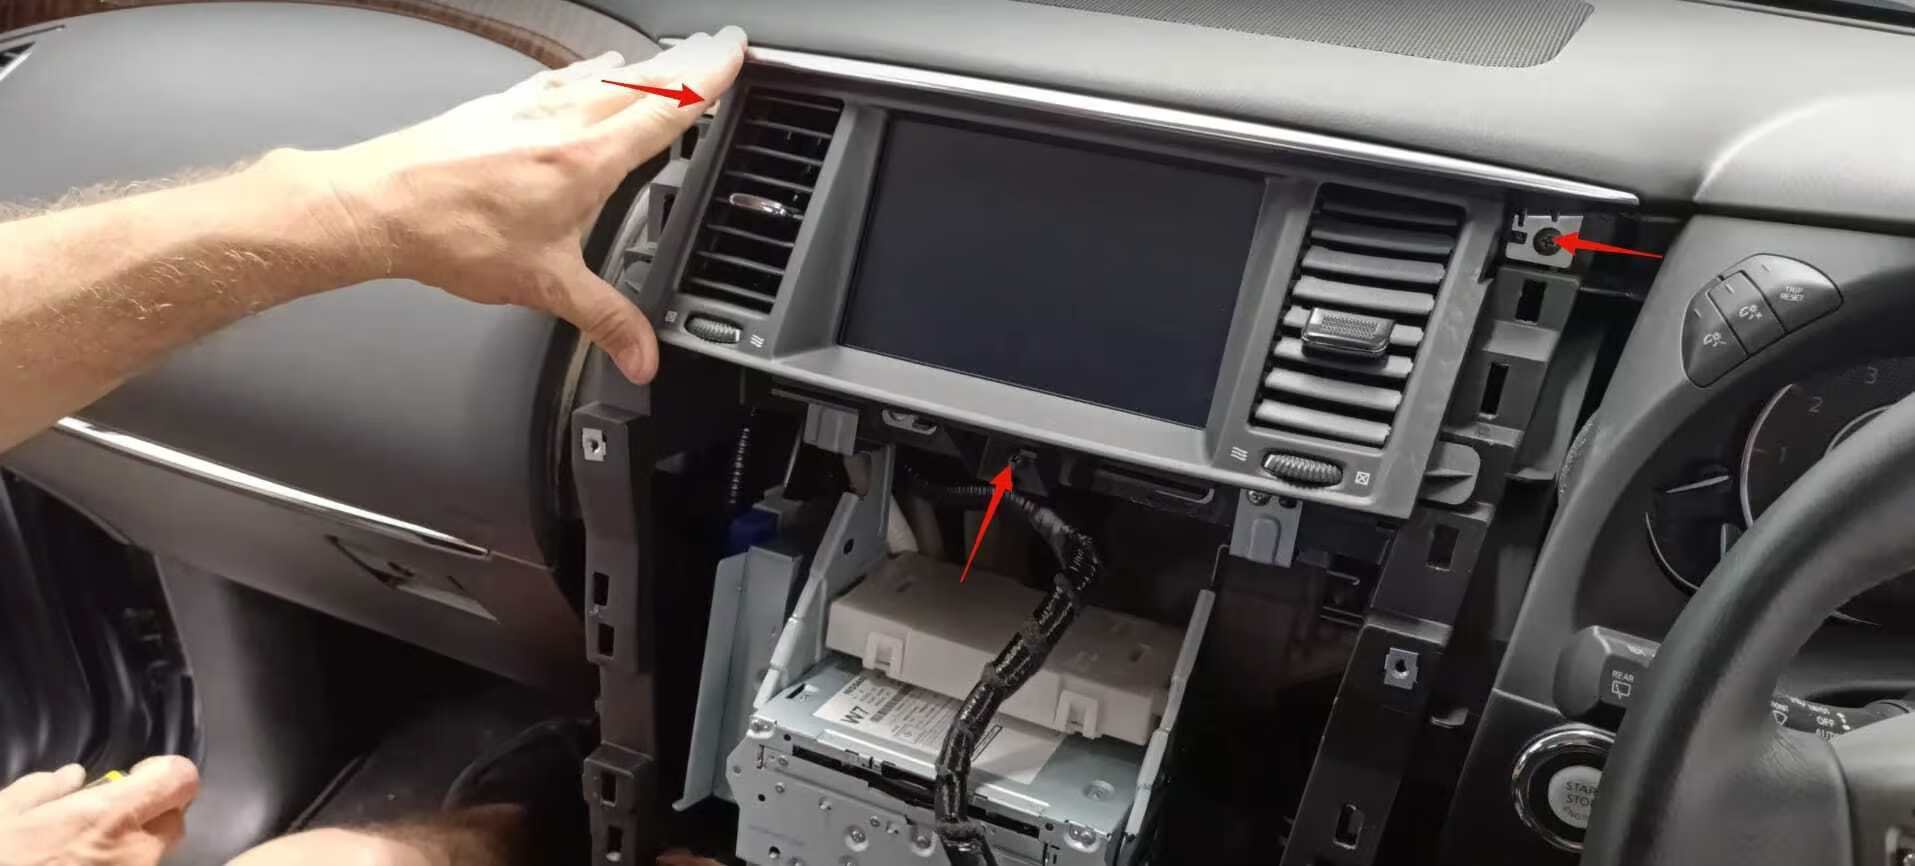
- Step 10: Starting at the bottom, loosen the clips holding the climate vents one by one and then pull straight outwards as shown below. Set it aside.
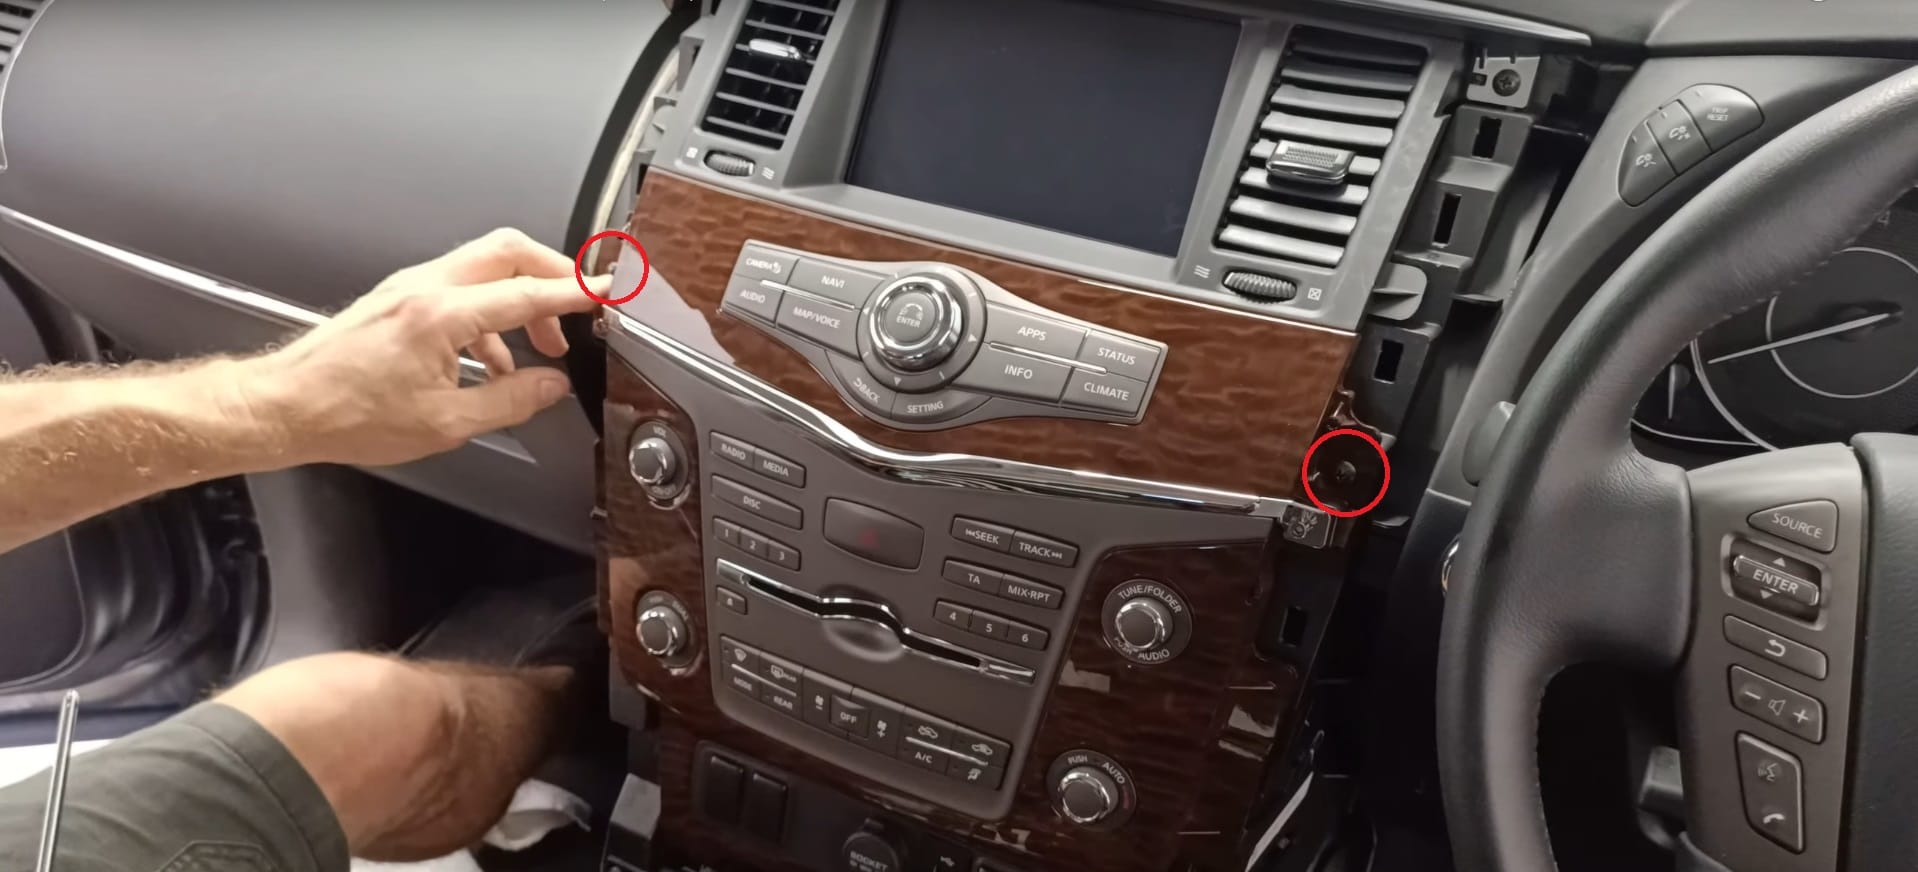
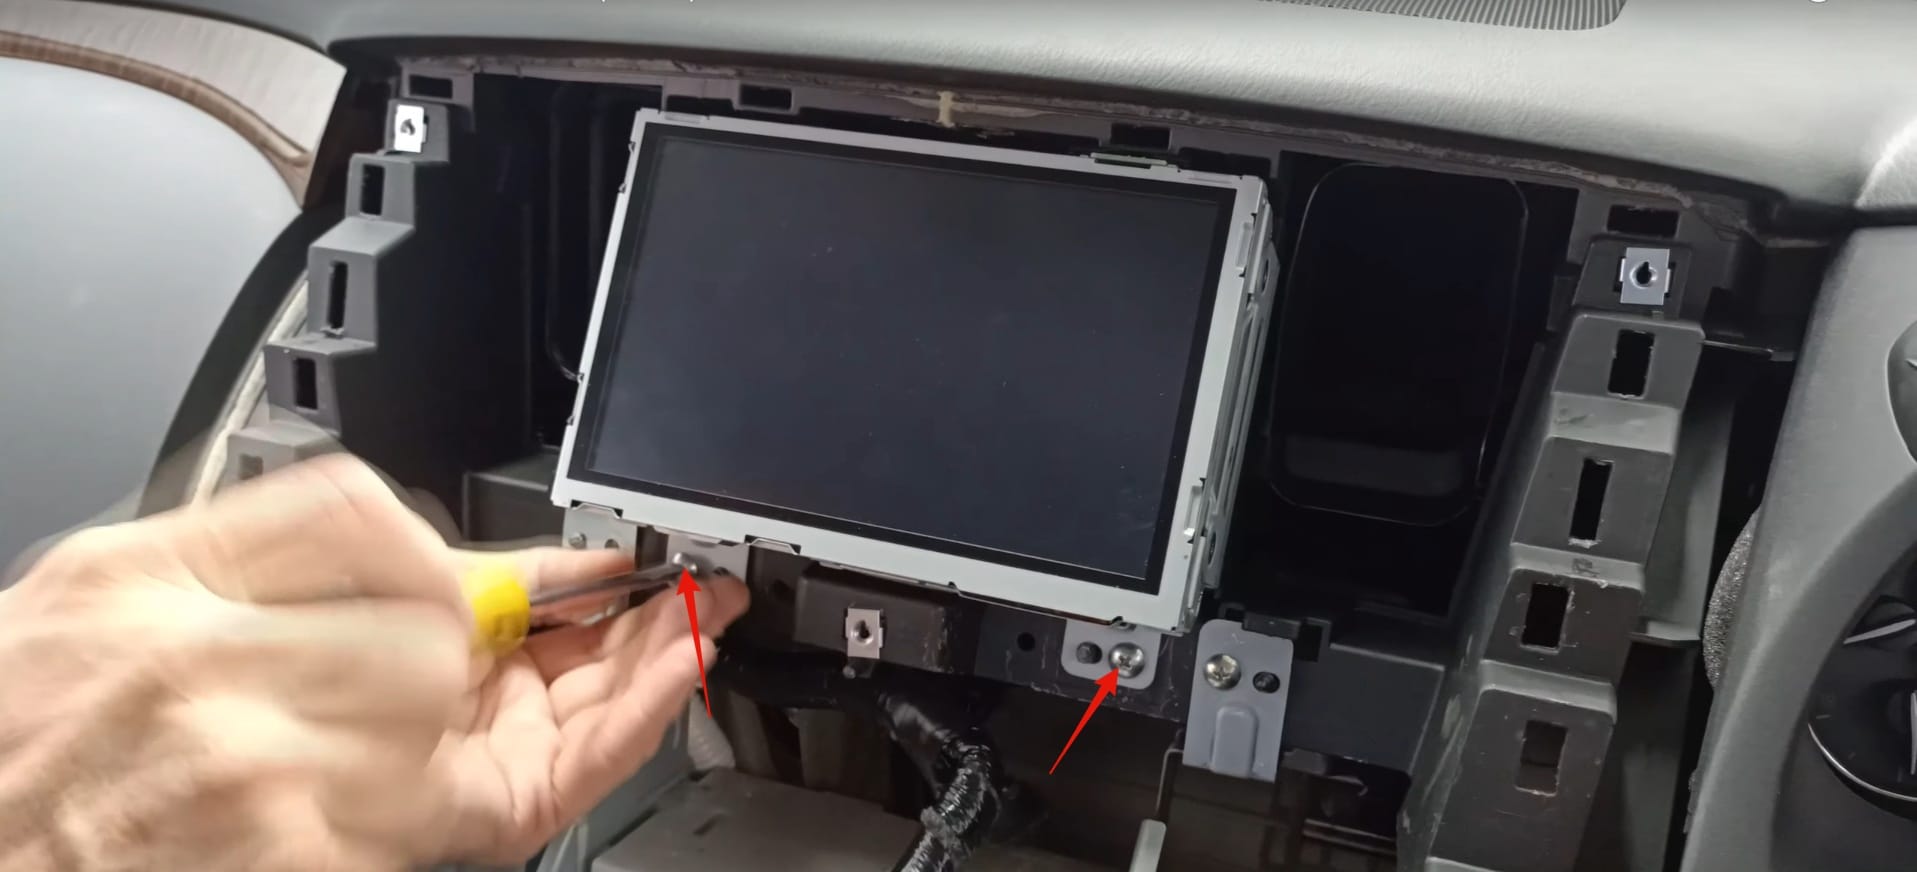
- Step 11: Remove the two screws holding the screen in place, and lift the screen out. (It is hinged at the top, and held in place by two studs on the bottom).
- Step 12: Remove the DCU screen, and unplug any cables on the back. There is plenty of slack on these cables to get your hands behind there and remove them.
💡 Advice: Before disconnecting the cables, take a picture of them! All of the connectors are keyed such that you can’t plug them in wrong, but it’s always good to have a photo to ensure you’ve done it correctly
What’s next?
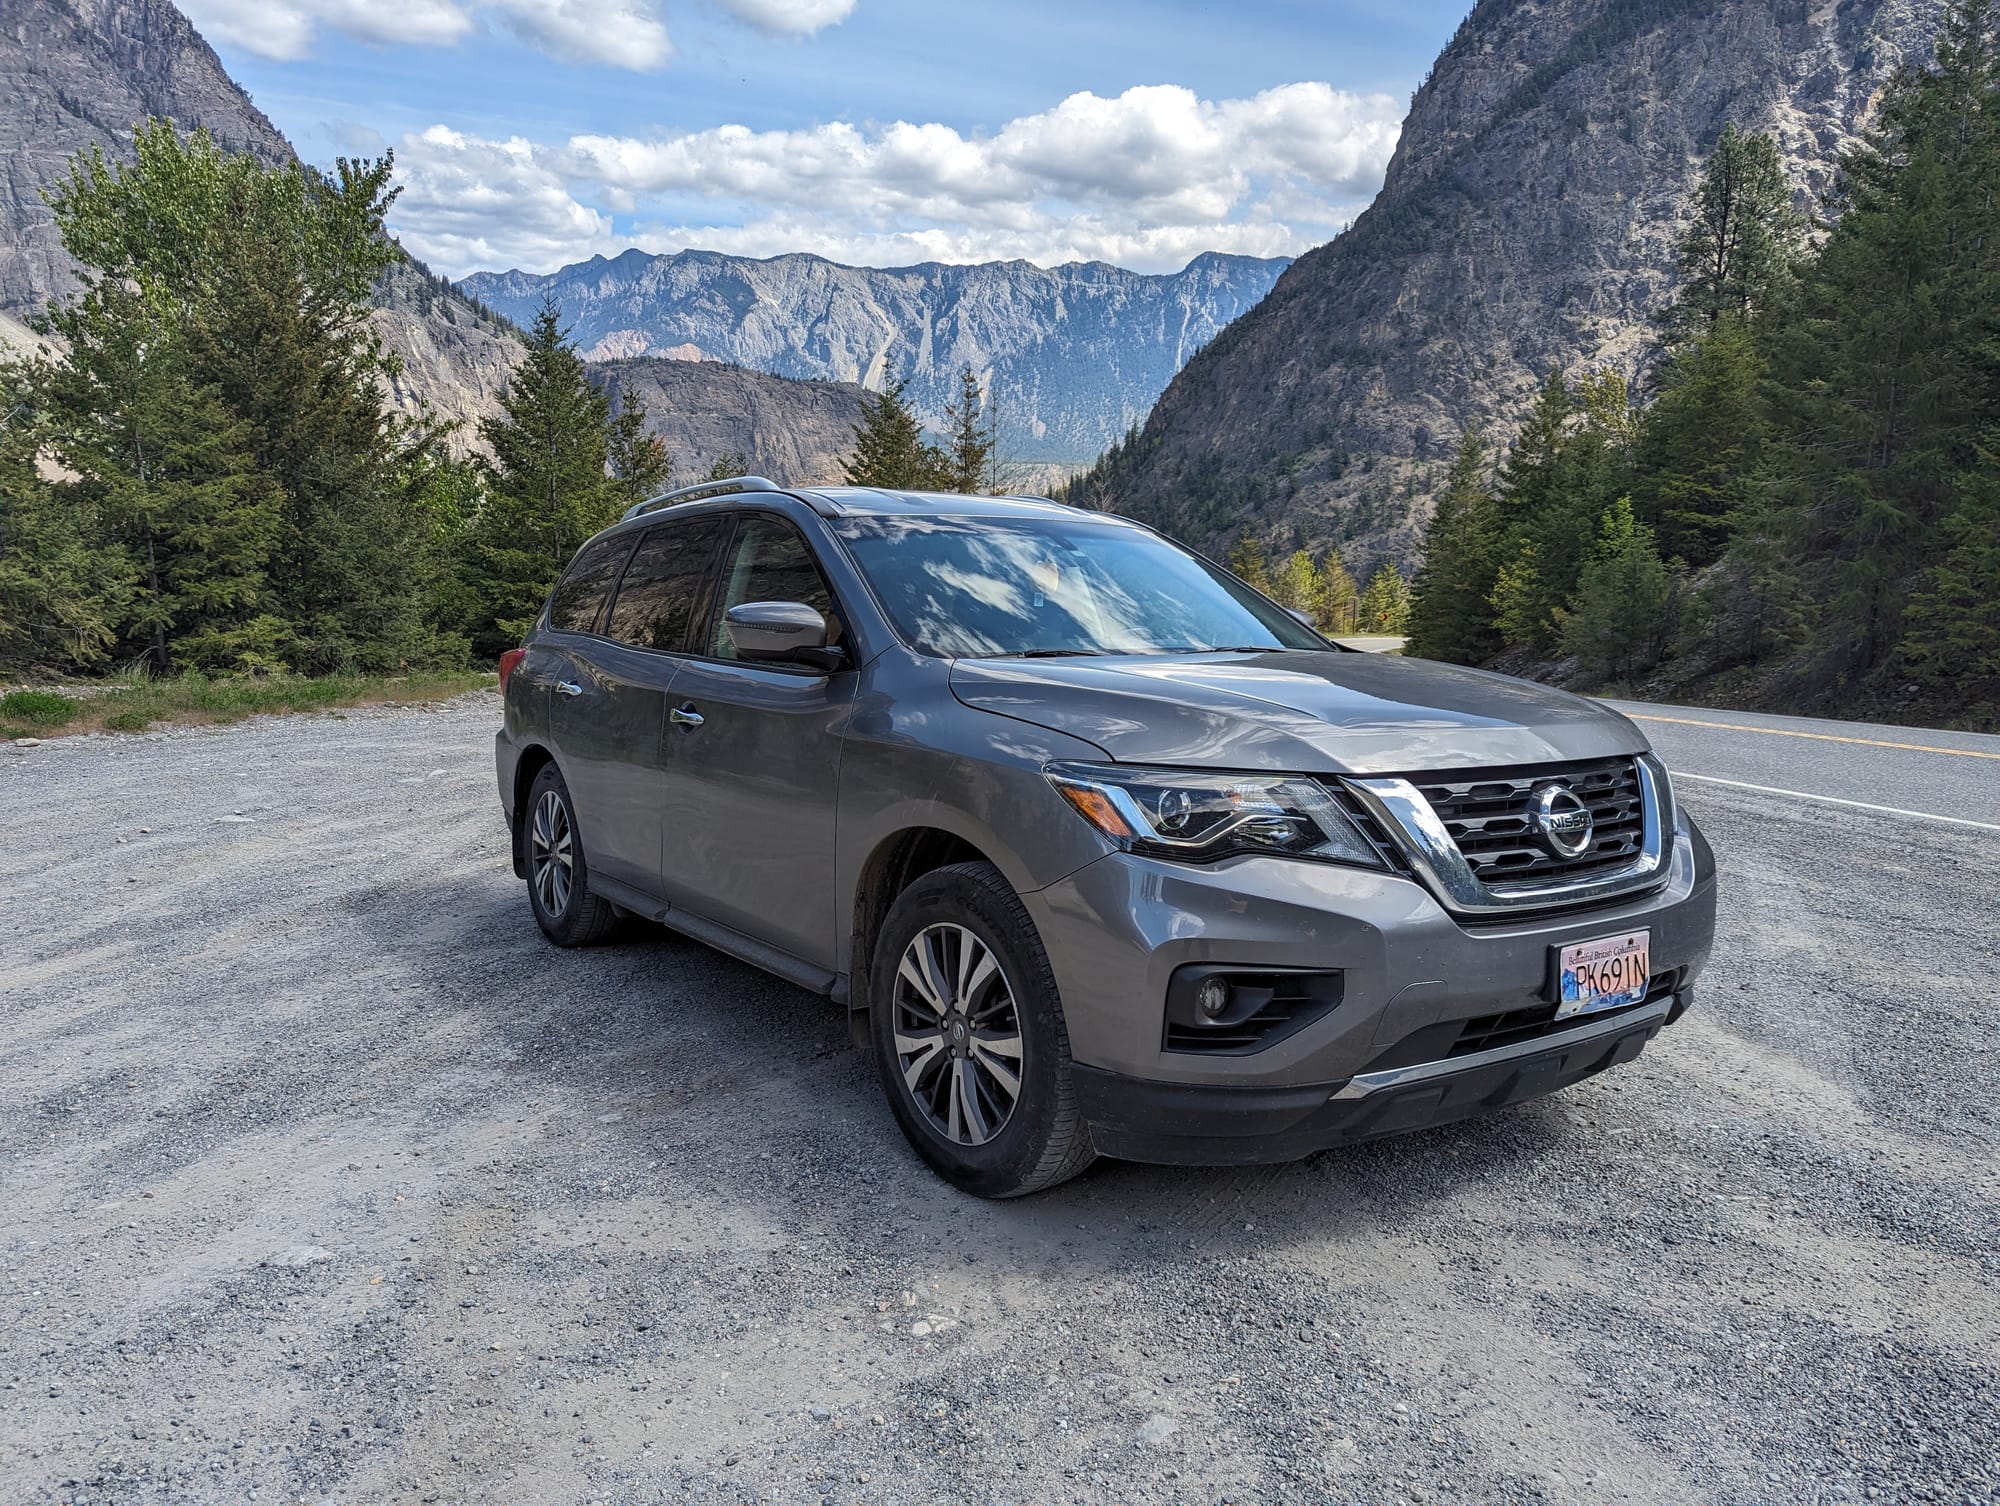
Now that the DCU Screen has been removed from the vehicle, you can move on to the next stage of repair– replacing the MicroSD Card that’s inside the DCU Screen responsible for it’s failure. For those that have purchased a Repair Kit for the Armada, you can find the guide for that here. If you have not yet purchased a Repair Kit, but would like to do so now; you can do so here. If you have access to a Linux machine and would like to perform the repair yourself, you can do so here. And if you have a different vehicle, check out the list of guides to see if I have one for yours specifically, you can find that here.Finally, as is tradition, enjoy a photo of my pathfinder 🙂
I have surround cameras on the mirrors also will this work had Nissan diag radio said it needed to be shipped off for repair said dcu was bad has all signs of being as card
Hello,
Yes, the Image for the Armada was made with the highest trim vehicle, it’s compatible with all trims and features!
Thanks,
Hello I’m a super happy customer that recently got a fix kit and it worked perfectly it resolve my screen issues of my armada 2018 it was working only reverse camera kind of glitch but as soon as I installed the kit it worked perfectly don’t hesitate about ordering one it’s worth the try before spending thousands of dollars, delivery took a little longer than expected [NOT sellers fault](UPS lost my package ) seller was very responsive and he step in so that UPS could deliver my package I personally recommend dcufix they are honest and legit website. Thanks DCUFIX. ⭐️⭐️⭐️⭐️⭐️